Source to Target Flow overview
The Source to Target Flow let you build simple data pipelines that take and push data from a Source to a Target destination. Data Integration streamlines the process by identifying the structure of the incoming data and generating the necessary target tables and columns.
With Data Integration, there are more than 180 supported Sources as targets, such as Facebook Ads, Google Analytics, and Oracle, to all the leading data warehouses.
Before you begin
- Click Data Flows from the left-hand menu of the Data Integration Console.
- Click Create Data Flow and select Source to Target Flow or select an existing Data Flow.
Step 1: Set up source
- In the Source tab, select the data source from which you want to ingest data and fill out the respective parameters to customize this ingestion.
- You can choose a source from the list of supported Data Integration connectors.
- You must select or create a connection regardless of the data source. If you already created a connection, it appears in the Connections drop-down menu; otherwise, click New Connection to create one.
Predefined reports
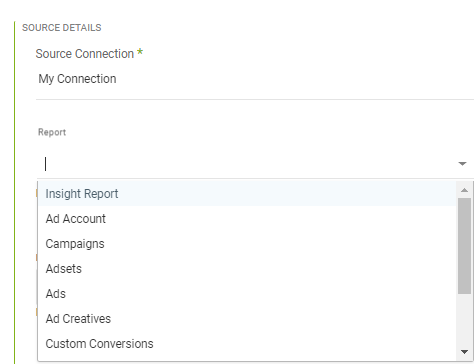
Depending on your chosen data source, the Source tab provides options to customize and shape the data Data Integration pulls into your target.
Using the Predefined Reports option, you can select multiple predefined reports with a predefined set of fields simultaneously. These predefined reports make it easy to configure your source data structure quickly.
Refer to the topics for each data source, which describes all predefined reports, fields, and schema definitions. For example, HubSpot Predefined Reports.

If you want custom reports and advanced configuration, use the Custom Report option to create a custom single report by selecting the report type and fields.
For example, when connecting to an API connector such as Facebook Ads, the connector provides you with parameters and options that reflect what the API offers. In Facebook Ads, you can select the Facebook Ad report you want to pull into your target.
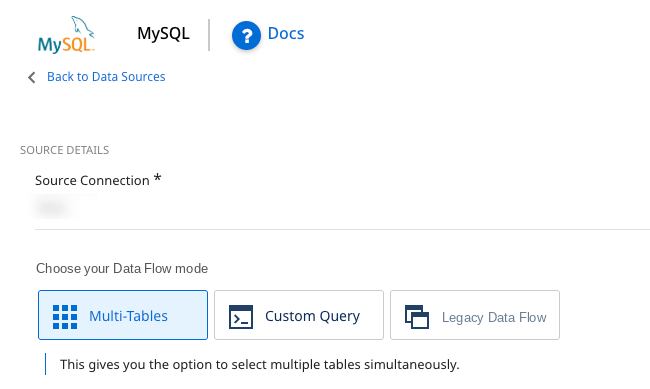
The Source tab appears differently when connected to a Database Source. Instead of pulling predefined reports and selecting accounts, campaigns, date ranges, and so on, you can choose how to pull data from our source database.
Incremental loading
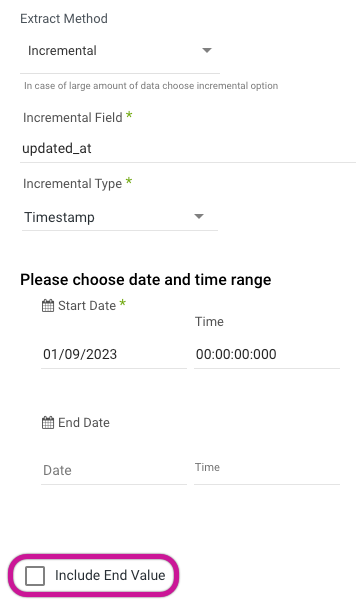
In RDBMS sources (MySQL, SQL Server, Oracle, PostgreSQL), as well as other sources (Salesforce, NetSuite), you can set the Extract Method to load data incrementally.
Instead of extracting all the data in a given table or report, you can identify a field that serves as your increment, such as a timestamp or ID field. For example, if you set a Data Flow to load incrementally based on a field in the table called DATE_LAST_MODIFIED, then each time the Data Flow runs, Data Integration checks the largest DATE_LAST_MODIFIED value from the previous run, and extracts only newer DATE_LAST_MODIFIED records to send to the target data warehouse.
The Start Date for the incremental field is inclusive, and the End Date defaults to exclusive:
- Start Date = 2020/01/10 00:00:00,
- End Date = 2020/01/11 03:00:00,
The query in the backend has the following range:
start_date>=2020/01/10 00:00:00end_date<2020/01/11 03:00:00
You can specify the end value in these increments:
This changes the above query range:
start_date>=2020/01/10 00:00:00end_date<=2020/01/11 03:00:00
The incremental loading method saves time and RPUs by only processing the delta between runs. This results in lower data volume than extracting all data during every run.
Select time periods
In most API connections, you can specify a time period for data extraction.
The options for the data retrieval period can vary depending on the Source connector type.
-
Custom - Data range: Set a custom date range for retrieving data.
-
Day - Yesterday: It sets the start date from yesterday to today (up to the current moment, considering microseconds) by initializing a starting date based on the current date and subtracting one day, then adding one day and the specified microseconds to get the ending date.
-
Week (Monday - Sunday)
- Week to date: It sets the start date to the beginning of the current week and the end date to the current date. It includes all days from the start of the current week, including the current day.
- Previous week: It sets the start date to the beginning of the previous work week, the end date to the start date plus one week, and the specified microseconds.
- Previous week to date: It sets the start date to the beginning of the previous week and the end date to the current date. The Previous week to date includes all days from the start of the previous week up to and including the current day.
-
Month
- Month to date: It sets the start date to the beginning of the current month and the end date to the current date. The Month to date includes all days from the start of the current month up to and including the current day.
- Previous month: It sets the start date to the beginning of the previous month, the end date to the start date plus one month, and the specified microseconds.
- Previous month to date: It sets the start date to the beginning of the previous month and the end date to the current date. The Previous month to date includes all days from the start of the previous month up to and including the current day.
-
Year to date: It sets the start date to the beginning of the current year, and the end date to the current date. The Year to date includes all days from the start of the current year up to and including the current day.
- These options may differ based on the Source connector type and the limitations of its API.
- After the first run with a Custom date range, the Data Flow retrieves data from the indicated Start Date to the indicated End Date (if you do not specify the End Date, it fetches data from the Start Date until the current time). Subsequent runs of the Data Flow update the Start Date to match the date and time of the latest run, leaving the End Date empty. This ensures that the Data Flow load resumes from where it left off during the last run.
Last days back option
The Last days back option in some source connections lets Data Integration to include an additional number of retroactive days in the data pull, beyond the specified time period.
For example, if you set the time-period to Yesterday and Last days back to 1, Data Integration retrieves the data for yesterday, the previous day, and the current date.
Step 2: Select target
In the Target tab, you can select your cloud target, where Data Integration stores your data from the source.
After configuring the source, move to the Target tab to define where to send the data. Data Integration supports the following cloud data warehouses and cloud file storage as targets.

Set the connection for your chosen target, or create a new one if needed.
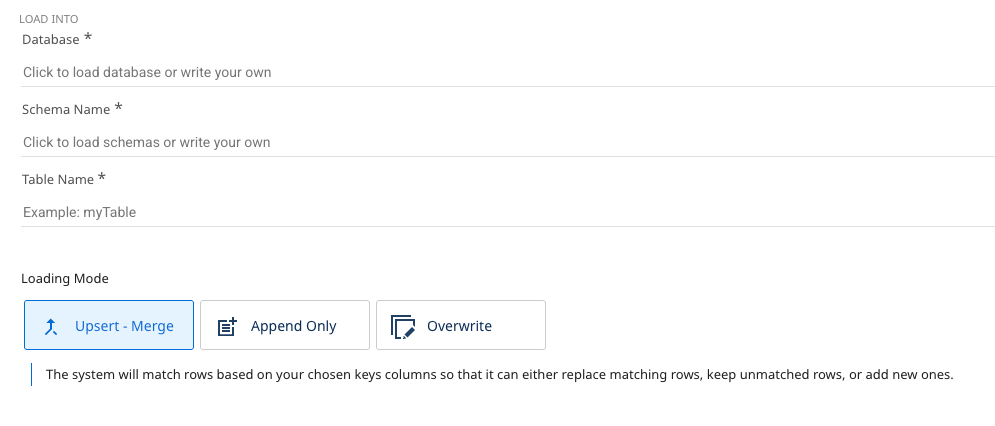
Define a database, a Schema, and a target table. Data Integration stores the data from your selected source in these locations. Data Integration automatically detects available databases and schemas to choose from.
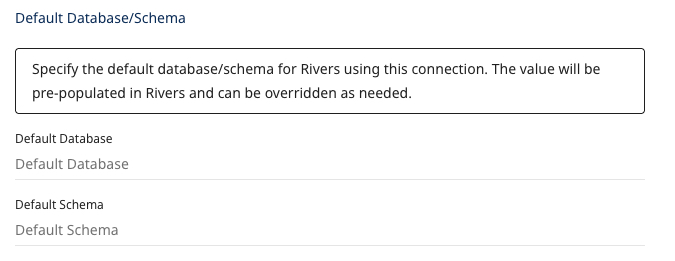
In Snowflake, the connection form includes a Default Database/Schema section. This lets you specify the database and Schema you want to work with, and the connection automatically remembers and uses these as the default.
Choose the loading mode you require:
- Overwrite: Replace the data in the target table entirely with the data from this run. Data Integration automatically creates the target table if it does not exist.
- Upsert-Merge: Add only new or changed records to the target table based on a defined key in the Column Mapping.
- Append Only: Combine the data from this load into the existing target table.
If you choose to use Upsert-Merge, you can define your merge key by clicking in the Column Mapping (the next tab).
Upsert-Merge can also filter on Logical Keys. This enables de-duplication within the source records (Data Integration does not de-duplicate existing target records). Add an expression (in Target Database syntax) to the Filter Order Expression field. This acts as an ORDER BY function in SQL, with the Data Flow only pulling the first record.
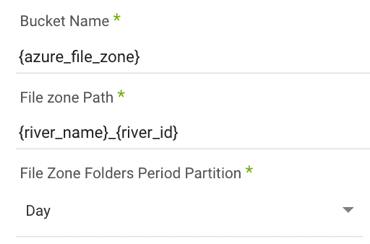
Identify the desired bucket and file path where Data Integration stores the data. The default is the bucket you used to set up the connection.
Step 3: Configure schema
Column mapping
The Schema tab auto-detects a table schema, providing extra customization and updates to the target table's metadata before Data Integration loads the data.
Select Auto-Mapping to auto-detect the schema from the Source tab. Data Integration populates the corresponding fields and their data types.
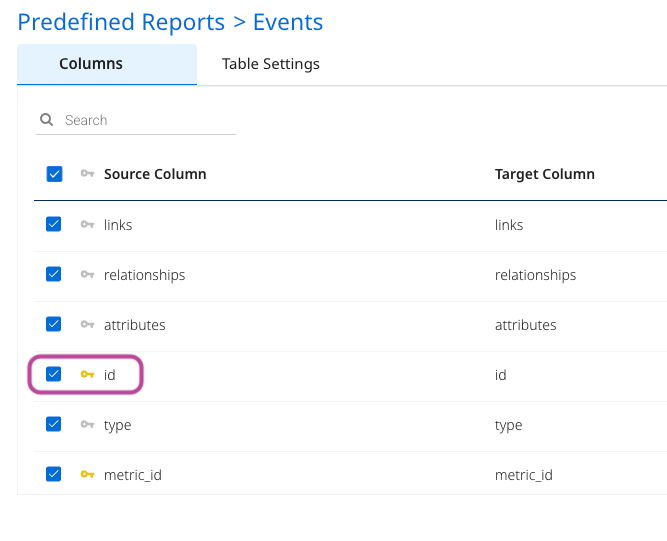
If you select Upsert-Merge as your loading mode in the Target tab, click the key symbol next to the desired key field to define the primary key for data merging. If you click multiple fields, this acts as a combination key (the combination of the two field values) as the primary key in the upsert-merge.
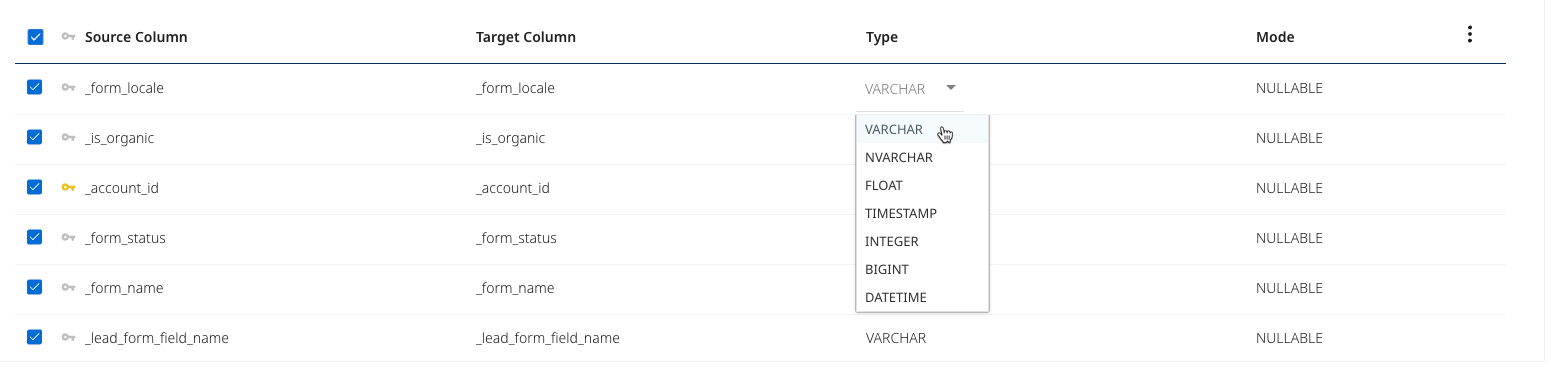
You can also edit field properties such as the target field name, data type, and mode, letting you to rename fields and cast data types during the load process.
-
Data Integration excludes column descriptions from the metadata. Ensure you document these descriptions separately as required.
-
Data Integration does not support using dots (.) in column names. Using dots can cause errors or unexpected behavior during data processing. Ensure to remove or replace any dots in column names to ensure compatibility with Data Integration.
The Mode option lets you specify the behavior and constraints of a column in a database schema. It defines how the column handles values, nullability and multiplicity:
-
Nullable: This option lets the column accept null values. You do not need to store a value for every row in the dataset. A row can have a defined value or no value (null) for this column.
-
Required: This option always requires the column to contain a value. Every row in the dataset must have a value for this column; the column does not allow null values.
-
Repeated: Use repeated mode for columns that need to hold multiple values of the same type, functioning similarly to an array or list. This is useful for defining nested or complex data structures. For example, in Google BigQuery, a column with the Repeated mode can store an array of values, where each row may contain zero, one, or more values for that column. In contrast, Required expects exactly one value, while Nullable permits a single value or null.
The Cluster key option lets you define a partition field.
The Expression option lets SQL syntax define a new field or alter the definition of an existing field based on the selected target data warehouse.
Step 4: Settings and activities
Schedule & notifications
After setting up the Column Mapping step for your Data Flow, you can run it instantly (by clicking the Run button at the bottom) or schedule it for later execution. For more information about scheduling, refer to the Schedule the Flow section.
Activities
Once the Data Flow runs, navigate to the Activities tab in the right-hand menu to observe the ongoing progress. Data Integration offers organized logs, providing an insightful view into the operations within each of your connections. You can monitor, access, and analyze these logs.
A Data Flow supports up to 500 tables.
