Viewing domain data
View the data in a primary data domain in the Golden Records page.
Before you begin
If you have configured data to be masked in the model, masked field data is hidden in golden records. Masked values are only visible if you have one of the following user permissions:
- MDM - Privileged Data Steward role
- MDM - Administrator role (or - MDM - View Records entitlement)
- MDM - Reveal Masked Data privilege
- MDM - Data Steward role (or MDM - Stewardship privilege) and the Reveal Masked Data Hub entitlement (available with the Advanced Security feature)
You can activate Accelerated Query when you have 100,000 or more golden records in a deployed model (universe). This feature improves query performance. Read Activating Accelerated Query to learn more.
When a model's field is partially masked or fully masked, the model disables the corresponding filter option. For example, if the system masks the email field, you cannot add an email filter as the option is disabled and greyed out.
When you load the Golden Records page, the browser URL shows the filters in use. You can enter a URL with filter parameters in the browser bar. You can also bookmark URLs with filter parameters. A Golden Records page URL does not include the Filter Operator setting. A bookmarked URL always loads the page with the Filter Operator set to AND. For example, The following URL retrieves active golden records:
-
updated in the last 24 hours
-
contributed by the source with permanent ID NS
-
attached to the domain with system ID abcdef01-2345-6789-abcd-ef0123456789
-
hosted in the repository with system ID 01234567-89ab-cdef-0123-456789abcdef
https://platform.boomi.com/MdmSphere.html#mdm_data;accountId=account-123456;repository=01234567-89ab-cdef-0123-456789abcdef;universe=abcdef01-2345-6789-abcd-ef0123456789;sourceId=NS;updated_dateRange=day;type=active
Procedure
-
Select Stewardship > Golden Records.
-
In the repository/domain list, select the domain.
A data grid is displayed in which each row represents a golden record. The first column, Updated Date, is the timestamp of the last update of the golden record. If a golden record title format is specified in the domain model, the next column, Record Title, is the golden record title. The right-most column, Created Date, is the timestamp of the creation of the golden record. The remaining columns correspond to the fields in the domain model. Collections are omitted; collection data for an individual golden record is viewable in its detail view — see step 14.
To view a Long Text field value, click the
 View value icon representing that value in the grid.
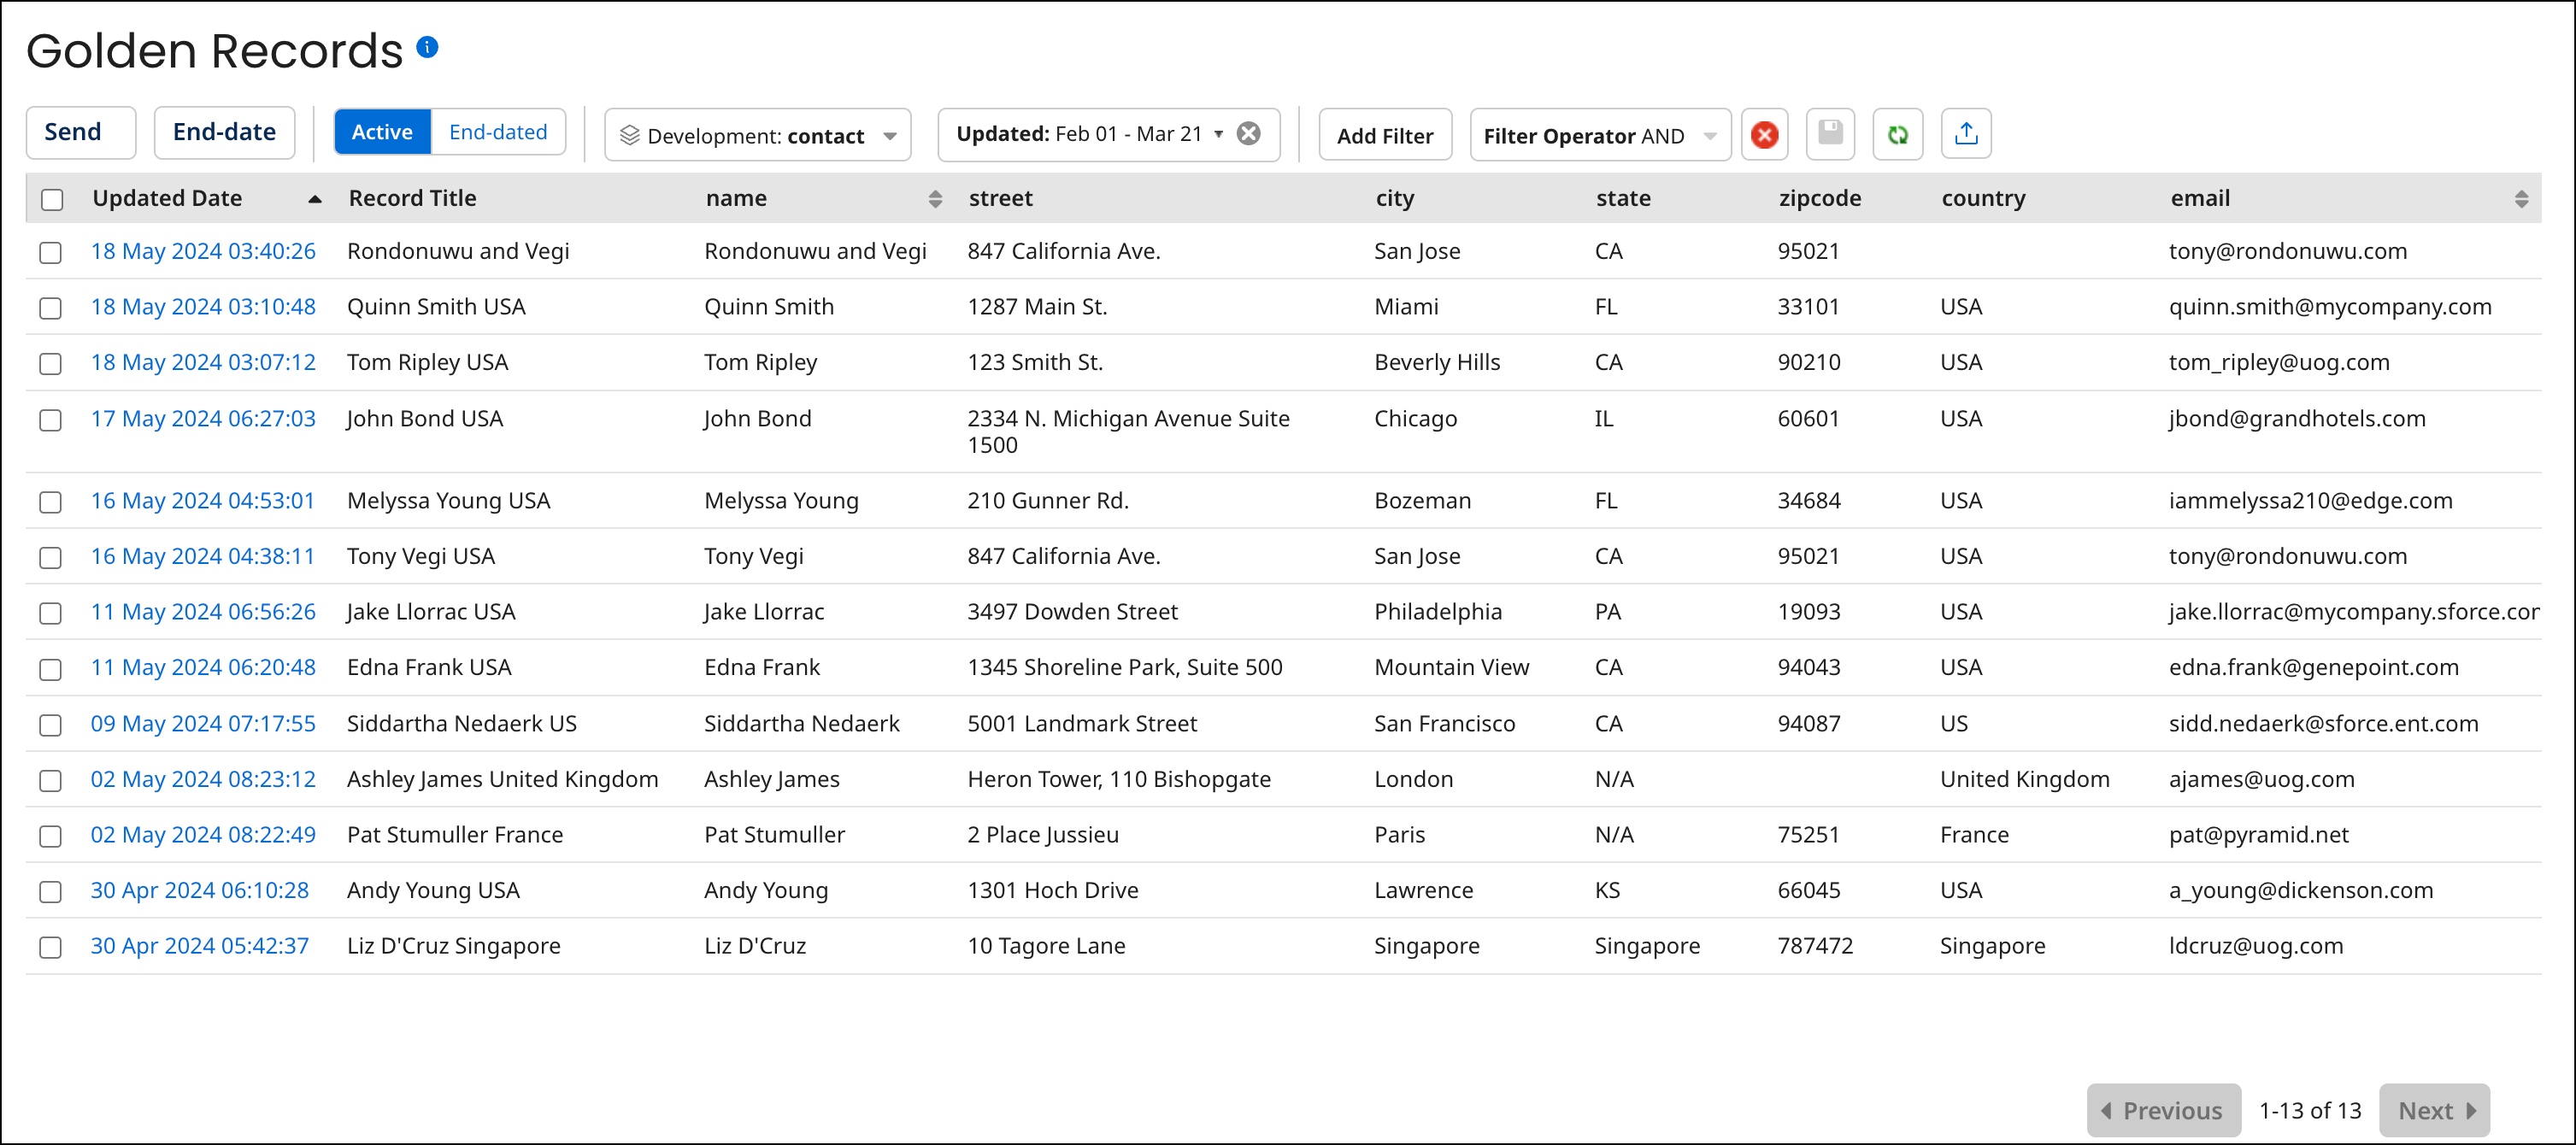 note
noteThe Send button is visible only to administrators and users having a role with the MDM - Source Management privilege and only while Active is selected.
Filtering by date of last update is applied by default unless other filters have been explicitly saved as defaults; initially only active golden records updated in the past 24 hours load into the grid. To switch between active and end-dated golden records, click Active or End-dated.
Initially a maximum of 100 golden records load into the grid.
To refresh the grid, click
 Refresh.note
Steps 3–13 describe how to modify the filtering applied to the data in the grid. Each of these steps except step 13 relates to a particular filter type. While a Golden Record ID (step 11) filter is applied, it is not possible to apply any of the other types of filters — and vice-versa.
While a filter is applied, a button for that filter appears to the left of the Add Filter button. The button’s label shows the specified criterion — for example, Updated: Past 24 Hours.
-
To clear a filter, click
 on the filter’s button.
 -
To clear all filters, click
 Clear All Filters.
 -
To save the currently applied filters and Filter Operator as defaults for application to the data grid when the Golden Records page reloads, click
 Save current filters as default view. You can save filters separately for each of the repository’s hosted domains. For a given domain, you can save filters separately per account for Active and End-dated golden records.
-
-
Optional: To filter active golden records by created date, do one of the following:
-
If active golden records are not currently filtered by created date, click Add Filter and select the Created Date filter type.
-
Otherwise, click the Created: button for the currently applied filter.
A dialog appears and takes focus.
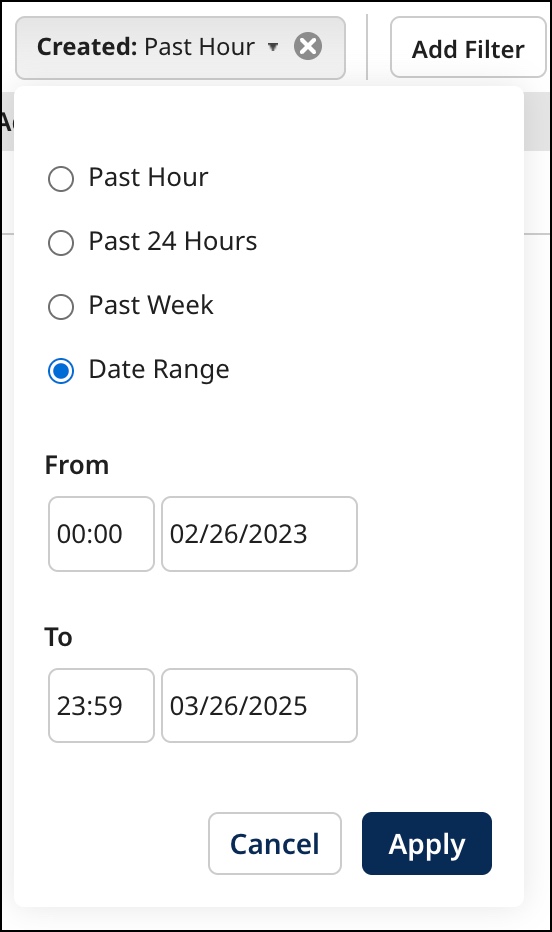
Select one of the following from the dialog and then click Apply
-
Past Hour
-
Past 24 Hours
-
Past Week
-
Date Range, then type From and To dates, or click the date fields and select dates from calendars. You can optionally type or select From and To times rather than accepting the 00:00 and 23:59 defaults.
-
-
Optional: To filter active golden records by date of last update, do one of the following:
-
If active golden records are not currently filtered by date of last update, click Add Filter and select the Updated Date filter type.
-
Otherwise, click the Updated: button for the currently applied filter.
The dialog mentioned in step 3 appears and takes focus. Set the time span and then click Apply.
-
-
Optional: To filter the data by a field value, do one of the following:
-
If the data is not currently filtered by a field value, click Add Filter and select the Field Data filter type.
-
Otherwise, click the button whose label identifies the field and value for the currently applied filter.
A dialog appears and takes focus.

-
In the Field list, select the field.
-
In the next list, select the operator.
noteThe operators available for selection and the default selection are dependent upon the type of field you selected, and the remaining substeps are dependent upon the operator you select. For most field type and operator combinations, continue with substep c as written here.
-
In the Value field, type the value.
-
Click Apply.
noteYou can repeat this step to apply additional filters of this type.
-
-
Optional: To filter active golden records by tag, do one of the following:
-
If active golden records are not currently filtered by a tag, click Add Filter and select the Record Tag filter type.
-
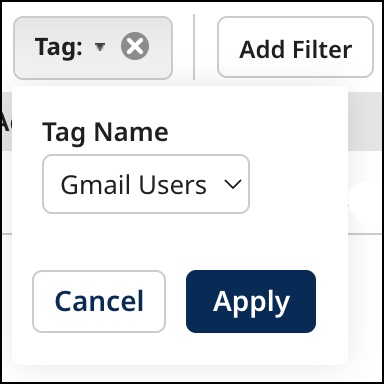
Otherwise, click the Tag: button for the currently applied filter.
A dialog appears and takes focus.
-
In the Tag Name list, select the tag by which to filter.
-
Click Apply.
-
-
Optional: To filter active golden records by creating source, do one of the following:
-
If active golden records are not currently filtered by a creating source, click Add Filter and select the Creating Source filter type.
-
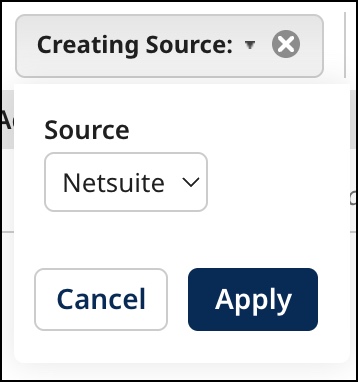
Otherwise, click the Creating Source: button for the currently applied filter.
A dialog appears and takes focus.
-
In the Source list, select the source by which to filter.
-
Click Apply.
-
-
Optional: To filter the data by source entity ID, do one of the following:
-
If the data is not currently filtered by a source entity ID, click Add Filter and select the Source Entity ID filter type.
-
Otherwise, click the Source Entity ID: button for the currently applied filter.
A dialog appears and takes focus.

-
In the Source list, select the source.
-
In the Entity ID field, type the entity ID.
-
Click Apply.
noteThe Starts With operator is used when applying this filter type. For example, setting Entity ID to “12” would return each golden record whose entity ID for the selected Source begins with “12”, such as "123" and "1234321".
-
-
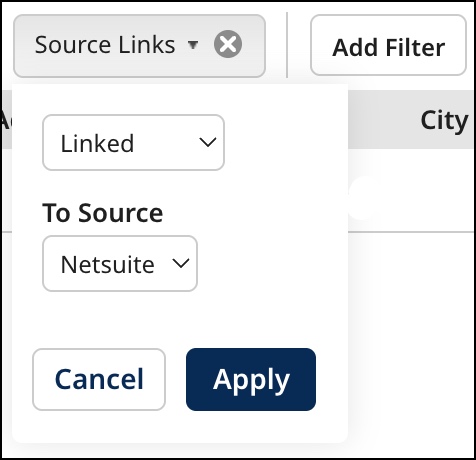
Optional: To filter active golden records by source links, do one of the following:
-
If active golden records are not currently filtered by source links, click Add Filter and select the Source Links filter type.
-
Otherwise, click the Linked to: or Not Linked to: button for the currently applied filter.
A dialog appears and takes focus.
-
In the first list:
-
To filter by the presence of links to a source, selected Linked.
-
To filter by the absence of links to a source, selected Not Linked.
-
-
In the To Source list, select the source.
-
Click Apply.
-
-
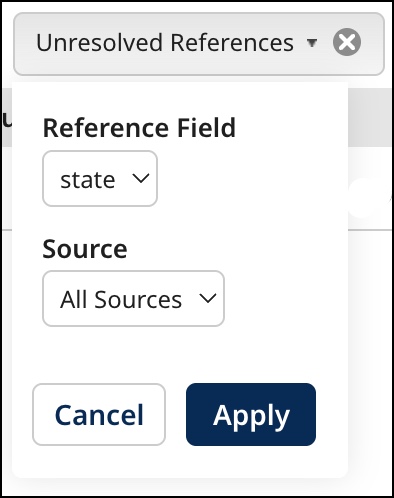
Optional: To filter the data by the presence of unresolved reference field data, do one of the following:
-
If the data is not currently filtered by the presence of unresolved reference field data, click Add Filter and select the Unresolved References filter type.
-
Otherwise, click the Unresolved: button for the currently applied filter.
A dialog appears and takes focus.
-
In the Reference Field list, select the reference field to evaluate for the presence of unresolved data.
-
In the Source field, select an individual source by which to filter or All Sources (default), which limits results to records for which all source contributions are unresolved.
-
Click Apply.
-
-
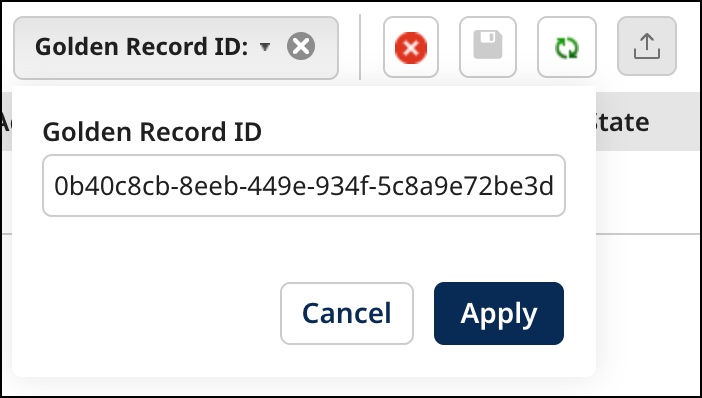
Optional: To filter the data by golden record ID, do one of the following:
-
If the data is not currently filtered, click Add Filter and select the Golden Record ID filter type.
-
If the data is currently filtered by a golden record ID, click the Golden Record ID: button for the currently applied filter.
A dialog appears and takes focus.
-
In the Golden Record ID field, type the golden record ID.
-
Click Apply.
-
-
Optional: To filter end-dated golden records by end date, do one of the following:
-
If end-dated golden records are not currently filtered by end date, click Add Filter and select the End Date filter type.
-
Otherwise, click the End-dated: button for the currently applied filter.
The dialog mentioned in step 3 appears and takes focus. Set the time span and then click Apply.
noteIt is not possible to end-date a golden record that is referenced by another golden record.
noteThis action is available only to administrators and users having a role with the End-date Records entitlement.
-
-
Optional: If you have applied multiple filters and you want the filters to be “OR’ed”, in the Filter Operator list, select OR. Otherwise, the filters are “AND’ed”, which means only golden records meeting all of the specified filter criteria are selected.
noteThis control is hidden while filtering by golden record ID is applied because filtering by golden record ID in conjunction with a filter of another type is not possible.
-
Optional: To view details for a golden record, click its Updated Date.
The detail view opens.
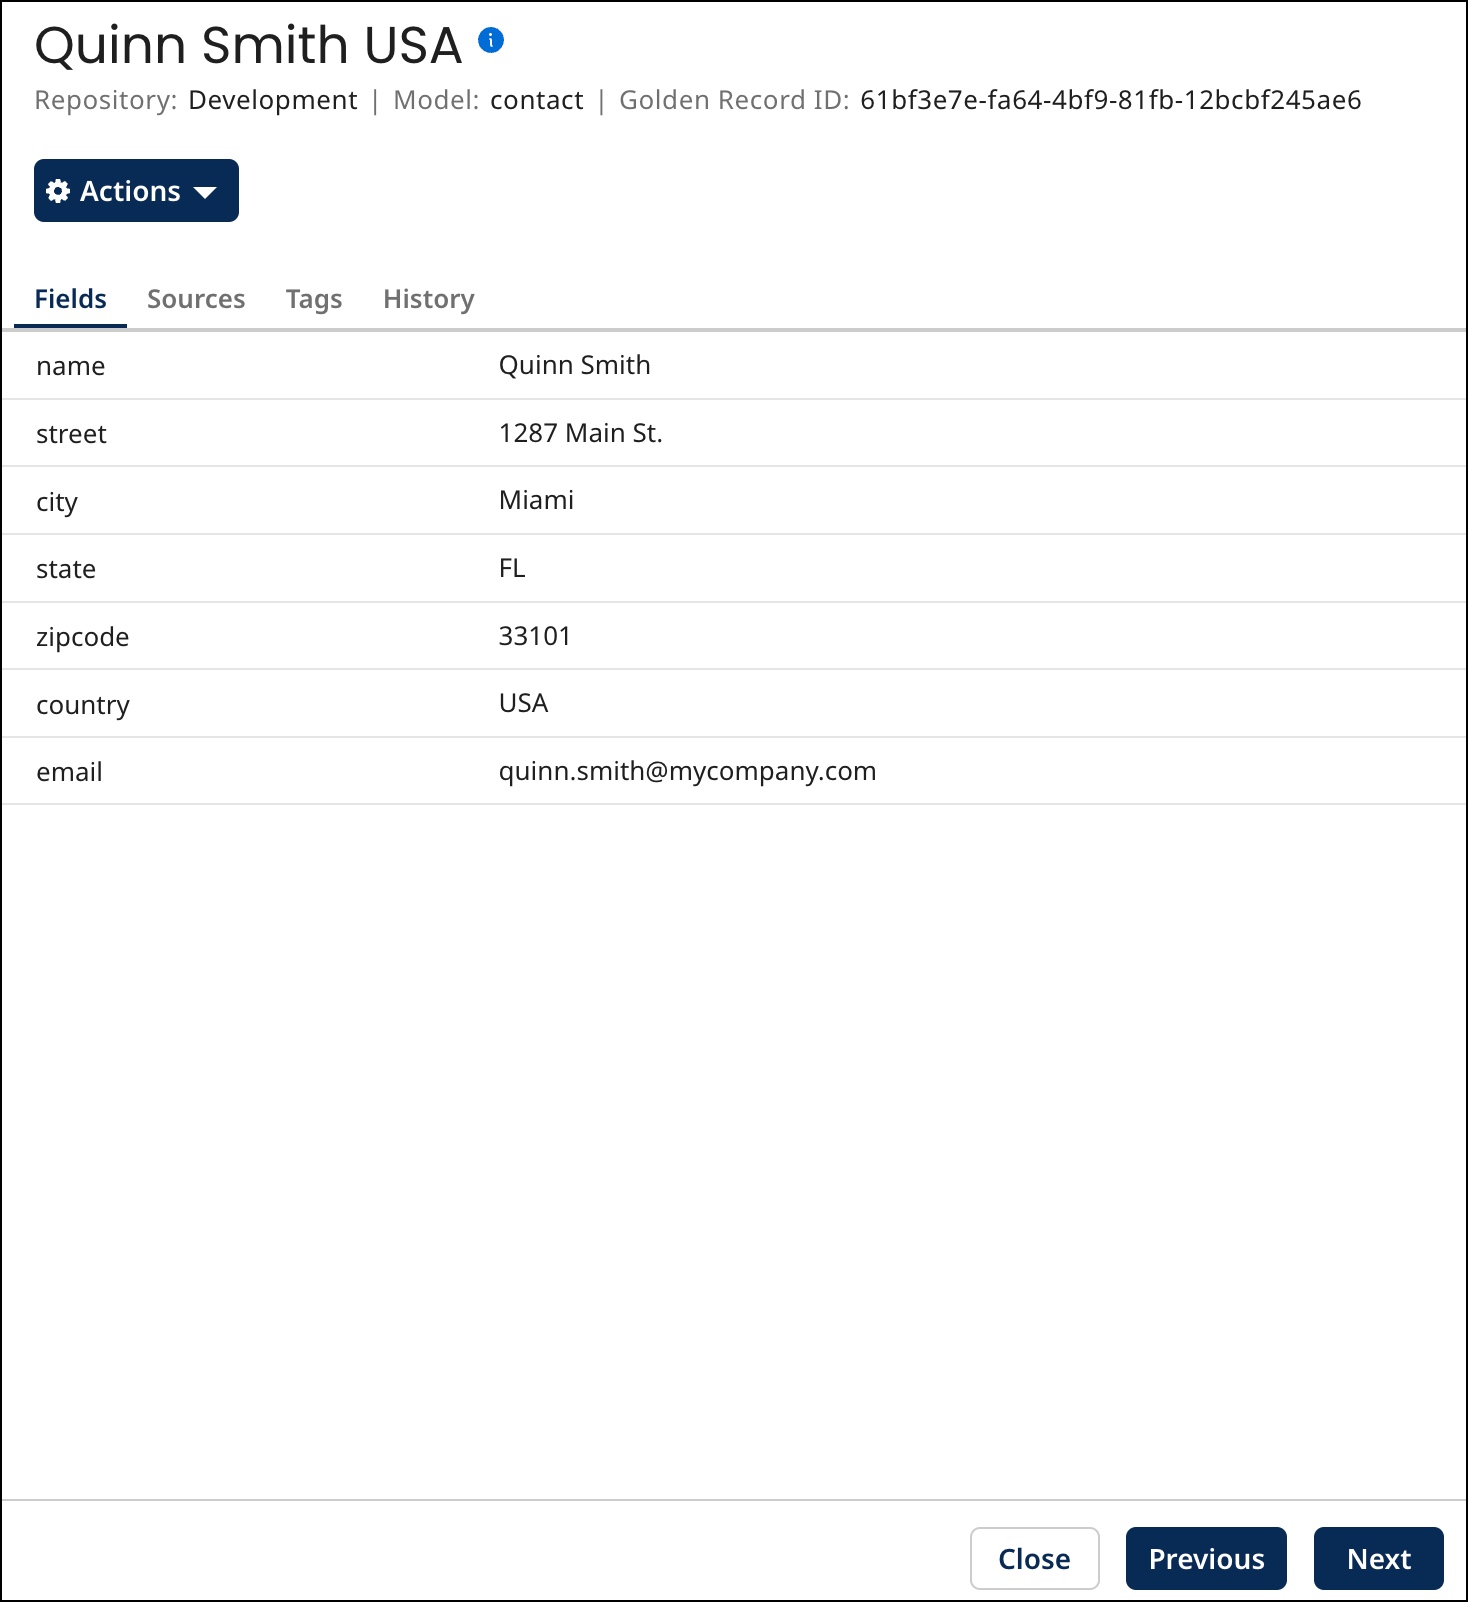
Do any or all of the following:
-
To view the field data, select the Fields tab — this tab is selected by default.
noteYou can view up to 100 repeatable fields or field groups. You can view additional fields by selecting Original XML or by querying the Repository API. If field values are masked, you can view additional fields in the History tab.
noteTo view details for a referenced golden record, click the corresponding reference field value.
-
To view source agreement for a field for which sources are ranked, select the Fields tab, and click View Source Agreement in the field’s list entry. Sources are listed in their ranked order, and those in agreement are indicated by the
 icon and bold type. In the case of an ordinary field, a source is considered to be in agreement if its most recent entity submission specified a value for the field identical to the field value in the golden record. Similarly, in the case of a collection, a source is considered to be in agreement if its most recent entity submission specified a collection identical to the collection in the golden record.
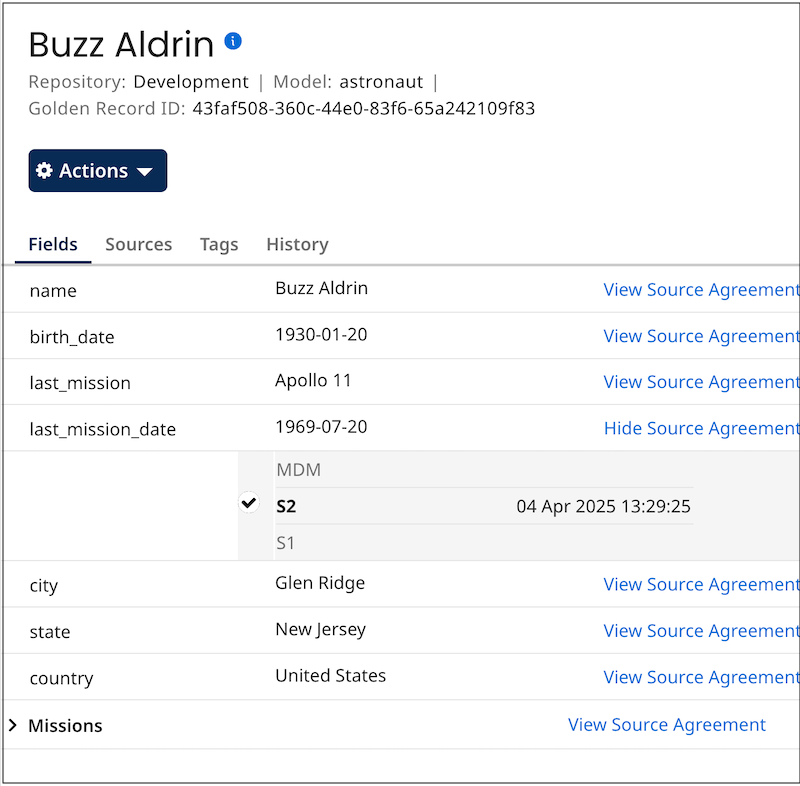
To hide source agreement for a field, click Hide Source Agreement.
-
To view the source entity IDs contributed as reference field values in entities by individual sources and the respective states of the references, select the Fields tab, and in the field’s list entry click
 View contributed values by source. Reference field values are links to details for the referenced golden record. If a golden record title format is specified in a referenced domain’s model, the values of title format fields in referenced golden records are shown as reference field values instead of golden record IDs. If a reference field value is unresolved, the text “Unresolved” appears. A Pending status indicates that the reference is not resolved. Data Hub did not find a match in the reference source. A Resolved status means Data Hub was able to find a match in the reference source and link it to the golden record.
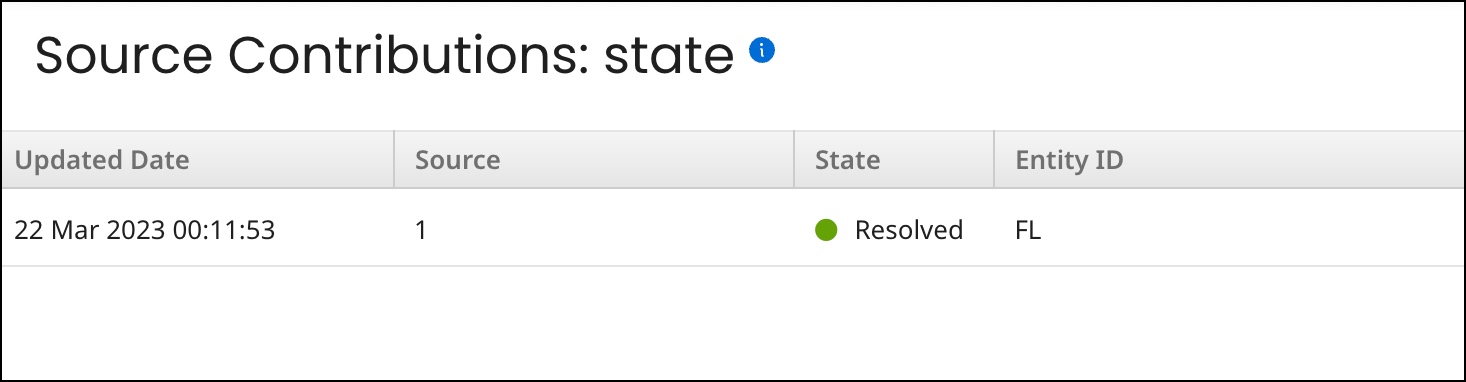
When you are done viewing the Source Contributions view, close it — either press Esc, click Close or click elsewhere in the Golden Records page.
-
To view the golden record’s sources and the states of the links from the golden record to source entities, select the Sources tab.
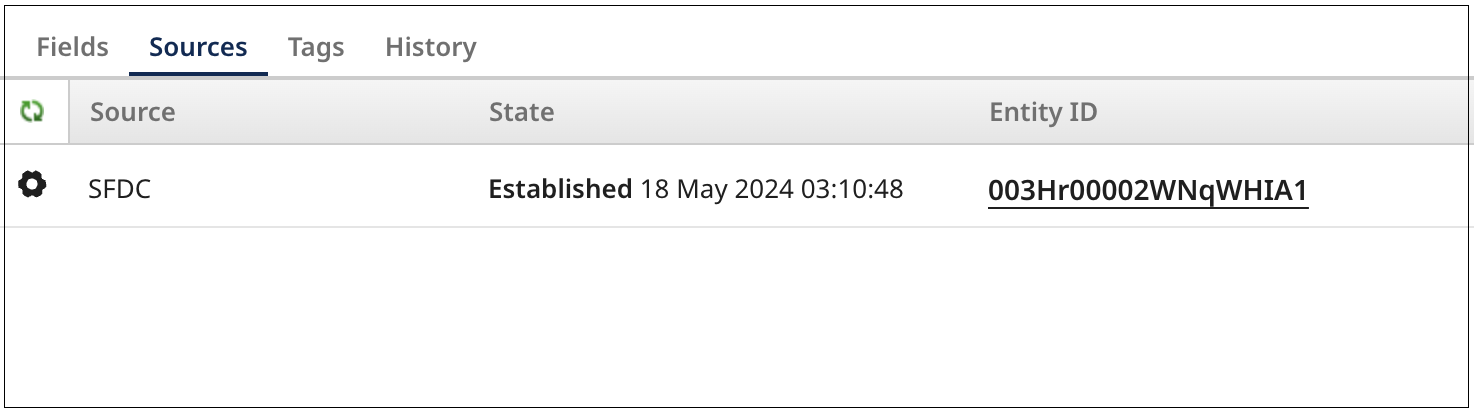 note
noteYou can link from the sources list to entities in source systems, provided the source entity URL formats are correctly specified in the Entity ID URL field for the source attachments in the domain Sources tab, or if not there, for the source definitions in the Sources page. The links open in separate browser tabs or windows.
-
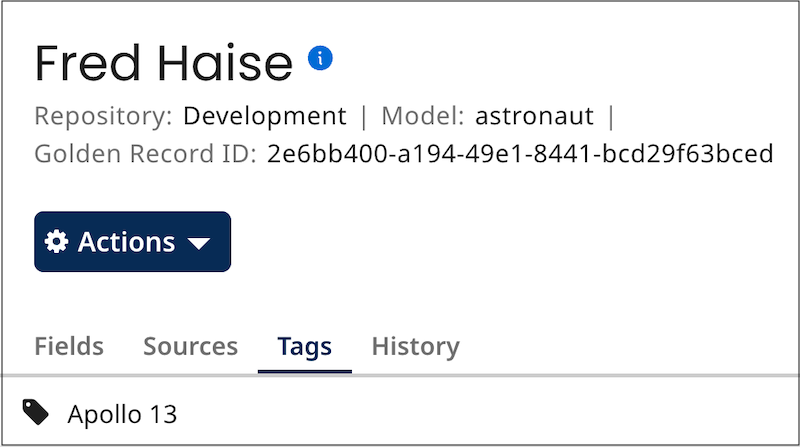
To view the golden record’s tags, select the Tags tab.
-
To view the golden record’s version history, select the History tab.
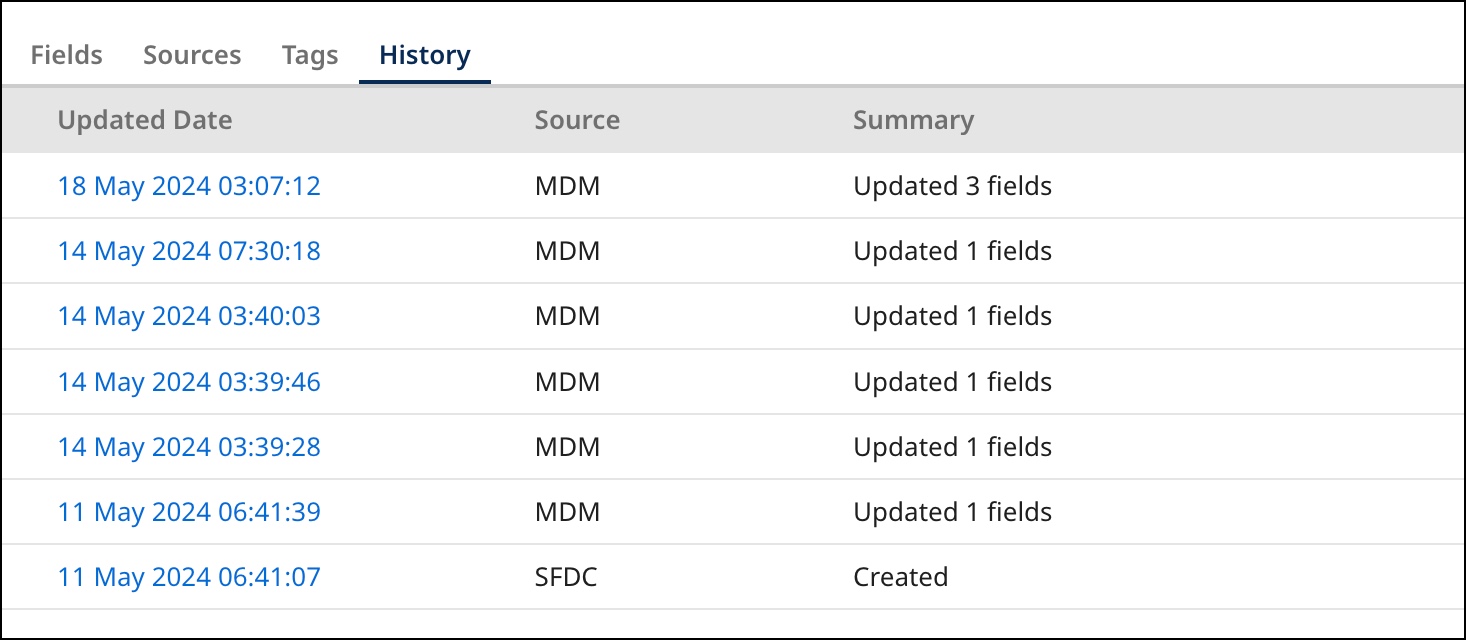
To view a version’s details, click its Updated Date.
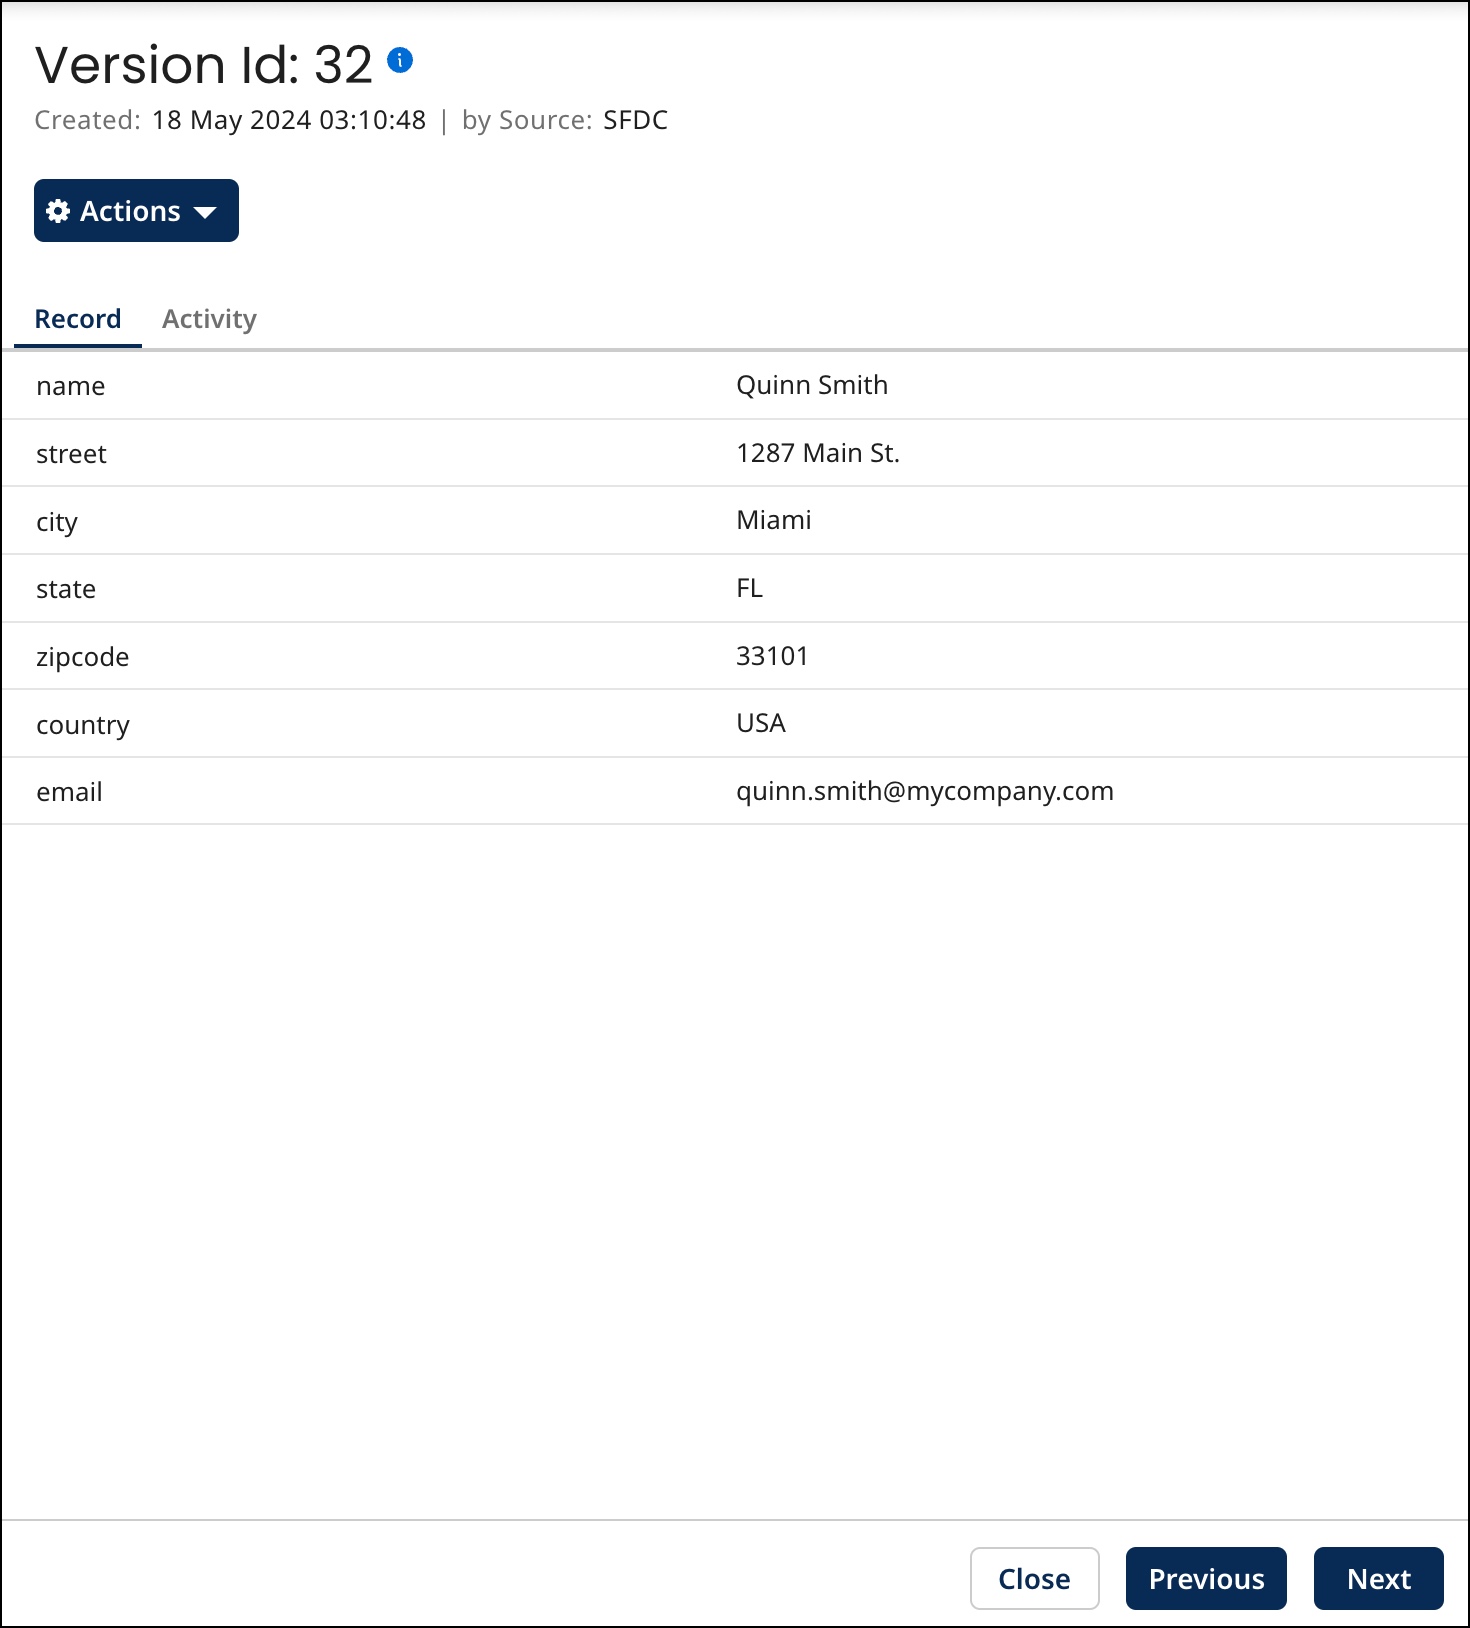
In the version detail view, to view the values of all fields for the version, select the Record tab. To view events that occurred leading to the creation of the version, select the Activity tab. To view the previous and new values of created and updated fields for the version, select the Changes tab.
When you are done reviewing the version details, do one of the following:
-
Close the version detail view — either press Esc, click Close or click elsewhere in the Golden Records page.
-
Navigate to detail for the next version (previous entry in the History list) — click
 Previous (or press the Up arrow key).
 -
Navigate to detail for the previous version (next entry in the History list) — click Next
 (or press the Down arrow key).
-
-
-
Optional: When you are done reviewing the golden record details, do one of the following:
-
Close the detail view — either press Esc, click Close or click elsewhere in the Golden Records page.
-
Navigate to detail for the previous golden record in the data grid — click
Previous (or press the Up arrow key). -
Navigate to detail for the next golden record in the data grid — click Next
(or press the Down arrow key).
-
