Adding, editing, and deleting user roles
This feature is part of Advanced User Security, which is available in the Enterprise and Enterprise Plus Editions, and as an add-on to the Professional and Professional Plus Editions. Consult with your Boomi account representative to enable this functionality.
Administrators with access can create custom roles and assign privileges to them.
If the available user roles and their assigned privileges do not match your workflow, an administrator can create custom roles and assign to them the privileges that you need. Custom roles can inherit one of the available roles and its privileges along with any additional privileges that you assign, or the custom role can be unrelated to an available role and can consist of the privileges that you select.
Adding a new user
To add a user you must be logged in as a user with User Management privileges.
-
Select Settings > Account Access and click the User Management tab.
-
Select the Custom Roles tab, click the '+' icon.
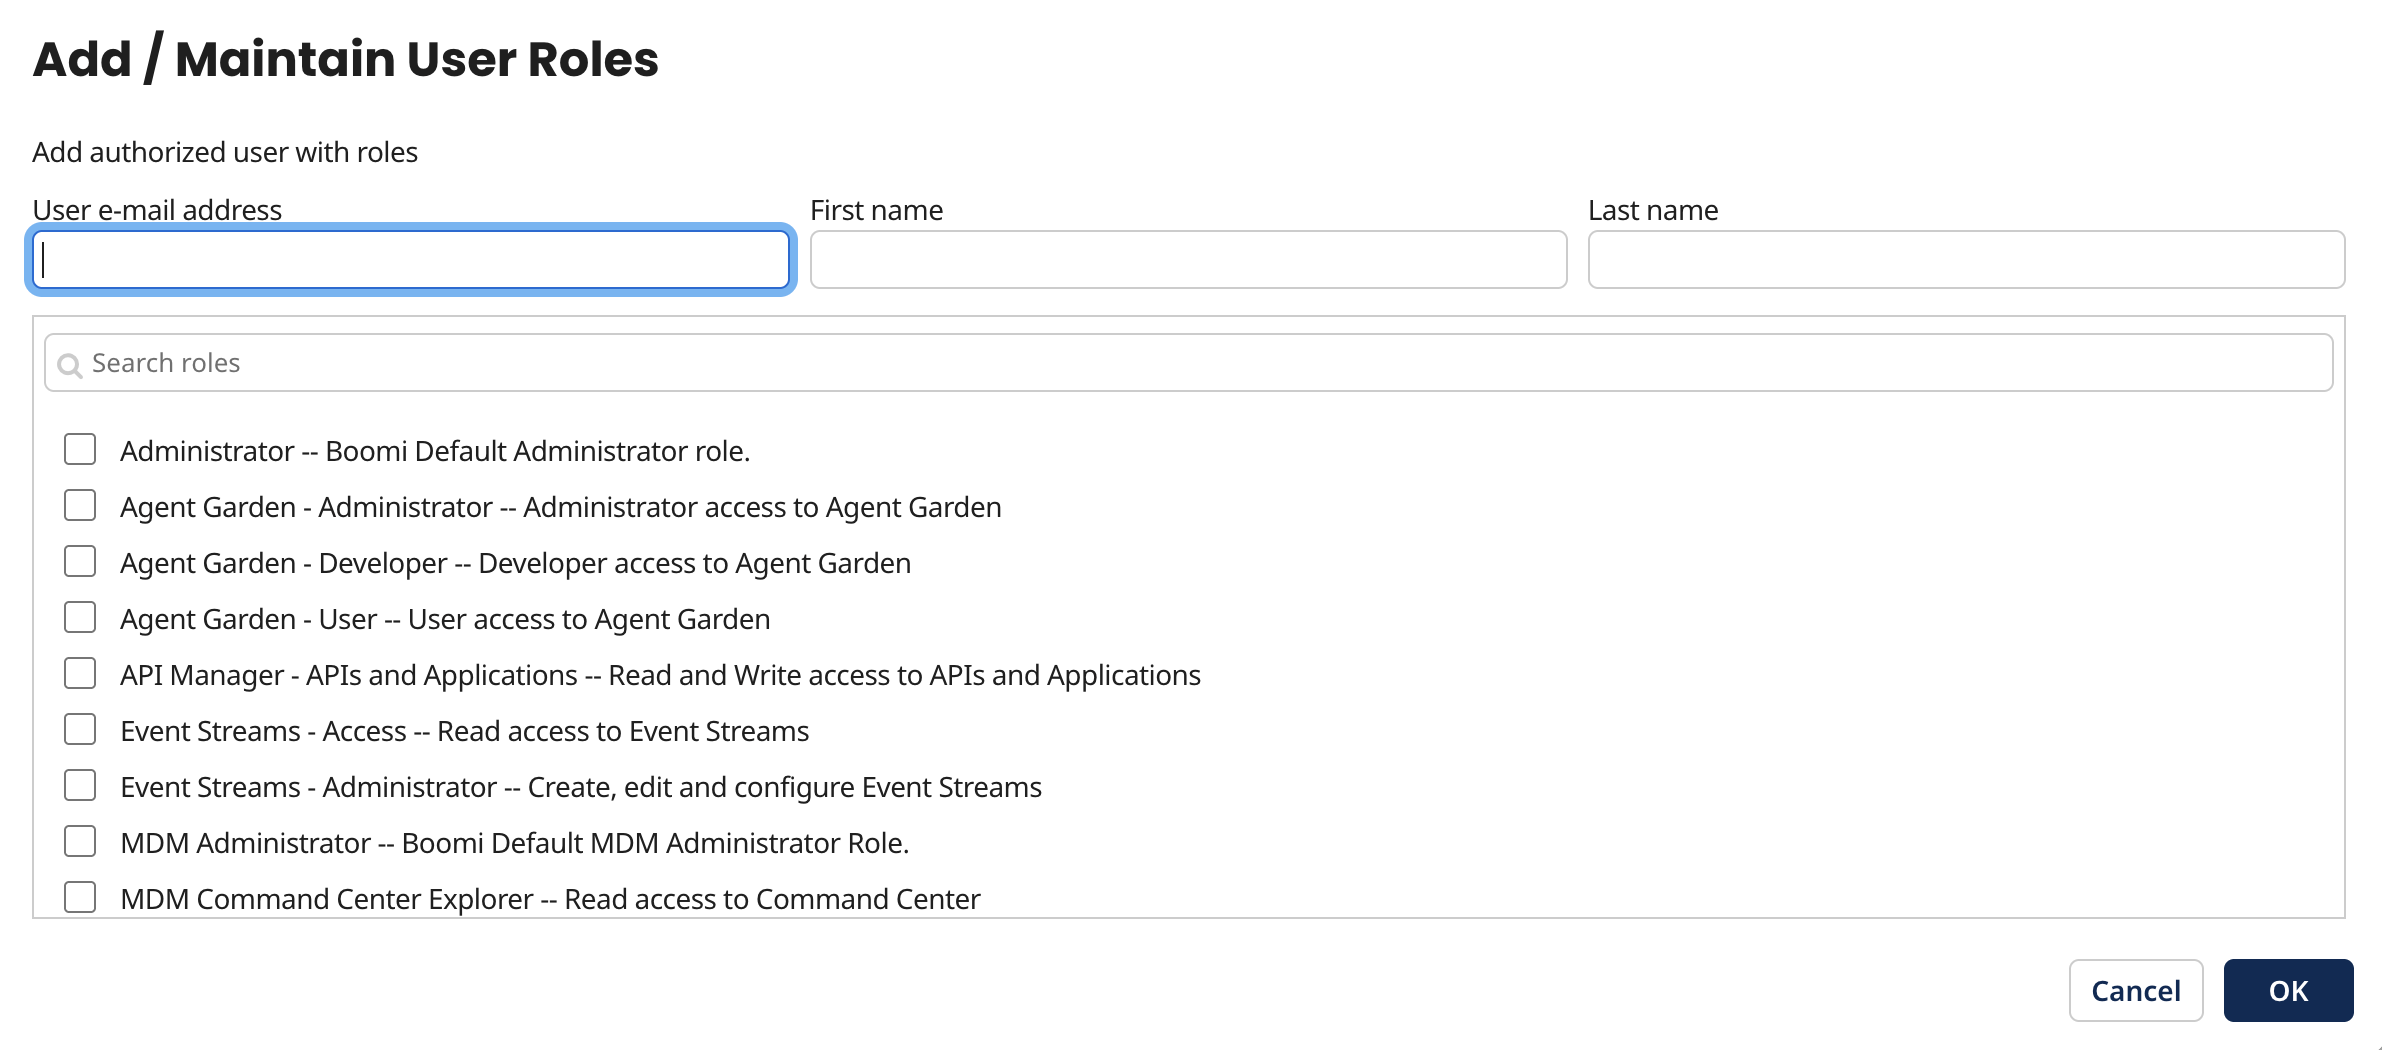
The Add/Maintain User Roles dialog opens.
-
Enter the User email address.
-
Enter the user's First name and Last name.
-
Select one or more roles to apply to the user. New users must have at least one role.
Selecting multiple roles increases the number of unique privileges. For standard accounts, Administration and Standard User are the only available roles. For examples of how to combine roles to create a unique set of user privileges, refer to Custom Role Scenarios.
-
Click OK.
New users receive a welcome notification email and temporary password that can be used to log into the account. The user can change their email and/or password on the User Information tab.
If the user already has access to other accounts through this email address, they receive an email notifying them of access to the new account.
There is a limit of 10000 users that can be linked to a given account; an error will be thrown if this limit is exceeded.
Editing and deleting roles
Select the user you wish to modify.
- To edit the role, select the pencil icon and check or uncheck the desired roles for that user.
- To remove a user, select the red X icon. A warning dialog will appear to indicate that this action cannot be reversed. Select OK.
Removing a user does not affect any components they may have created.
Adding a new custom role
Refer to Custom Role Scenarios to learn more about use cases for custom roles.
-
Select Settings > then click the User Management tab under Account Access.
-
On the Custom Roles tab, click the blue '+' icon.
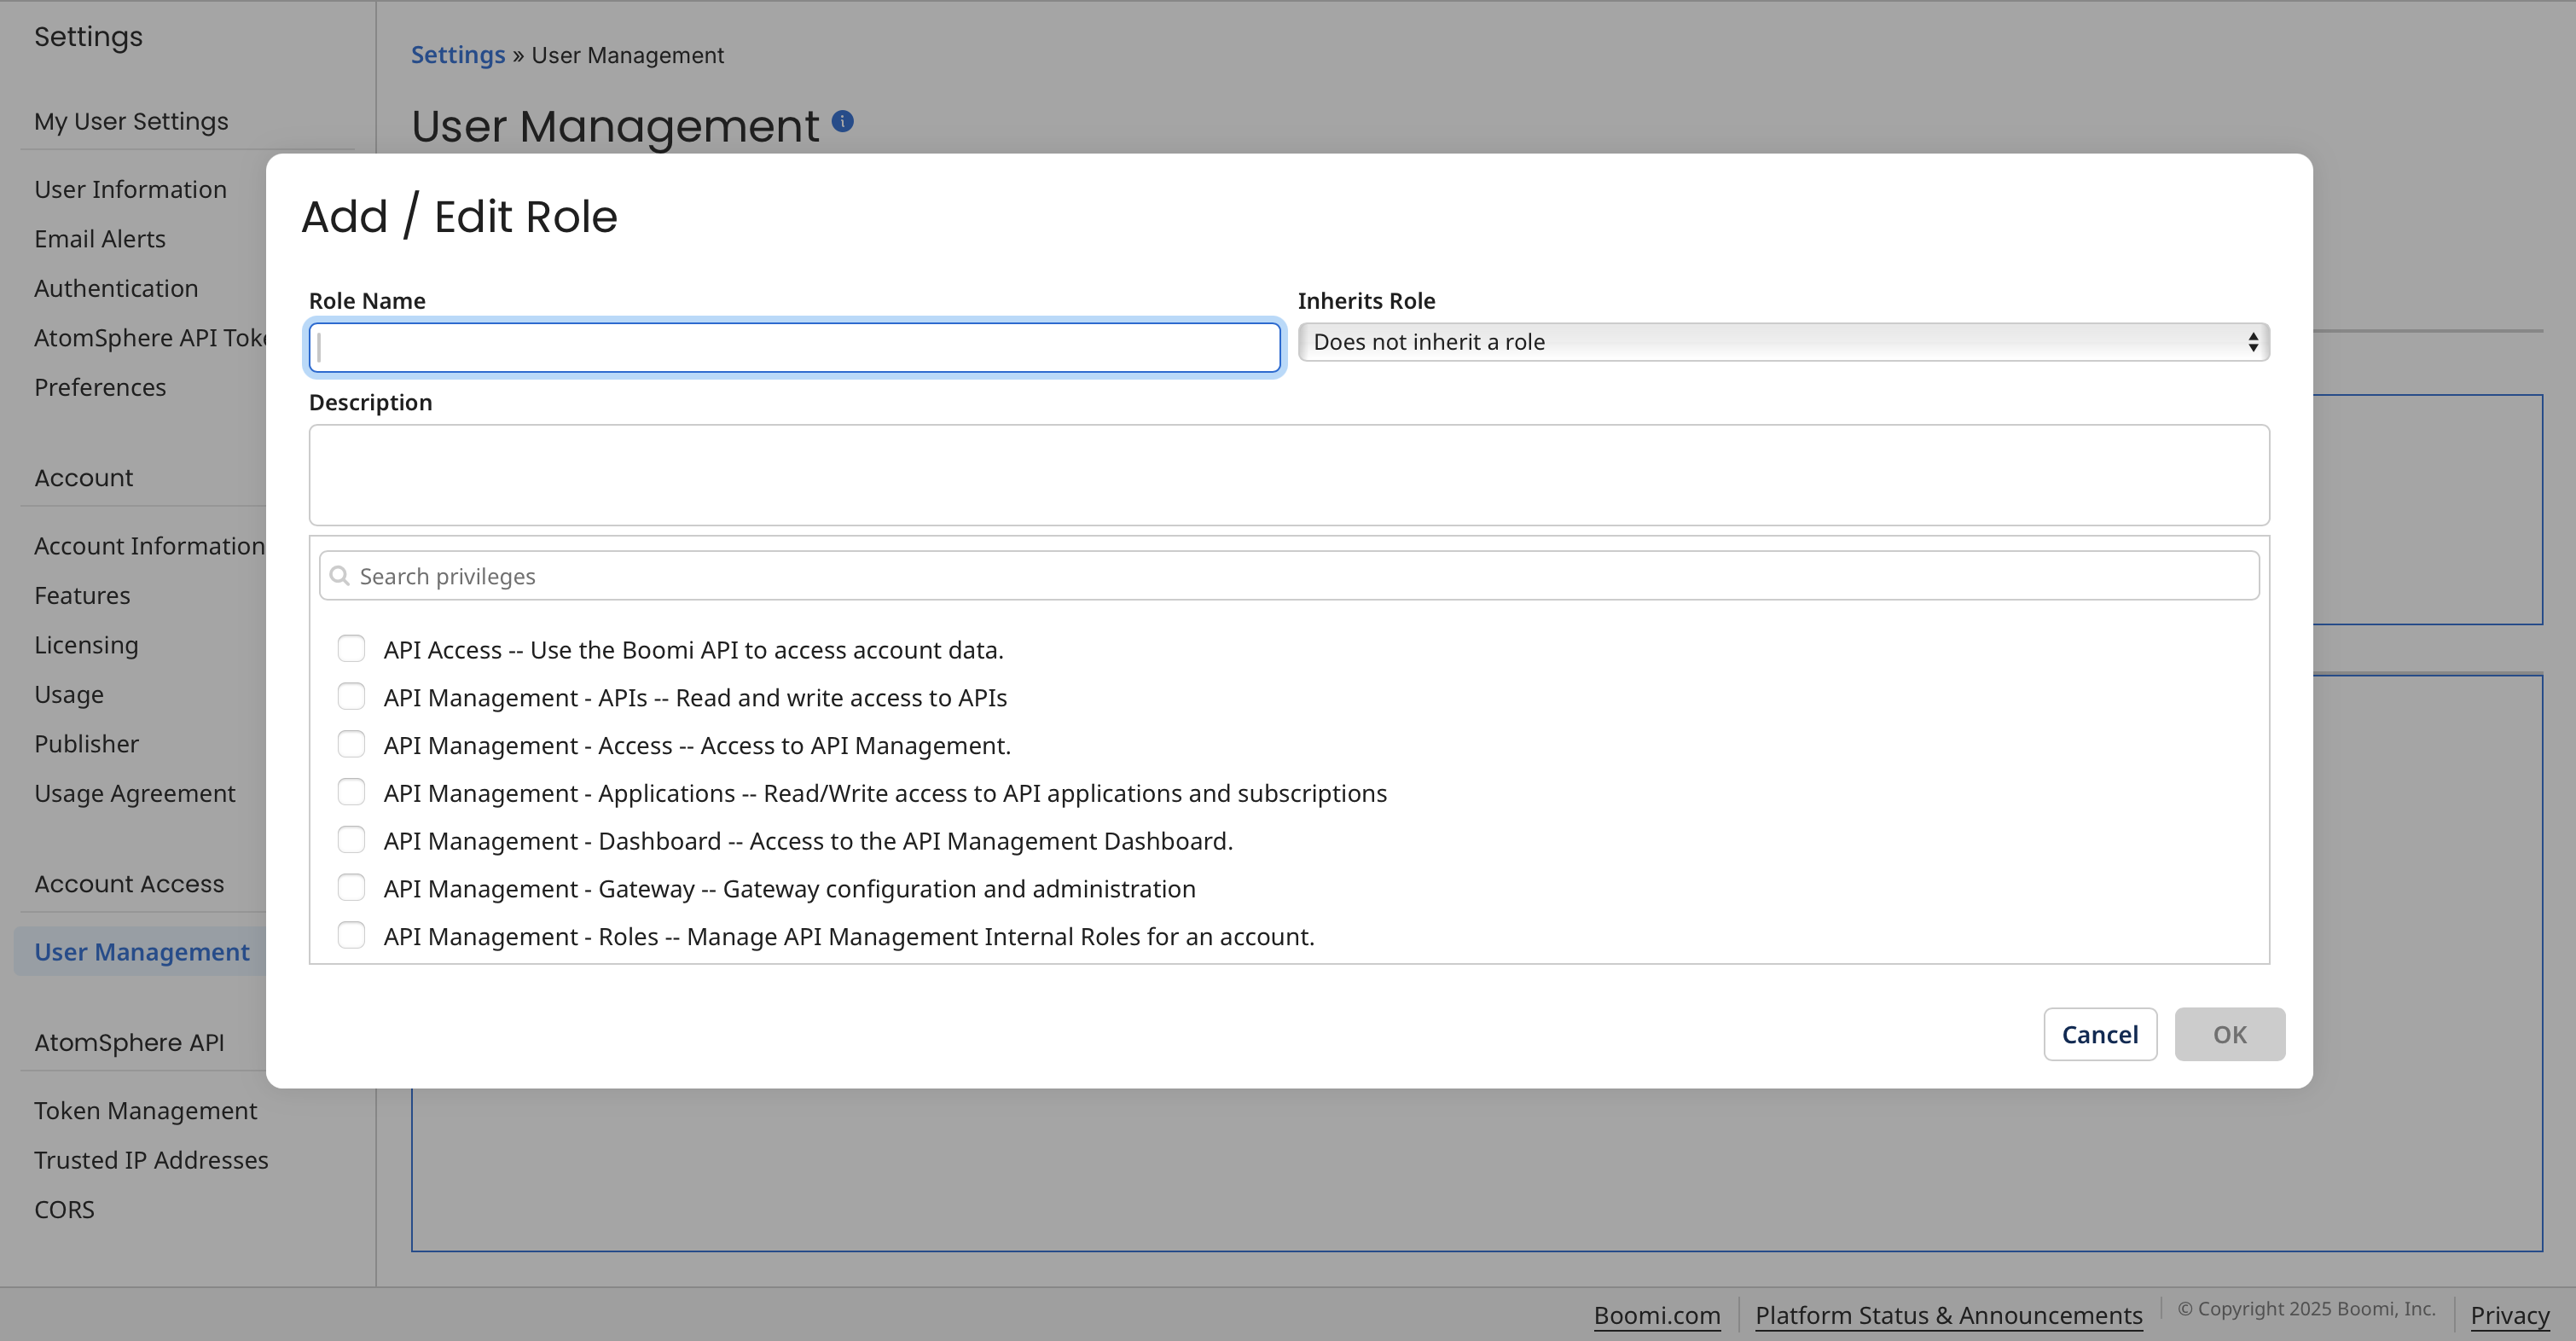
The Add/Edit Role dialog opens.
-
Enter the role name. You can also provide a description of the role.
-
Select a pre-existing role in Inherits Role if desired. Does not inherit a role is the default.
-
Select the privilege(s) you want to apply to the custom role.
-
Click OK.
The custom role is saved and appears on the Custom Roles tab. It also is available in the Add/Maintain User Roles dialog so that you can assign it to users.
Adding a custom role to an environment
Use the Manage > Runtime Management > Environments page to add a custom role to an environment.
-
Go to Manage > Runtime Management.
-
Click the Environment's name to open and view its details.
-
On the Environments page, click Add a role next to the Roles with Access field.
The Add/Edit Role dialog opens.
-
Enter the role name.
-
Enter a description.
-
In the Inherits Role list, select an existing role.
This assigns a predefined set of privileges to the custom role.
-
Click OK.
The role is saved and appears in Settings > Account Access > User Management > Custom Roles tab.
Editing and removing custom roles
- To edit a role, select a role on the Custom Roles tab and click the pencil icon. Change the Role Name, Description, Inherits Role and/or Additional Available Privileges fields as desired.
- To remove a role, select it on the Custom Roles tab and click the red X icon.
