Adding a Snowflake provider account
After completing Setting up the External OAuth connection:
-
Log in to Agent Control Tower.
-
Navigate to Manage Providers.
-
Select Snowflake
-
Click Account > Add Account.
-
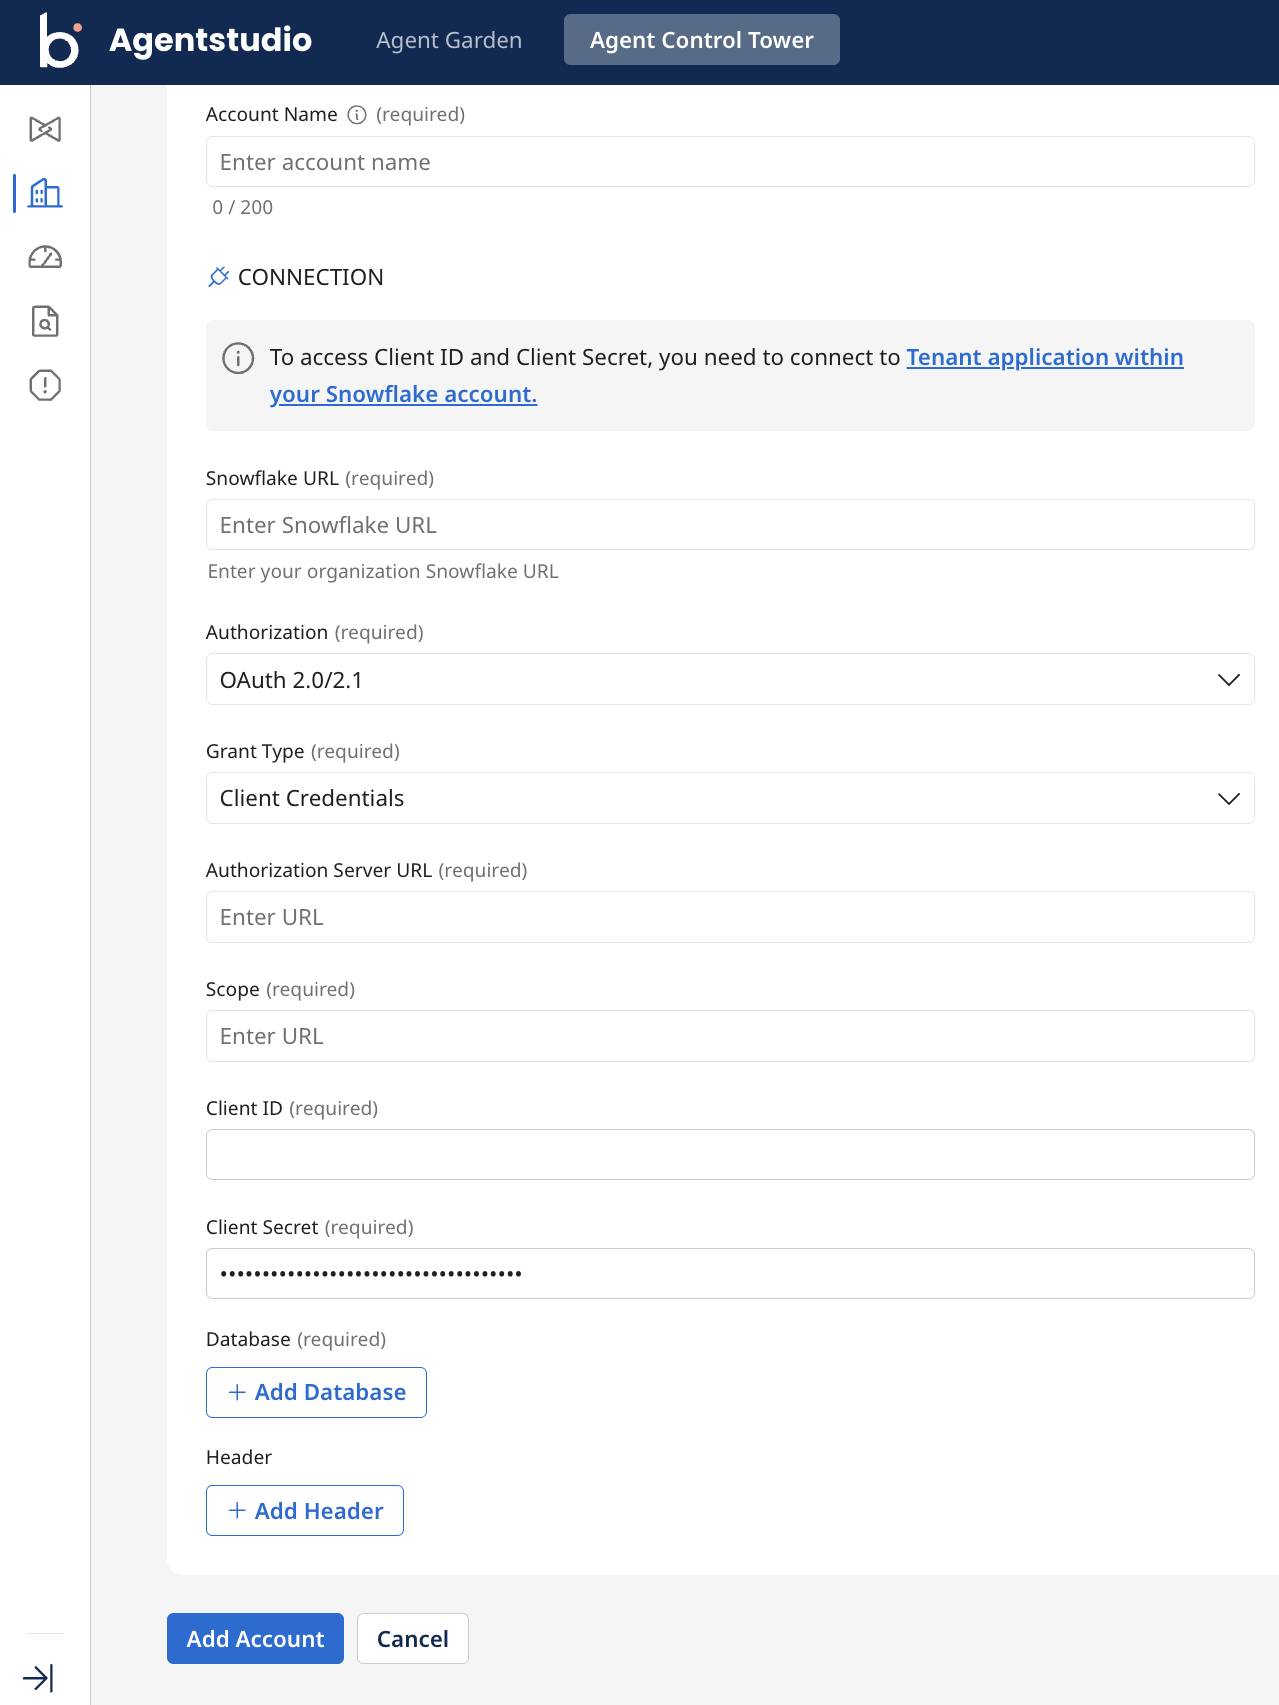
Fill in the following details in the Add Account page:
-
Account Name: Enter a Snowflake provider account name. For example, Snowflake test 1.
-
Snowflake URL: Enter your organization Snowflake URL
https://<account_identifier>.snowflakecomputing.com. The account identifier can be found in the account details screen on the Snowflake dashboard. -
Authorization: Retain as OAuth 2.0/2.1.
-
Grant Type: Retain as Client Credentials.
-
Authorization Server URL: Enter the base URL for your Azure Tenant
https://login.microsoftonline.com/<TENANT_ID>. Replace<TENANT_ID>with your specific Directory ID. -
Scope: The Application ID URI created in Phase 1 Step 1 of setting up an External OAuth connection, followed by /.default:
<RESOURCE_APP_ID_URI>/.default. This communicates with Azure to provide all permissions granted to the application. -
Client ID: The Application (client) ID
<CLIENT_APP_ID>of the Client App created in Phase 1 Step 2 of setting up an External OAuth connection. -
Client Secret: The secret value
<CLIENT_SECRET>generated in Phase 1 Step 2. -
Database: The name of the Snowflake database you want to connect to, for example ENG_AI_DB.
- Schema: The name of the Snowflake schema you want to connect to, for example Cortex_agents.
-
Headers: Optional. Include any specific headers if required.
- Click Add Account.
Allow a few minutes for synchronization. Once synced, your Snowflake Cortex agents appear in the Agents screen, where you can view tools and instructions of particular agents and manage trust levels and tags.
Next steps: Managing Snowflake agents
