Creating a sales insight agent with MCP
The Boomi Platform lets you expose API endpoints in the API Control Plane as MCP (Model Context Protocol) tools, streamlining the development of AI agents. Since MCP tools are pre-configured, you can attach them and continue building your agent. Refer to MCP Overview to learn more.
You'll use the following services in the Boomi Platform to build an AI agent with MCP tools from API Control Plane:
 Agentstudio
 Integration
 API Management and API Gateway
 API Control Plane
Prerequisites
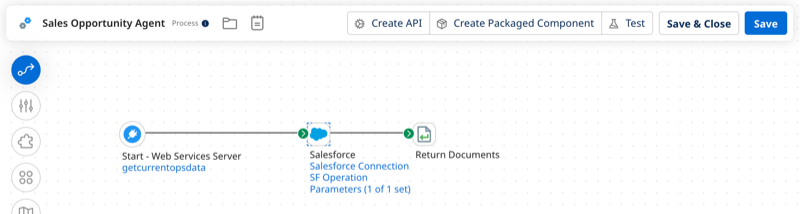
- Processes created in Integration. Since we're creating a Sales agent, these processes can query your CRM for opportunities and leads. For example, with Salesforce you can create an integration that queries Salesforce opportunities. Refer to Creating a Sales Visualization agent for an example of a CRM integration process.
-
Your processes deployed as API endpoints in API Management on the API Gateway. Refer to Creating an API service component for steps to deploy your process as an API endpoint in API Management.
-
A CRM, such as Salesforce, that contains sales data.
Agent overview
In this example, we'll build an agent that:
- Connects to a remote MCP server that contains MCP tools created in API Control Plane. The MCP tools contain API endpoints that get information from your CRM.
- Uses the MCP tools to provide opportunity and lead analysis to your sales team.
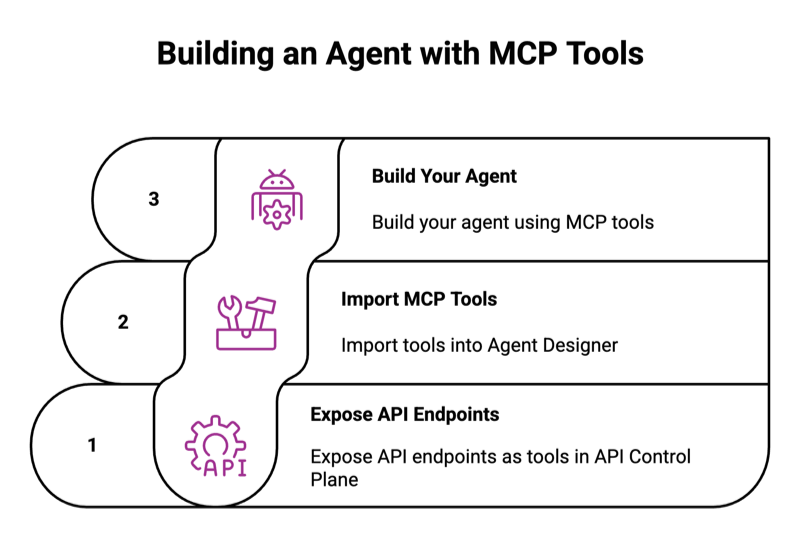
Step 1: Expose API endpoints as MCP tools
Before you begin, ensure your processes are deployed as API endpoints on the Gateway in API Management.
- Navigate to API Control Plane > Environments.
- Select the Environment where your API is attached.
- Navigate to Actions > Discover and select Discover APIs and Discover Components.
- Select Discover.
- Select API Products.
- Select Create New API Product.
- Add a technical name and display name for your API product. The name cannot contain spaces.
- Optional: Enter an Owner name.
- Select Create New API Product.
- Select Plans > Create New Plan or select an existing plan.
- Enter a display name.
- Configure your quota and rate limits.
- Navigate to API Products > Assigned APIs.
- Select Assign on all API endpoints you want to add as tools for your agent.
- In Plans, select Assign to assign the plan you created.
- Navigate to Applications > Create New Application.
- Enter a display name.
- Ensure the toggle is set to Active.
- Select Create New Application.
- Navigate to API Products > Subscriptions > Subscribe.
- Select Subscribe next to your API product.
- Select the application you created in step 12.
- Select Subscribe.
- In API Product > Overview click the arrow next to MCP status.
- In Visibility, select Expose APIs as Tools.
- Select Save.
- Navigate to Applications.
- Select your application.
- In Subscriptions, select the Subscription for your API product. Notice the green MCP enabled tag. Select Secrets.
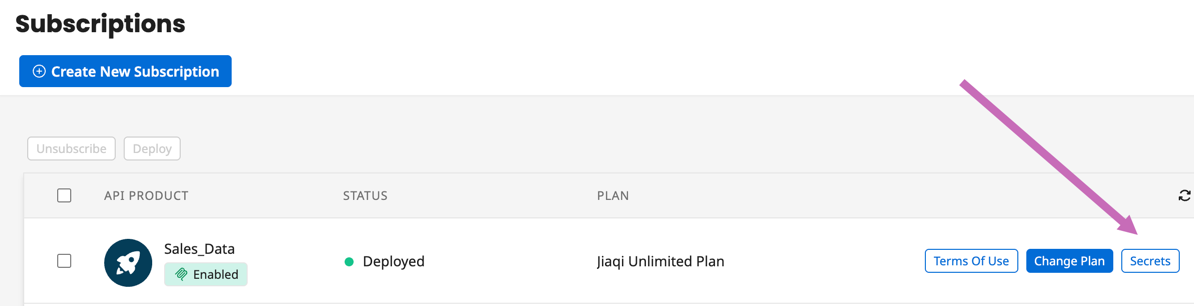
- In MCP Credentials, you'll notice an AI Agent Key and an MCP address. Copy the MCP address and the AI Agent key to set up your source in Agent Designer.
Step 2: Import MCP tools in Agent Designer
- In Agentstudio > Agent Garden, navigate to the Sources tab.
- Select Create New Source > MCP > Add Source.
- Enter a name for the source. For example, Sales Data.
- Enter a description for the source to note what types of tools are included.
- Select SSE as the Transport type.
- Copy the MCP address from the API Control Plane and paste it into the URL field.
- Select None in Authentication.
- In Headers, add a header.
- In Header Name enter
x-agent-key. - Paste the Agent key from the API Control Plane.
- In Header Name enter
- Select Test Connection.
- Select Discover Tools.
- Select the tools (API endpoints) you want to import.
- Select Continue.
- Select Save.
Step 3: Build your agent
- Navigate to Agentstudio > Agent Garden > Agent Designer.
- Select Blank Template > Build with AI and create your version of the agent that you customize to your needs. Refer to Building an agent for assistance. You can also use the following steps as guidance to configure your agent.
- In Profile, set the following:
- Goal: Provide comprehensive sales intelligence and lead analysis to help sales team members make data-driven decisions about opportunities and client targeting.
- Agent Name: SalesInsightAI
- Personality:
- Creativity: 75
- Decisiveness: 90
- Clarity: 95
- Confidence: 85
- Engagement: 88
- Voice: Professional
- Conversation Starter: Can you show me insights about my open opportunities.
- In Tasks, add a task for your agent called "Get Opportunity Data".
- Name: Get Opportunity data
- Description: Retrieve comprehensive opportunity data from CRM (enter name of CRM).
- In Instructions, enter "Call the get opportunities tool to retrieve opportunity dataset." and "Prepare data for analysis."
- Select Add Task.
- Select the Manage Tools button in the task.
- Select Add New Tool. Select the MCP tool or tools your agent needs to complete the task.
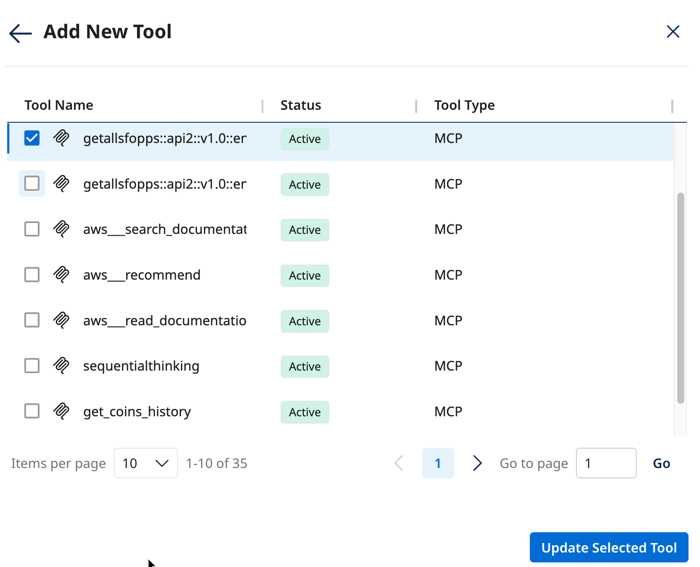
- Select Add Tool.
- Repeat steps 4-9 for any additional tasks you've added to your agent. Refer to Writing tasks and instructions for assistance.
- In Guardrails, add safety mechanisms. Refer to Creating guardrails for assistance. The following guardrails are examples.
- Blocked message: "I can only provide sales data and analysis."
- Denied topics:
- Bribery
- Sales advice
- Word filters:
- advice
- tactic
- illegal
- bribe
- Select Save.
- Test your agent in the Test Agent window. Refer to Testing and Troubleshooting an agent for assistance.
- Click Save & Continue.
- Open the agent. When you are ready to deploy:
- Navigate to the Review tab.
- Select Create, then Package & Deploy. Refer to Deploying agents to learn more about setting up environments for agent package deployment.
- Select a target production environment from the Production Environment drop-down.
- Select Create Package & Deploy.
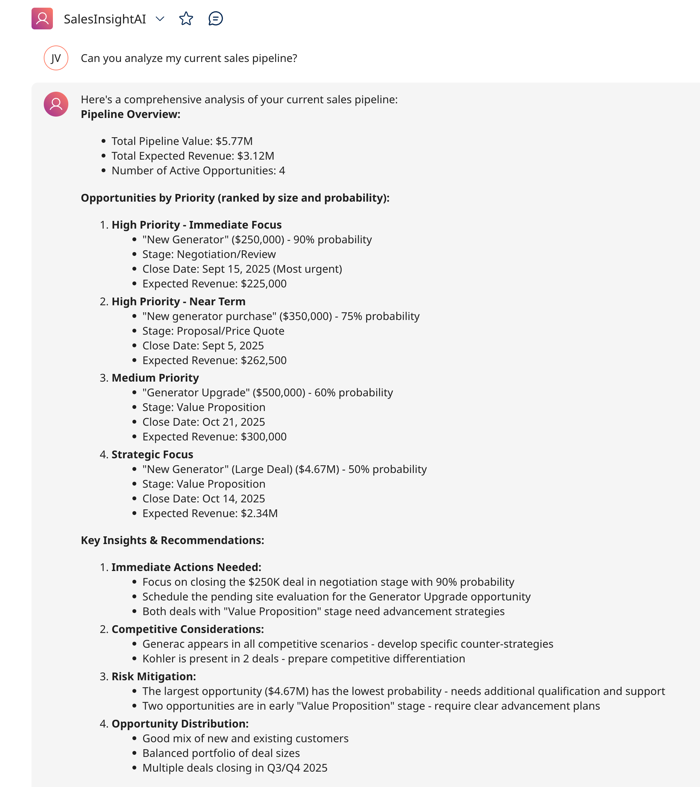
- Start using the agent in the conversation user interface.
here's an example of a possible output: