Importing an agent
You can import agents that are shared with you or from the templates gallery in the Agent Garden home page. The agent templates gallery features two sections of agents:
- Templates - ready-to-deploy and configurable agents made by Boomi. Configurable agents usually require you to provide credentials, such as for an API call.
- Marketplace - agents and agent bundles created by Boomi partners and the Boomi community that are available on the Marketplace. The bundles include integrations and other assets you can install and configure in the Boomi Platform.
Refer to Building an agent from a template and Installing Marketplace agents to learn how to import agents from the templates gallery.
You can share agents by exporting two configuration files: a YAML file that contains Profile, Tasks, Instructions, Tools, and Guardrails details, and a PDF file that indicates what you need to configure for the agent. Refer to Exporting an agent for more information on how to export agents. Refer to Publish AI Agents if you are interested in becoming a Technology Partner and sharing your AI agent on the Marketplace.
The YAML and PDF import files do not contain authentication or credentials for tools. Before packaging and deploying the agent in the Agent Garden, you must configure credentials for any tools linked to an agent's instructions. For example, if you want to use a Weather API tool, you need to add your authentication token to the tool configuration. After you configure tools, you must activate them.
Prerequisites
-
Agent Developer role or a custom role with Agent Garden and Agent Create privileges. Refer to User roles and privileges and Agent Garden for more information.
-
YAML file with agent configuration details.
Important considerations
- If an imported agent has MCP tools, those tools display a Stale status until you add authentication credentials.
- If the exported agent had a Meta Hub business glossary or a Knowledge Hub knowledge base attached to a task, the YAML file does not include those attachments. The accompanying PDF export lists any attached glossaries and knowledge bases under Meta Hub Glossaries and Knowledge Bases. After importing the agent, check the PDF and manually re-attach any glossaries or knowledge bases it lists. Refer to Connecting a business glossary to your agent and Connecting a knowledge base to your agent for details.
Import an agent
Follow these steps to import an agent a Boomi account has shared with you.
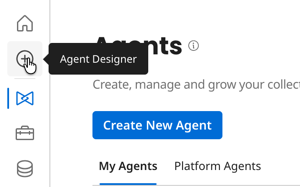
- Navigate to Agent Garden > Agent Designer.
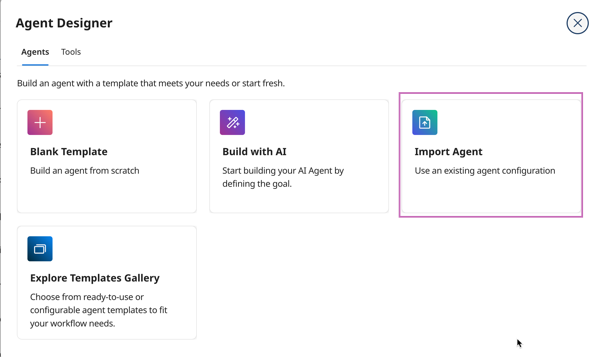
- Select Import Agent.
- Click Import File.
- Click Select File and select the YAML file.
- After the upload is complete, click Save and Continue. If the YAML file is not valid or there is missing data, the Agent Designer will indicate which line number needs to be fixed or which tool needs additional details.
- Review the Profile, Tasks, and Guardrails data for the agent. The preview also indicates how many tools will be created. Click Import and Edit to continue.
- The agent editing screen opens. If a tool requires you to configure authentication, the task step shows a red warning icon indicating you need to configure credentials for tools.
- Click Edit Details on the task that needs tool configuration.
- Click the Tools tab.
- The tool is in draft format. Click the tool name link to edit the tool. Before continuing, save any changes you have made to the agent.
- In the Tool configuration screen, if needed, add credentials to your tool.
- Click Deploy Tools.
- Click Deploy.
- Navigate to the Agent Designer and open the agent. Repeat steps 8-13 until all tools are configured.
- Optional: Test your agent in the Test Agent window. Select a runtime cloud to choose which regional cloud runs your test session. Refer to Testing and troubleshooting an agent for more information.
Testing your agent may count against any usage limits.
- Select Create > Package & Deploy. Choose your target production environment and select Create Package & Deploy. Your package is assigned a version number automatically.
Your agent remains in a draft state until you package and deploy it. You can continue editing it at any time without affecting active deployments. Changes only go live when you create and deploy a new package. For details on managing packages, deploying to multiple environments, and working with regional runtime clouds, refer to Deploying agents.
