Building an agent
An AI agent is an intelligent application designed to perform tasks to achieve specific goals using prompts and available tools, such as APIs and integrations. AI agents streamline business processes and accelerate productivity in your organization. Refer to About AI agents to learn more about what AI agents are, how they can benefit your organization, and when to create an AI agent. For more information on use cases and benefits, refer to Agent Designer overview.
The Agent Designer lets you define the agent’s personality and reasoning style, attach backend capabilities using tools, and apply guardrails to ensure safe and secure interactions. Throughout the creation process, you can test your agent iteratively and make adjustments to improve its responses and behavior. After packaging and deploying your agent to an environment, users can interact with it through the conversational interface in the Agent Garden.
Prerequisites
To build, edit, and deploy agents and tools, you must have one of the following roles:
- Agent Garden Administrator
- Agent Garden Developer
- A custom role with privileges (Agent Garden Access, Agent Create, Agent Edit, Agent Feedback Submit, Agent Garden Feedback View)
Read Agent Garden for details on adding roles and setting up custom privileges.
Important considerations
- The Agent Designer employs a framework that selects the most suitable model for a given function, such as reasoning, summarization, and guardrails. It uses LLMs via Amazon Bedrock's managed service.
- Agents built in the Agent Designer can respond with text, images, and chart visualizations in the Agent Garden's conversational experience. Image links also appear in agent responses in the Message step from processes using Agent step. Videos are currently not supported.
- If your agent performs only simple tasks, such as sentiment analysis, summarization, and data formatting, turn on Fast mode to improve the AI processing speed in the agent's Profile configuration.
- If your agent requires deep step-by-step analysis and reasoning, turn on Extended Thinking. Keep in mind that this setting increases latency. Refer to Choosing an LLM model setting to learn more.
- If Extended Thinking is on and the agent has no guardrails set, the chat streams the agent's plan in real time.
- Context window limitations: The user prompt, agent goal, tasks, and instructions combined cannot exceed 200K input tokens.
- With Extended Thinking on, conversational agents retain tool-response data across the session. This reduces repeated tool calls and helps the agent work with larger data, such as attached glossaries and knowledge bases, without losing access to earlier results as the conversation continues. Structured mode is single-turn and doesn't carry session memory.
Step 1: Identifying tools
Before creating an agent, identify the tools and capabilities it will need to achieve its goal. For example, it may require access to a weather API to provide weather forecasts. You can attach multiple tools to agent tasks. Refer to Identifying and adding capabilities to agent to learn about the different tool types available.
Step 2: Building the agent profile
You can create an agent using a template, AI assistance, or manually without pre-populated fields to guide you. You can also import an agent from another Boomi account using a YAML file.

-
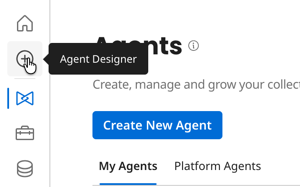
Navigate to Agent Garden > Agent Designer.
-
Select Agents.
-
Select one of the following options:
- Select Blank Template to create an agent from scratch without a starter template. This option generates blank configuration fields. It is recommended for experienced users who understand how to build tasks and guardrails.
- Select Build with AI - This option utilizes the Large Language Model (LLM) to generate editable configurations based on your agent goal, including tasks, instructions, and guardrails. It is recommended for new users to help them get started quickly. You can have AI assist you with building your agent based on the goal you describe. AI auto-fills in the profile, tasks, instructions, and guardrails fields for you. You can include a lot of detail about the different tasks your agent performs and if it calls a specific tool for additional capabilities, such as calling an API to get data. The Goal field supports up to 2000 characters.
- Select Import Agent - You can import a YAML file that contains a configuration of an agent built in the Agent Designer from another account. YAML files are generated when you export an agent.
- Select Explore Templates Gallery to create an agent with pre-defined, editable configuration that generally suits your use case or is intended for learning and exploration. Explore the templates gallery with over 100 AI agents. A template with a Deploy button indicates that the agent is ready to use immediately. A template with a Configure button indicates that the agent requires you to enter some credentials for tools, such as a key to call an API.
-
In Profile, enter the goal of the agent. If you are building with AI or a template, this goal is pre-populated. However, you can make edits and additions to the goal. The goal displays on the main agent page when the user enters a prompt. It also provides information to the LLM about its purpose. The Goal field supports up to 2000 characters.
-
Enter an agent's name to identify the agent.
-
Optional: Click Edit next to Agent Photo to select an avatar and color for the agent.
-
In Profile, select one of the following options in the Model Configuration section. Refer to Choosing an LLM model setting for details:
- Standard - Provides responses with moderate to high latency. Best for well-defined tasks with predictable output structure, such as code generation for moderately complex tasks, data analysis with known schemas, and structured content generation.
- Fast - Provides responses with low latency. Best for pattern-matching tasks like sentiment analysis, field extraction, text formatting, simple classification, and single-hop Q&A.
-
Optional: Select Extended Thinking when you want the agent to perform a deep, step-by-step analysis to generate a response. If the agent has no guardrails set, the chat streams the agent's plan in real time. Review What is Extended Thinking? for details.
-
Choose your agent’s mode based on its use case:
-
Conversational mode (default) - The AI agent responds in natural language text. This mode is ideal for conversational agents where the user may have follow up questions after the initial prompt. The agent can use chat history and context to respond to the user and achieve its goal.
-
Structured mode - The AI agent receives JSON input from Boomi Integration and responds in a consistent, structured JSON format. This model is ideal for workflows that use Agent step where the agent’s response is consumed by downstream systems. The response is single turn, meaning the agent has a single input and output with no reference to previous responses. Refer to Using Structured agent mode for details
-
-
Optional: In File Upload, turn on the Allow files to be uploaded toggle to let users send documents and images to the agent. The toggle is off by default. When enabled, select at least one format under Allowed Formats:
- Document Formats — PDF, DOCX, XLSX, CSV, TXT
- Image Formats — PNG, JPEG
Refer to Enabling file uploads for more information.
-
Configure the personality for the agent’s responses. These settings control the agent’s temperature, which includes how random and varied its responses are and how it reasons to achieve its tasks.
- Creativity - This setting controls how well an agent can generate new and imaginative responses. Low level creativity results in straightforward, repetitive responses. High level creativity results in unique and diverse responses that include metaphors and examples. Higher creativity = higher randomness
- Engagement - This setting controls the interactive and conversational quality of the agent's responses. Low engagement delivers short, straightforward responses with little depth or follow-up questions. High engagement results in detailed, helpful, and enthusiastic replies that invite the user to respond.
- Decisiveness - This setting controls the agent's ability to respond with answers quickly. Low decisiveness delivers responses that offer multiple options and may show hesitation. High decisiveness gives clear and concise responses with minimal hesitation, potentially missing nuanced views in subjective discussions.
- Clarity - This setting controls how straightforward and easy-to-understand the agent's responses are. It controls focus and precision. Low clarity delivers vague responses that lack detail and may be confusing. High clarity delivers short, relevant, and factual answers.
- Confidence - This setting controls how certain the agent's responses sound. Low confidence delivers neutral and exploratory statements that invite user input and collaboration. High confidence delivers strong, definitive statements.
-
Select the voice and tone for the agent’s responses:
- Professional - The agent’s responses are courteous, concise, respectful, objective, helpful, and solution-oriented.
- Friendly - The agent’s responses are casual, warm, engaging, jargon-free, and enthusiastic. They may include exclamation points and simple language (“lets you” instead of “enables”).
- Instructional - The agent’s responses are detailed, helpful, logical, direct, supportive, and objective. If steps do not resolve the issue, the responses may include steps and alternative solutions.
- Playful - The agent’s responses are lighthearted, enthusiastic, engaging, very casual, encouraging, and fun. They may include emojis and exclamation marks and make you laugh or smile.
-
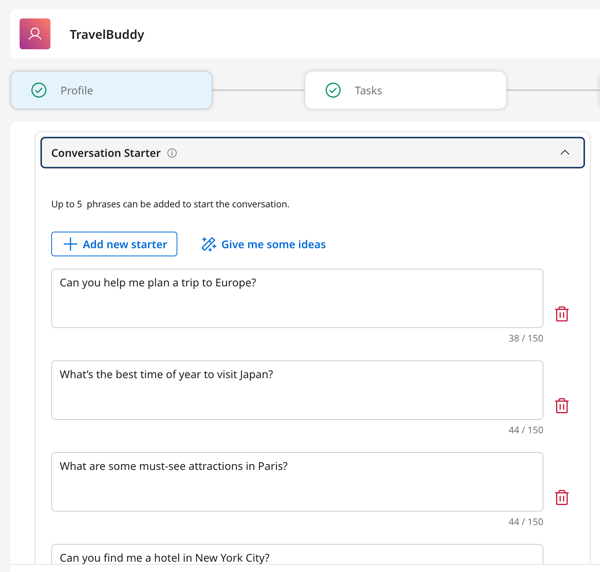
In Conversation Starter, select Add new starter to provide prompts users can enter to start chatting with your agent or select Give me some ideas to get AI-generated conversation starters. These starter prompts display as clickable buttons on the agent’s main conversation page so users can quickly get started.
-
Click Save and Continue.
Step 3: Adding tasks
Read Writing tasks and instructions for best practices and conceptual information.
- In Tasks, click Add new task to create an objective for the agent to accomplish. Each task includes instructions, similar to subtasks, that include details about accomplishing the task. Optionally, you can attach a tool to a task to provide the LLM additional capabilities it needs to perform the task. Tasks and instructions do not need to be in sequential order.
- Enter a task name.
- Enter a detailed description of the task and what the agent must do to perform the task. Be as detailed as possible to help the LLM understand its objective.
- Enter instructions to break the task into multiple steps. This helps the LLM understand each part of the task and how to accomplish it. Instructions do not need to be in order. The agent uses reasoning to determine the correct order based on the task and goal.
- Optional: Click Give me some ideas to let AI generate ideas for instructions based on your detailed task description.
- Click Add task.
- Repeat step a through c for each task.
- Optional: Select Manage Tools in a task to add a capability or function so the agent can accomplish the task. For example, if the task involves the agent retrieving information from an API, you can attach an API tool you created. Refer to Identifying and adding capabilities to agent to learn about the different tool types available.
- Click Add New Tool. Use the filters and search bar to find the tool by name, description, or tool type.
- Select the checkbox next to the tool or tools to add.
- Select Add Tool.
- Optional: Select Requires Approval to require the agent to ask the user if it can proceed with an action performed through the tool. This is useful when the agent performs a permanent update, changes a field in a record, or creates something new in a system.
- Optional: Select Data Passthrough to send raw data directly to the conversation. The data bypasses the Agent's reasoning steps and the raw data, such as an API response, is sent directly to the user in the chat. If you select Data Passthrough when attaching a integration tool, the agent responds with raw system data from the integration's execution status. When Data Passthrough is deselected, the agent responds with the data processed using natural language text. Refer to Data passthrough setting for details.
- Click Save.
- Optional: Select Glossaries in a task to attach a Meta Hub business glossary. Glossaries give the agent access to your organization's terminology so it can accurately interpret prompts using organization-specific definitions. Refer to Connecting a business glossary to your agent for details.
- Select Attach Glossary.
- Select Attach next to the glossary you want to attach.
- Close the panel.
- Optional: Select Knowledge Bases in a task to attach a Knowledge Hub knowledge base. Knowledge bases give the agent access to your organization's data through retrieval-augmented generation (RAG), so it can ground its responses in real enterprise content. Refer to Connecting a knowledge base to your agent for details.
- Select Attach Knowledge Base.
- Select a repository to narrow the list of available knowledge bases.
- Select one or more knowledge bases from the list.
- Optional: Select Configuration to change the retrieval mode and result limit for each knowledge base you attach. Select Save.
- Optional: Add metadata filters using the drop-downs populated from the knowledge base's schema. Select Save.
- Close the panel.
- Click Save and Continue.
Step 4: Creating guardrails
Read Creating guardrails for safety defaults and conceptual information.
-
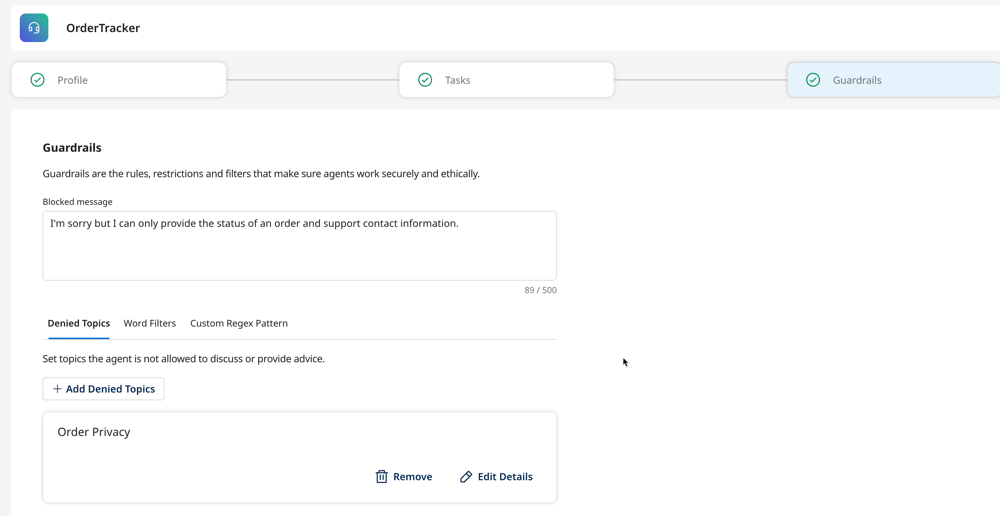
In Guardrails, enter a blocked message. This message displays any time a user prompts the agent for a response that violates the agent’s restrictions and ethical guidelines. Refer to Creating guardrails for more information.
- Click Add Denied Topics to enter a topic the agent cannot respond to, along with a few sample phrases. For example, a bank may want its AI agent to avoid any conversation related to investment advice or engage in conversations related to cryptocurrencies. In this case, you can enter “investment advice” and “cryptocurrency” as denied topics. You can set a maximum of 30 denied topics. The maximum number of sample phrases is 5. Topic descriptions can be up to 200 characters.
- Click the Word Filters tab. Enter words or short phrases that trigger the agent to respond with the blocked message. For example, you can add words such as steal, hack, and fraud.
- Click the Custom Regex Pattern tab. Enter patterns of sensitive data, such as email addresses and phone numbers, that will trigger a blocked message from the agent. For example, you can add
^[a-zA-Z0-9._%+-]+@[a-zA-Z0-9.-]+\.[a-zA-Z]{2,}$for email addresses.
-
Click Save and Continue.
Step 5: Reviewing and testing
Refer to Testing and troubleshooting an agent for more information and best practices.
Important considerations
- Testing your agent may count against any usage limits.
- Your agent remains in a draft state until you package and deploy it. You can edit agents at any time without affecting active deployments. Changes only go live when you create and deploy a new package.
Test your agent before and after you add tasks and guardrails. Testing iteratively helps you easily identify which configuration is causing an issue and which configurations are working correctly.
- Review the settings you created for your agent.
- In the Test Agent window, select a runtime cloud to choose which regional cloud runs your test session. Enter a prompt to test the agent's responses and capabilities. When the agent responds, click Show Trace to inspect the internal decision-making process. The trace provides a detailed breakdown of how the agent interprets inputs, applies logic, and generates responses, and indicates errors with tool calls. This is useful for troubleshooting and making edits to your agent.

- When your agent is behaving correctly, go to the Review tab and select Create > Package & Deploy. Refer to Packaging and deploying an agent for details on linking runtime clouds and setting up environments. Choose your target production environment and select Create Package & Deploy. Your package is assigned a version number automatically. Your team can now interact with the agent in the conversational user interface. Refer to Using AI agents to learn more. You can now view session logs containing details of deployed Boomi garden agents behaviour, performance, and troubleshooting issues. Read Tracing sessions of Boomi Agent Garden agents to learn more.
For details on managing packages, deploying to multiple environments, and working with regional runtime clouds, refer Deploying agents.
Step 6 (Optional): Adding an Agent step to your integration
The Agent step allows you to integrate AI agents from the Agent Control Tower that you create with the Agent Designer directly into your integration process workflows.
You can find the Agent step in the Execute section of the Steps Palette on the Integration Build canvas. After adding it to the canvas, you can choose from the available agents in your Control Tower to configure in the step. Refer to Agent step to learn the basics and Creating a Data Quality Report agent to see how you can use Agent step in an integration.
Embedding agents in your applications
The Boomi Agentstudio Embed Kit allows you to embed agents you create in Agentstudio directly into your own applications. Get started with the GitHub repository and explore the Boomi Embedded documentation.
Next steps
- Read Agent examples to get tutorials on building specific agents for real-world use cases. You'll learn how to use Agent step, how to create an API your agent can use to retrieve data, and more.
- Read Using AI agents. After you deploy your agent, users are able to see and interact with your agent in a conversational interface in the Chat screen.
