Connecting to an MCP server
Model Context Protocol (MCP) servers provide a consistent way to connect your AI agents to various APIs, enterprise systems, and applications. The protocol accelerates agent development, allowing you to instantly import and update tools that extend your AI agent's functionality. By simplifying the integration of different data sources, MCP reduces the complexity and overhead associated with managing connections that drive agentic workflows.
With Agentstudio’s MCP support, you can instantly connect a wide range of tools without configuration, accelerating the development of intelligent automation within the Boomi Platform. When you import MCP tools, Agent Designer imports the tool definition which includes self-documentation describing what the tool does, the inputs it accepts, and the outputs it produces. The agent uses the tool description to reason when and how to use the tool.
You can expose API endpoints as MCP tools with API Control Plane or connect to third-party remote MCP servers. Refer to Creating an AWS Expert agent for a tutorial on connecting to third-party MCP servers and Creating a Sales Insight agent for a tutorial on connecting an agent with API Control Plane's MCP server. Explore this third-party list of remote MCP servers from MCPServers.org to learn more about MCP servers. Boomi and Boomi Agentstudio are not affiliated in anyway with MCPservers.org.
The Sources tab in Agent Designer enables MCP client configuration. It lets you connect to remote MCP servers and select which tools you want to import. If a connected MCP server is updated, Agent Designer automatically flags the imported MCP tools as Stale, allowing you to review and accept the new updates. Refer to Managing MCP tools to learn more.
Important considerations
- Agentstudio supports remote MCP servers only. You need to deploy your MCP server to the cloud to make it publicly accessible to connect it to AI agents.
- Agentstudio truncates tool responses greater than 100K tokens.
- Context window limitations: User prompt, agent goals, tasks, and instructions combined cannot exceed 200K input tokens.
Authentication options
You can use one of the following authentication options when connecting an MCP server in Agent Designer:
| Authentication method | Description |
|---|---|
| None | Select when no authentication is needed to connect. |
| Platform JWT | Select when using Boomi Platform APIs. No additional configuration is required. When a user interacts with an agent, the agent uses the JWT token of the user automatically when calling the API. This means that what the agent can access and respond to will depend on the user's permissions in the Boomi Platform. |
| Token | Select when your MCP server requires a Bearer token for authorization. Agent Designer automatically adds the Authorization header. You only need to provide the token value. This field does not accept API keys or other key types. You can add any custom headers to the Headers section. |
| Basic Authentication | Select when using username and password to connect to the API. |
| OAuth 2.0/2.1 | Select when using OAuth 2.0/2.1 Authorization Code flow to authenticate with an external identity provider. Conversational agents using an MCP tool from this MCP server prompts the user asking them to sign in with their credentials, allowing the agent to provide user-specific data. The authorization timeout is set to 10 minutes. You can click cancel and retry authorization. Configure the client ID, client secret, and Authorization server and token URLs. In some cases, when you enter the MCP server URL, Agent Designer automatically discovers and populates the Authorization Server and Access token URLs. You can also configure Authorization Server and Access token parameters as well as scope restrictions. For details on configuring OAuth fields, refer to Configuring OAuth settings Before you begin, ensure you have registered your app with your identity provider and entered the following Callback URL/ redirect URI in the OAuth settings for your system (Salesforce, AWS, Okta, Google Console, and so on): North America Platform: https://ai-agent-garden.datalake-prod.boomi.com/api/v1/oauth/callback EU Platform http://ai-agent-garden.datalake-uk-prod.boomi.com/api/v1/oauth/callback |
Connect an MCP server
- Navigate to Agent Garden > Sources > Create New Source > Model Context Protocol.
- Select Add Source.
- Enter a name and description for the MCP server.
- Select the transport type specified by the MCP server’s creator. The transport type is typically indicated with authentication details.
- SSE (Server-sent Events) - Designed for continuous event-driven communication from server to client.
- Streamable HTTP - Designed for progressive delivery of a single response in the form of chunks of data.
- Enter the URL, such as
https://knowledge-mcp.global.api.aws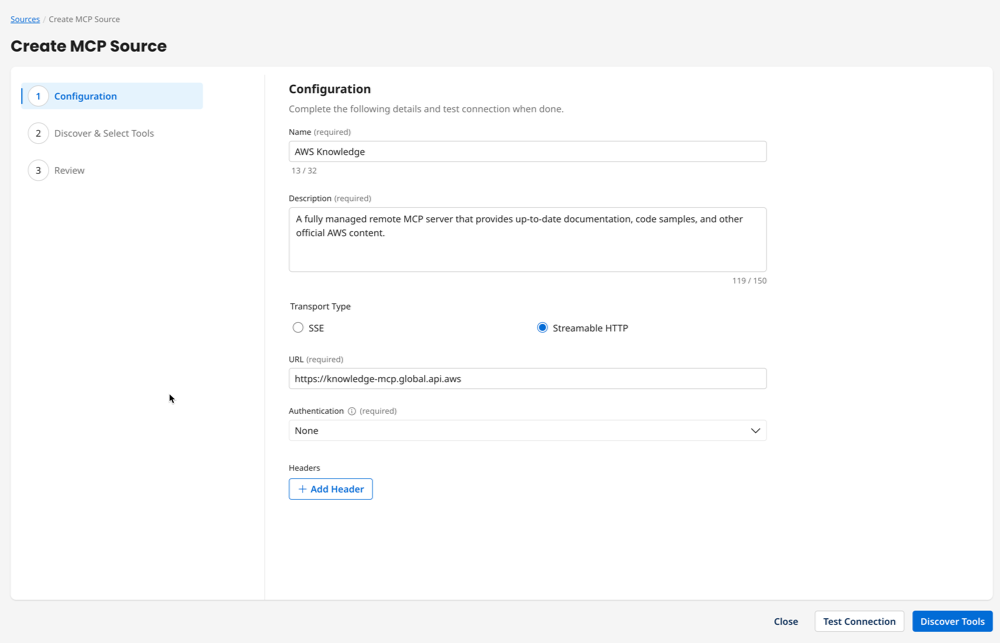
- Select the Authentication method and enter required credentials. Refer to Authentication options for more details.
- In Headers, add any required headers for authentication, data format, and so on.
- Click Test Connection to test the connection to the MCP server. If you've configured OAuth 2.0/2.1 authentication, you're prompted to sign in with your credentials.
- Click Discover Tools to import tools.
- Select the tools you want to import or select all available tools. You can return to your source later and import any tools you don’t select now.
- Review and click Save.
Adding MCP tools to agents
After connecting to your MCP server, you can add imported MCP tools to your agent. Tools imported from an MCP server display as an "MCP Tool". You can attach MCP tools to your AI agent’s tasks like any other tool in Agent Designer. You can attach multiple MCP tools to a task and the agent decides which tool to use to complete the task. Refer to Building an agent for steps on how to create tasks and attach tools.
If an MCP tool uses OAuth 2.0/2.1 authentication, any agent using the tool prompts the user to sign in.
Agentstudio checks updates to MCP servers automatically to keep you up-to-date on changes. If an MCP server makes an update to tools, server description, or parameters, an MCP tool displays as Stale, indicating that you need to receive server updates. Refer to Managing MCP tools to learn more.
Next steps:
- Explore the AWS Knowledge agent example that walks you through creating an AI agent that answers questions about AWS using tools from a remote, open MCP server.
- Learn how to create your own MCP server in API Control Plane.
- Add MCP tools to your AI agents. Refer to Building an agent to learn more about building agents.
