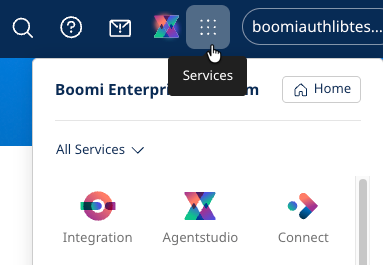
Feedback

Boomi Connect Administration

Logging in to Boomi Connect

To access Boomi Connect, you need administrative privileges (ACCOUNT_ADMIN) on your Boomi account. Click on the Services menu, then select Connect.

Boomi Connect on the Services Menu

The Boomi Connect home page is displayed, where you can perform the following actions:

  • Creating configurations
  • Editing configurations
  • Creating identity providers

Creating configurations

To create a new configuration:

  1. On the Boomi Connect Home tab, select Create Config and choose the connector you want to create a configuration for. You can search for a connector or scroll through the alphabetical list.

  2. In the Create Config screen, enter the required information. Each connector has a different set of information needed. The following is a selection of some of the fields you may encounter:

    • Config Name
    • Identity Provider - Select an identity provider that has been defined for your organization.
    • Account Identifier
      • Account Name
      • App ID
      • Host Name
      • Tenant Domain
    • Authentication Management
      • Access Token
      • API Key
      • Username & Password
      • OAuth Client ID, Client Secret, and Scopes
  3. The configuration is enabled by default. If you wish to disable it for any reason, you can toggle the Enabled switch.

  4. In the Manage Tools section, you see a list of tools defined for this connector. By default, all of them will be enabled. You can disable any tool by toggling the Enabled switch.

  5. Click Save to create the configuration.

  6. A confirmation page appears with the following information:

    • MCP URL - This is the URL of the MCP server that is registered with the MCP Registry
    • Client ID
    • Client Secret - Store the client secret safely since it will not be visible when you return to the configuration to view its details.
note

You will need this information when publishing the MCP server to your AI assistant.

  1. Click Done to create the configuration.
  2. (Optional) You can also create additional configurations for this connector by repeating the previous steps. You may want to use a different tenant or hostname, or a different set of enabled tools for a different user group, as defined by a different Identity Provider (IDP) role.

Editing configurations

To edit an existing configuration:

  1. Select the Configs tab on the Boomi Connect administration page. A list of all the configurations is displayed.
  2. Click the configuration name you want to edit.
  3. You can edit the name or the identity provider by clicking the Edit icon and then saving your changes.
  4. You can turn the configuration on or off by toggling the Enabled switch.
  5. You can enable or disable tools by clicking the Tools tab. Then, select the tools and click the Enable or Disable icon.

Creating identity providers

Setting up identity providers for your organization is an important step to automatically map user and AI tool access to enterprise permissions. Some sample identity providers include Okta, Microsoft Entra ID, Auth0, Ping Identity, Google Workspace, and ODIC.

note

Users will still need the proper credentials and permissions to perform an action. The Large Language Model (LLM) will respond if they do not have access due to their role. Some connectors also allow API keys to be entered for service-level users to grant higher authority.

If you have not created an identity provider, you will be prompted to create an IDP.

To create an identity provider:

  1. Select the Identity Providers tab on the Boomi Connect administration page. The Add Identity Provider page is displayed.
  2. Enter the following required fields to define your identity provider.
    • Name
    • Allowed Audience - The audience value expected in incoming tokens from this provider.
    • Well-Known URL - The OpenID Connect discovery document URL for this provider.
    • Client ID
    • Client Secret
  3. Click Add Provider to save your new identity provider.
  4. (Optional) If you want to target different user groups with distinct permissions, you may want to create additional IDP roles to gain more granular control.
On this Page