Microsoft Entra ID Setup for Connect
Creating an app registration in Microsoft Entra
To create a Microsoft Entra ID identity provider in Connect, you first need to create an application registration in Microsoft Entra.
Perform the following:
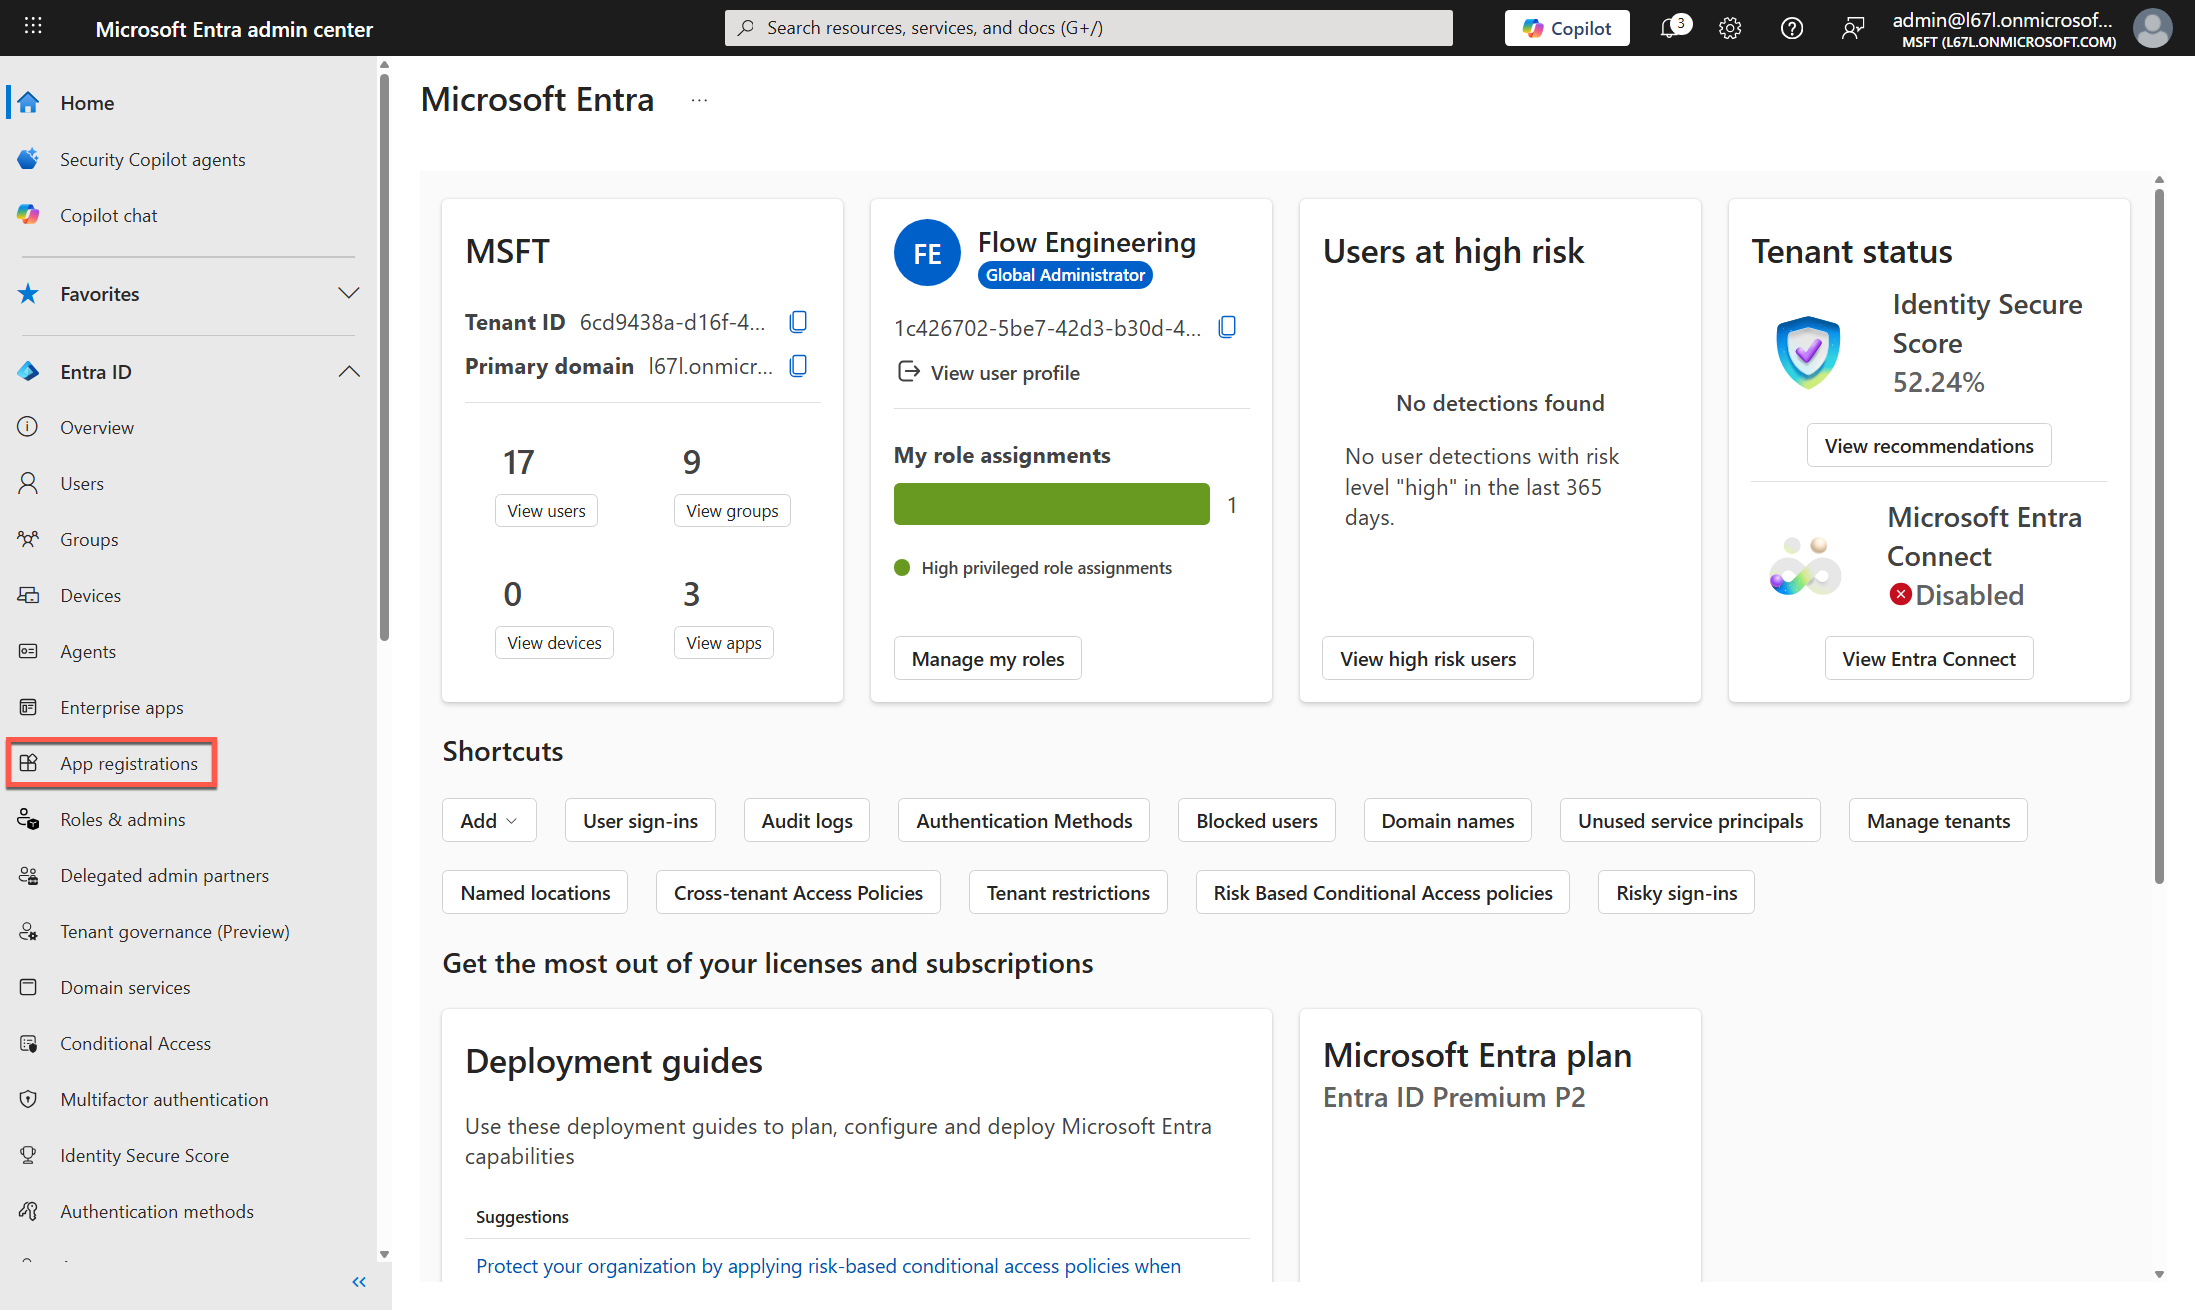
- Log in to the Microsoft Entra Admin Center
-
Create a new app by navigating to App registrations in the left navigation and clicking the + New registration button along the top of the page.
-
On the Register an application form:
- Give the app a user-facing name.
- Choose the supported account types.
- This will determine which accounts are allowed to use the identity provider. This has been tested with the default setting, Single Tenant Only - MSTF, which restricts access to user and guest accounts in the current directory (tenant). Click the Help me choose link to view more information on the options.
- Enter a redirect URI.
- From the Select a platform drop-down list, select Web.
- For the URI, if you are intending to use Microsoft Entra for authentication on the US platform instance of Connect, this would be: https://bc.boomi.com/oauth/identityprovider/oauth/callback
- Even if you’re on a different platform instance, the subdirectory of the URI after bc.boomi.com will be the same.
- Click Register.
-
View your created app by navigating via App registrations → All applications →
<your_app_name> -
Copy your app’s client ID and well-known URL:
- Under Essentials, copy the Application (client) ID value and save this for later use.
- Click the Endpoints button and copy the OpenID Connect metadata document value from the flyout list. Again, save this for later use.
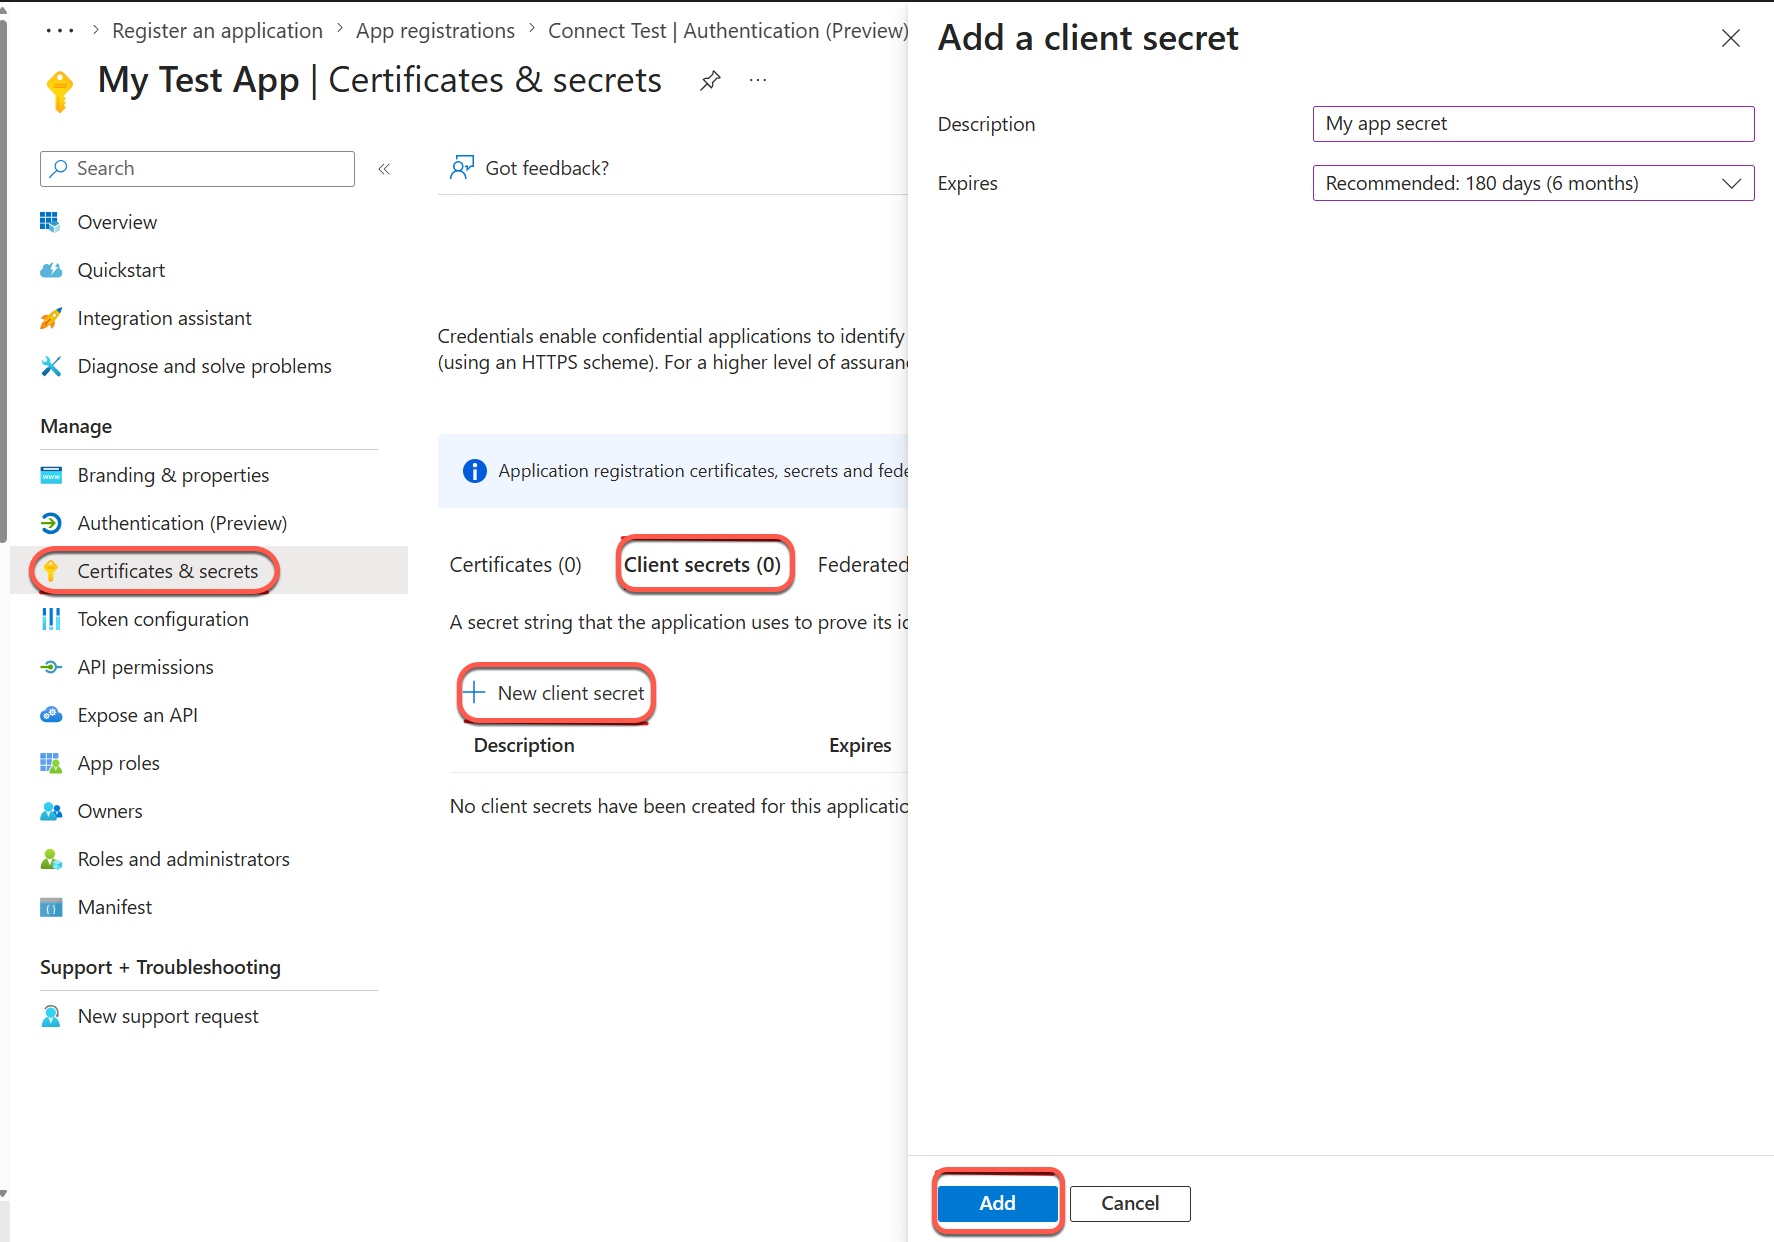
- Create a client secret for your app:
- Under Manage in the left navigation bar, click Certificates & secrets.
- Select the Client secrets tab.
- Click the + New client secret button.
- Enter a description for the secret. This can be anything.
- Choose an expiry time (Expires) for the secret. From the drop-down list, you can choose the default, one of the pre-sets, or a custom value.
- Click Add.
- Copy the Value field of the secret and save it for later use.
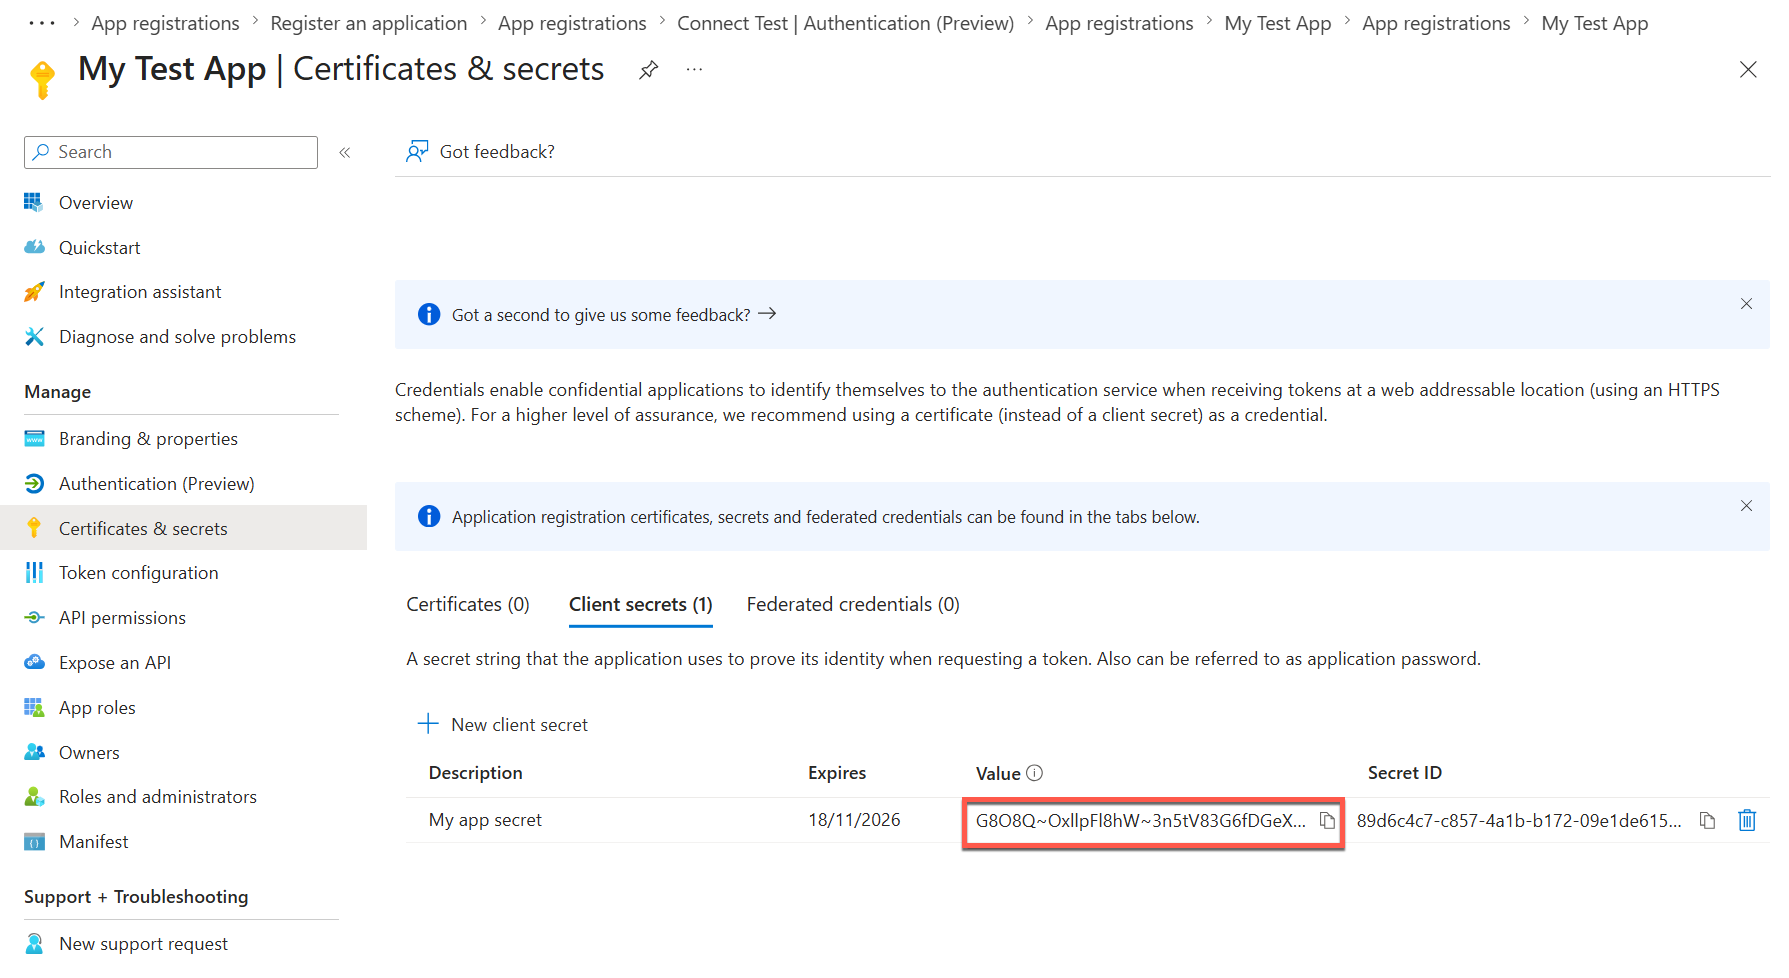
The value of the secret will never be shown again, so it is important to copy and save it now.
Creating an IDP in Connect for your Entra app
Now that you have created an Entra app, you can create an Identity Provider in Connect. Perform the following:
-
Log in to Connect. Ensure you log in to the same instance you specified in your redirect URI in step 3 above. For example, if you used https://bc.boomi.com/oauth/identityprovider/oauth/callback, log in to https://bc.boomi.com.
-
Navigate to the Identity Providers screen using left navigation menu.
-
Click the Add Identity Provider tile.
-
Fill in the Add Identity Provider form using the values from your Entra app:
- Enter a name. This can be whatever you want.
- For Well-Known URL, enter the well-known URL for your Entra app.
- For Client ID, enter the client ID of your Entra app again.
- For Client Secret, enter the client secret you created for your Entra app.
- Click Add Provider. Your identity provider has now been created and can be used to authenticate with connectors.
