Editing a solution
You can edit a solution in the following ways by either using the chat interface or through manual editing.
- Rename a solution
- Rename solution assets
- Remove, replace, and add asset nodes
If you and another user edit a solution at the same time, whichever change is saved first is retained. Concurrent edits receive an Asset Creation 409 error message. Reload the page and try saving your changes again. Refer to Troubleshooting solution build errors for more details.
AI-assisted solution editing
You can enter an edit request in the conversation panel to change a solution. For example, in the chat interface you can enter "Remove the Topic node." or "Remove the Pricing Change & Outcome Events node."
Manual solution editing
You can add an asset, remove an asset, or change the connections between assets, then save your changes so Orchestrate can update the solution. Use manual editing when you want to make a small adjustment to an existing solution, such as removing an asset you no longer need or connecting two assets that Orchestrate did not connect automatically.
You cannot start a new solution from scratch in manual editing mode. You must generate a solution draft from a prompt first.
Adding an asset
Add an asset node to your solution when the addition logically fits within the design. The asset type menu shows you the available asset types to select. Connection rules may prevent you from connecting certain asset types. If you do not see a connection option you expect, the connection is not supported for those asset types.
- Hover your cursor over the nearest node you want to connect to. Connection dots display.
- Select the node near the connection dot then select the plus icon.
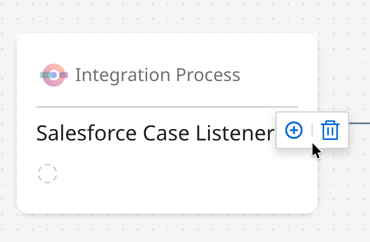
- A menu shows the available services that logically connect to the asset. Select a service name to create a new asset. If the menu is empty, there is no asset that can logically connect to the solution based on Boomi best practices.
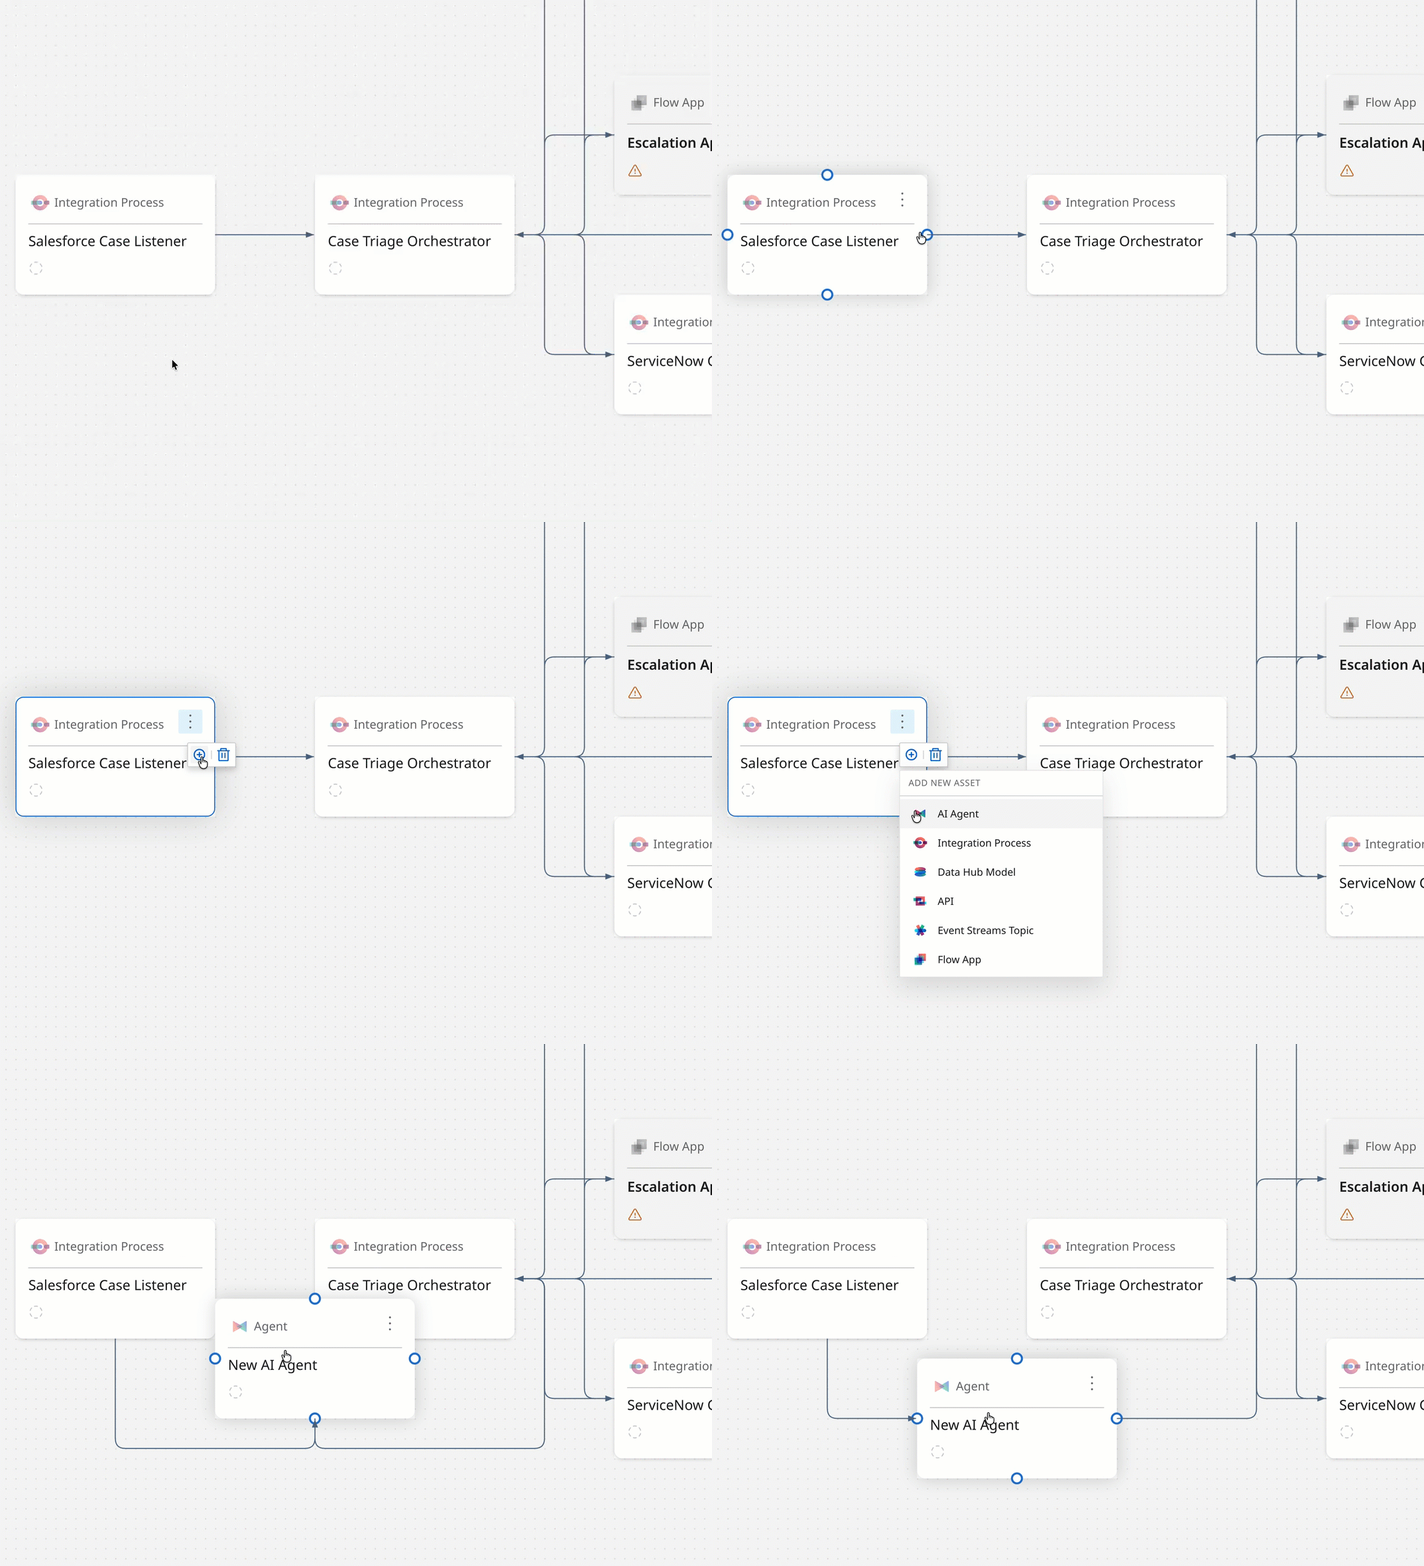
- Hover your cursor over the new node, select a dot and drag the connection line to another node. You can also request AI connect your node for you in the conversation panel. Refer to Connecting nodes to learn more.
- To edit an asset's name or summary before building the asset, select the Actions icon > View details.
- Select Save to save the solution draft and start building the solution in the Boomi Platform. All asset nodes must be connected before you can save.
Connecting asset nodes
Before you can save a solution, all asset nodes must be connected to at least one other node. There are two ways you can connect nodes after you edit a solution:
- Manually connect: Hover your cursor over the new node, select a dot and drag the connection line to another node.
- AI-assisted connection: Enter a request in the conversational panel to have AI connect nodes for you, such as "Connect nodes for me". If you move a disconnected node on the canvas and try to save the solution, a prompt appears with an option to let AI connect your nodes for you.
Removing connections
- Hover your cursor over the asset node for which you want to remove a connection. Connection dots display.
- Hover your cursor over the connection.
- Select the Remove Connection icon (trash can). Orchestrate deletes a single node connection.
- Repeat steps 1-2 for each node connection line you want to remove.
If you remove all connection lines from an asset, you cannot save the solution. You must either delete the asset from the solution or connect it to another asset node. Refer to Connecting nodes to learn more.
Deleting an asset
Deleting an asset. node permanently removes it from the solution design. Orchestrate does not delete built assets from the solution that exist in the Platform (integration processes, data models, agents, etc).
- Hover your cursor over the asset node.
- Select the Actions icon > Remove.
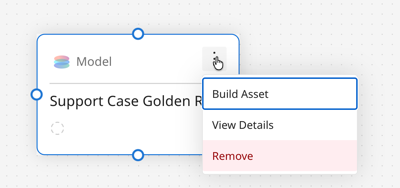
- Select Save.
Deleting a solution from the Design canvas
Deleting a solution permanently removes the solution from Workspaces. However, Orchestrate does not delete built assets from the solution that exist in the Platform (integration processes, data models, agents, etc).
-
Open the solution canvas.
-
Select the Actions drop-down in the canvas toolbar.
-
Select Delete solution. Confirm the deletion when the system prompts you.
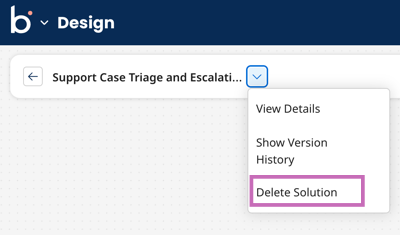
Refer to Deleting a solution for more details on deleting solution in Workspaces.
Modifying an asset outside Orchestrate
In addition to editing assets in the solution canvas, you can also edit assets outside Orchestrate. For example, you can rename or delete an Integration process directly in the Integration canvas rather than through Orchestrate.
Agent assets do not currently sync with Agentstudio. Deleting an agent does not affect the solution's agent asset and will still appear in the canvas.
Renamed assets: The updated name appears in your solution automatically, with no action required on your part.
Deleted assets: Orchestrate does not remove the node from your canvas. Instead, it marks the node as deleted and keeps it listed in Workspaces with a status label. Refer to Reviewing and configuring assets to rebuild a deleted node.
Saving a solution with a deleted asset: If Orchestrate detects that an asset in your solution was deleted in its home product, it shows an Unable to save dialog instead of a generic error when you try to save. You need to acknowledge the dialog before Orchestrate saves the solution; canceling reverts your unsaved changes. Renamed assets don't require this step.
Opening a solution with a deleted asset: When you open a solution that already has disconnected nodes from a previous session, Orchestrate shows a dismissible banner reading "At least 1 node was deleted. Summarize changes or regenerate solution in chat." and marks the affected nodes with an error icon. Resolve it by summarizing your changes or regenerating the solution in chat, or by rebuilding the affected node directly (refer to Reviewing and configuring assets). The banner clears automatically once you resolve or remove all disconnected nodes. If you dismiss the banner without resolving the nodes, it reappears the next time you open the solution.
