Managing files and folders
You can manage files and folders by copying, sharing, downloading, moving, or deleting them.
On the Managed File Transfer page, the Folder tree displays all folders in your file system and the Dashboard shows the contents of the folder you have selected.
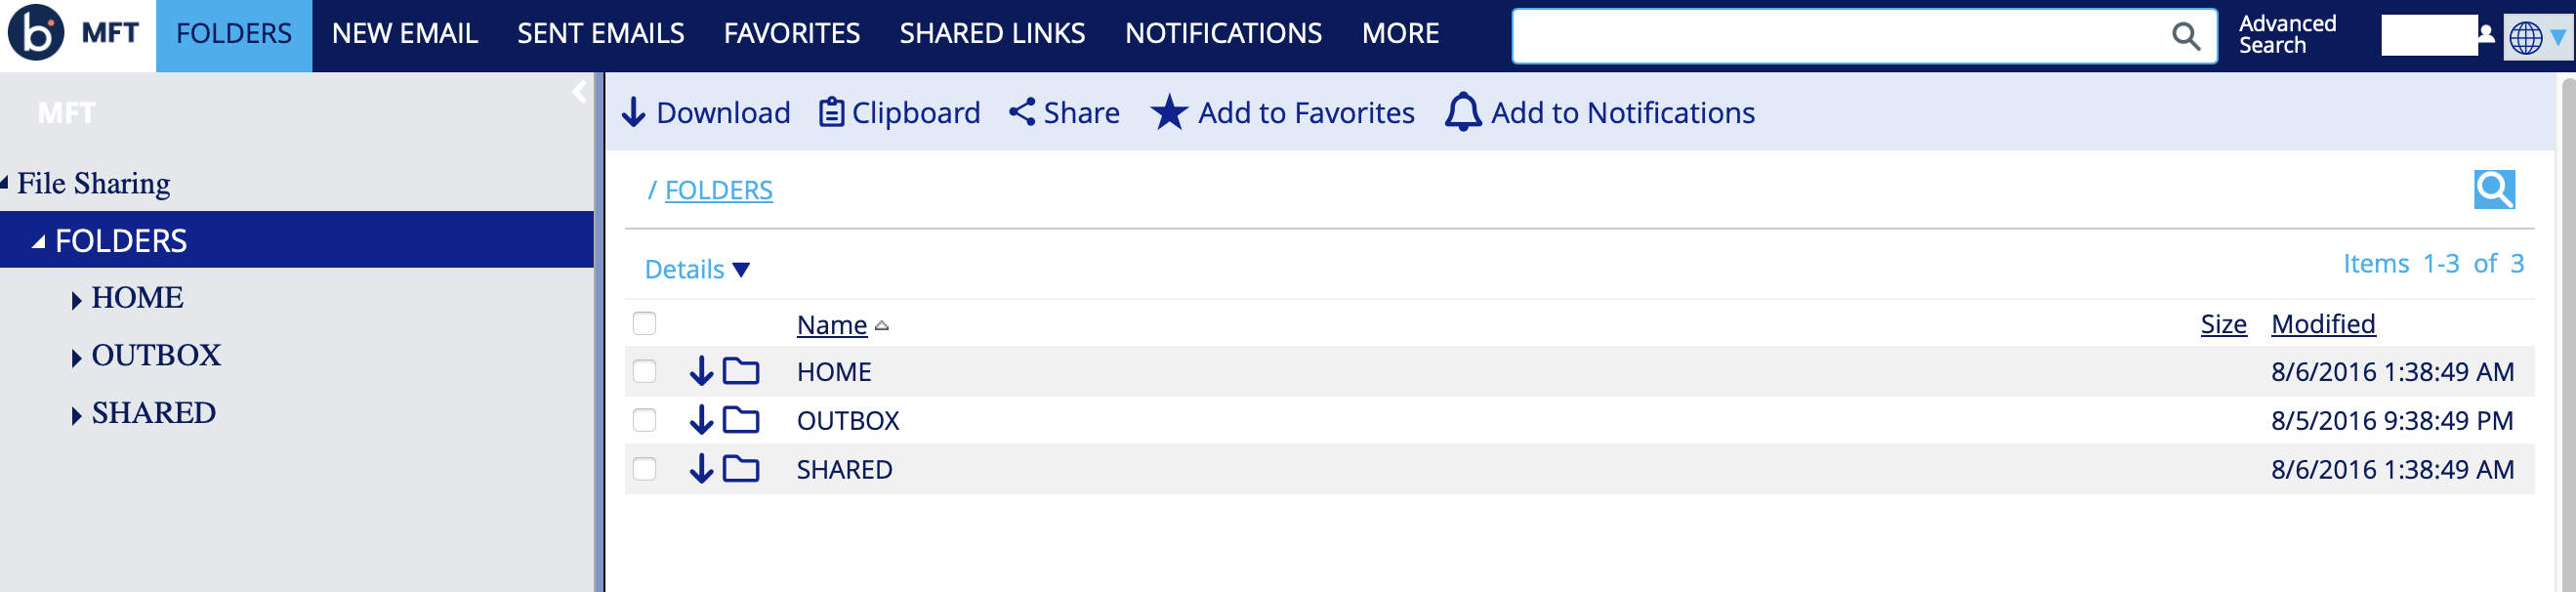
The Folders located in the root of the file system are Common, Home, and Outbox.
-
Common: This folder lets you upload files you want to share with others. Depending on Administrator settings, you can share these folders with all company users or restrict access to specific groups or individuals.
The Site Administrator can rename this folder.
-
Home: This folder contains your personal data files. They are visible to you, your Manager, and Administrators. You can share them by modifying access rules under any folder's Access tab.
- When creating an account, the Administrator decides whether the user needs a Home folder.
- A Home folder is used to securely receive files via a personal Managed File Transfer Dropbox.
- The system automatically creates My Dropbox sub-folders when a Home Folder is provisioned for a user.
-
Outbox: The system stores files in this folder when you send them using the Managed File Transfer add-in for Microsoft Outlook or attach them directly to a New Email message, before uploading them to a specific folder.
The system automatically creates a location for these file types and organizes them under the user’s folder. These files are organized by user, year, month, day, and email subject.
The following sections provide more details on files and folders.
Expanding folders
You can expand Folders to view sub-folders within the folder tree.
- Navigate to the Managed File Transfer File Sharing page.
- Click the arrow next to a folder to expand its sub-folders.
Viewing files and folders from the Dashboard
The Dashboard displays all files and folders within the file system to the right of the Folder tree. To view folder contents, select a folder from the Folder tree or click the Folders section at the top of the page.
- Navigate to the Managed File Transfer File Sharing page.
- Double-click on folders to open them and view their contents.
- To return to a previous folder, click its name in the folder path above the file system.
Creating a folder
To add folders to your existing Folder tree, follow these steps:
- Navigate to the Managed File Transfer File Sharing page.
- Click the folder in the Folder tree.
- Click Add Folder.

- Enter your desired folder name.
- Optional: Enter the Description.
- Click Save to create the new folder.
- You can add folders only to folders for which you have permission to manage.
- You can add as many folders as you want.
Downloading files and folders
You can download files and folders uploaded to your MFT server. You can use the Folder tree to navigate to the files or folders you want to download.
- Accessing disabled folders is restricted and grayed out to indicate they are unavailable for download.
- Use a browser that supports HTML5.

Downloading from a link that requires a login
To download the files using a login link, perform the following steps:
- Navigate to the Managed File Transfer File Sharing page.
- Select the checkbox next to the files or folders you want to download.
- Click Download.
- After clicking the download link, you are navigated to the Secure Message Login page, where you can register a new user account or log in with an existing account.
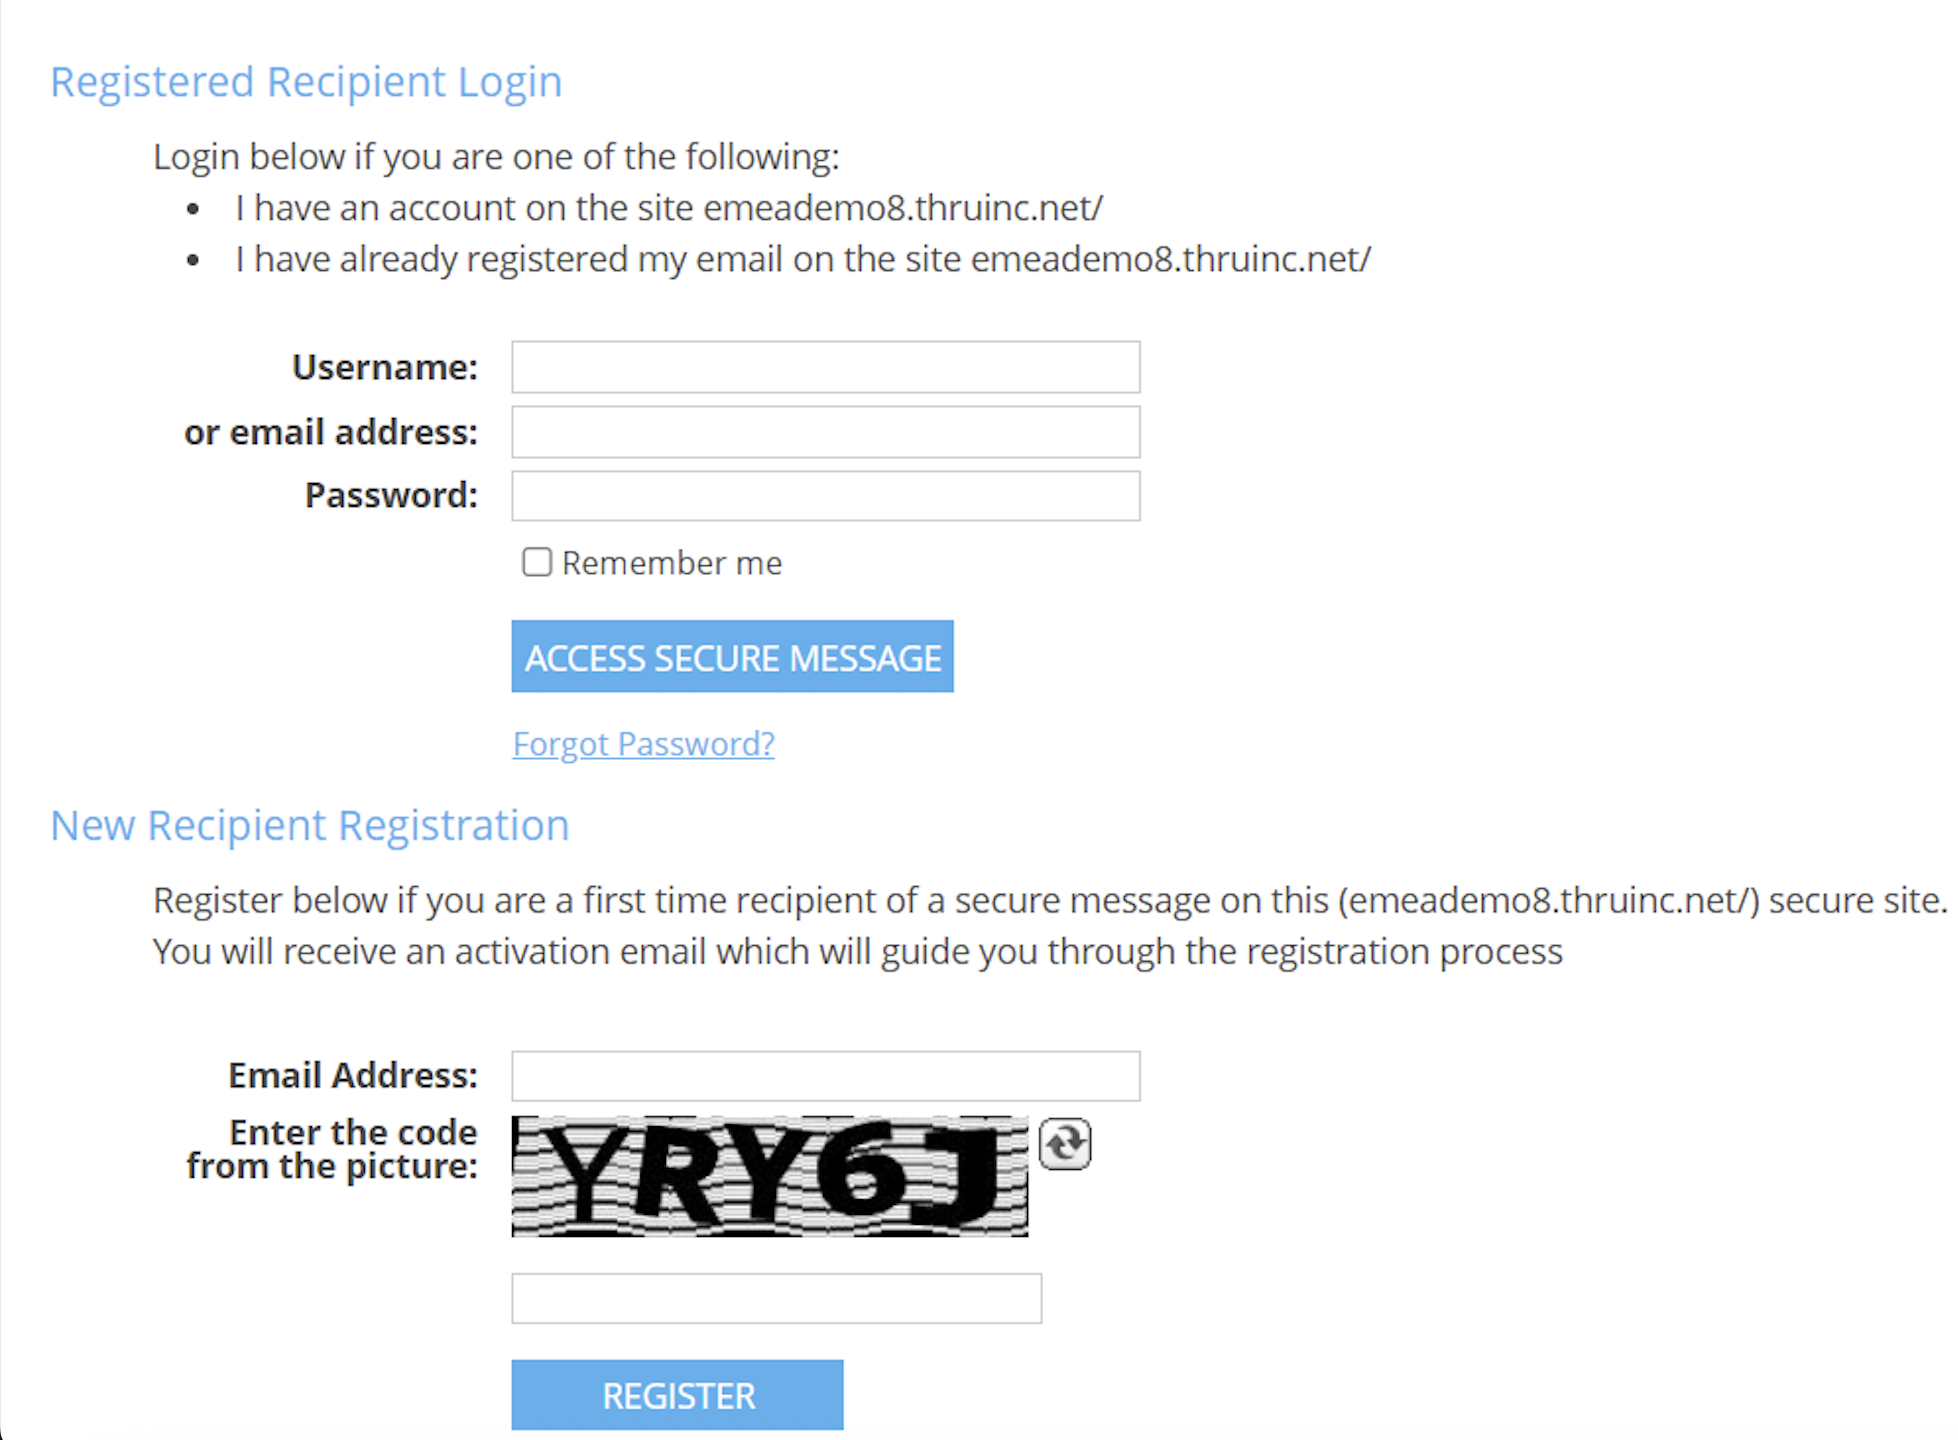
-
Enter your email address and password, then click the Access Secure Message.
- Use the Forgot Password link if you forget your password.
- Select the New Recipient Registration option if you are downloading files from a sender using the MFT secure file delivery service for the first time.
- Enter your email address and click Register.
You will receive an email from no-reply-notification@thruinc.com or notifications@thruinc.net that guides you through the registration process. The link to create a password expires within 24 hours.
The email address you enter must match what you received, or you will see an error.
- Registration cannot proceed if the entered Email Address is not the intended recipient of the secure message.
- If you are the intended recipient, enter the correct email address.
A common issue during registration is that users do not receive the registration email or cannot locate it. Check the following:
- Did you check your Junk or Spam email folder?
- Does your company use an email security gateway that may have blocked delivery from no-reply-notification@thruinc.com or notifications@thruinc.net?
- If so, ensure that the email from no-reply-notification@thruinc.com is allowed or trusted.
- Do you have any email filtering rules that might have redirected the email to a different folder?
After filling out the registration information, you are directed to a page where you can download your files.
Moving or copying files and folders
You can move or copy files or folders within MFT Web.
- Navigate to the Managed File Transfer File Sharing page.
- Click the Folder tree and locate the file or folder you want to move or copy.
- Select the checkbox next to the files or folders and copy.
- Go to the folder where you want to move or copy the selected items.
- Select the Clipboard drop-down.
- Do one of the following:
- Select Move Here to move the file from the original folder to the destination folder.
- Select Copy Here to copy the file from the original folder to the destination folder.
- Optional: Select Clear from the Clipboard menu to cancel the move or copy of the folders or files.
After selecting Clear, the file returns to its original location and is removed from the Clipboard.
- Copied files are considered new, and storage is added to the site statistics.
- A copy of the current version is created if a file is versioned.
In Managed File Transfer Audit, a file copy is recorded as an Upload operation, with fields NextPath and PreviousPath showing the source and destination folders.
Managing folder notifications
Notifications can only be set on folders, not on files.
The Notifications tab shows the list of notifications added to folders. You can select a folder and add notifications to it. You can access your notifications from the icon at the top of the web portal.

When a folder is selected to receive notifications, an email alerts you whenever a transaction occurs.
Notification transactions include file upload, deletion, download, rename, and more.
Changing notifications settings
To configure the notifications settings, do the following:
- Navigate to the Managed File Transfer File Sharing page.
- Click the Notifications tab.
- Select Modify.
- Select or clear the desired settings.

For instructions about notifications, refer to Configuring notifications.
Sharing folders and files using direct Links
You can share folders and files from Managed File Transfer using a direct link. The links to Folders can only be shared with other users who have permission to access the folder. Links to Files can be shared publicly or protected for external access.
- Navigate to the Managed File Transfer File Sharing page.
- Locate and select the folder or file you want to share.
- Click the Share.

Deleting files and folders
To remove files or folders, follow these steps:
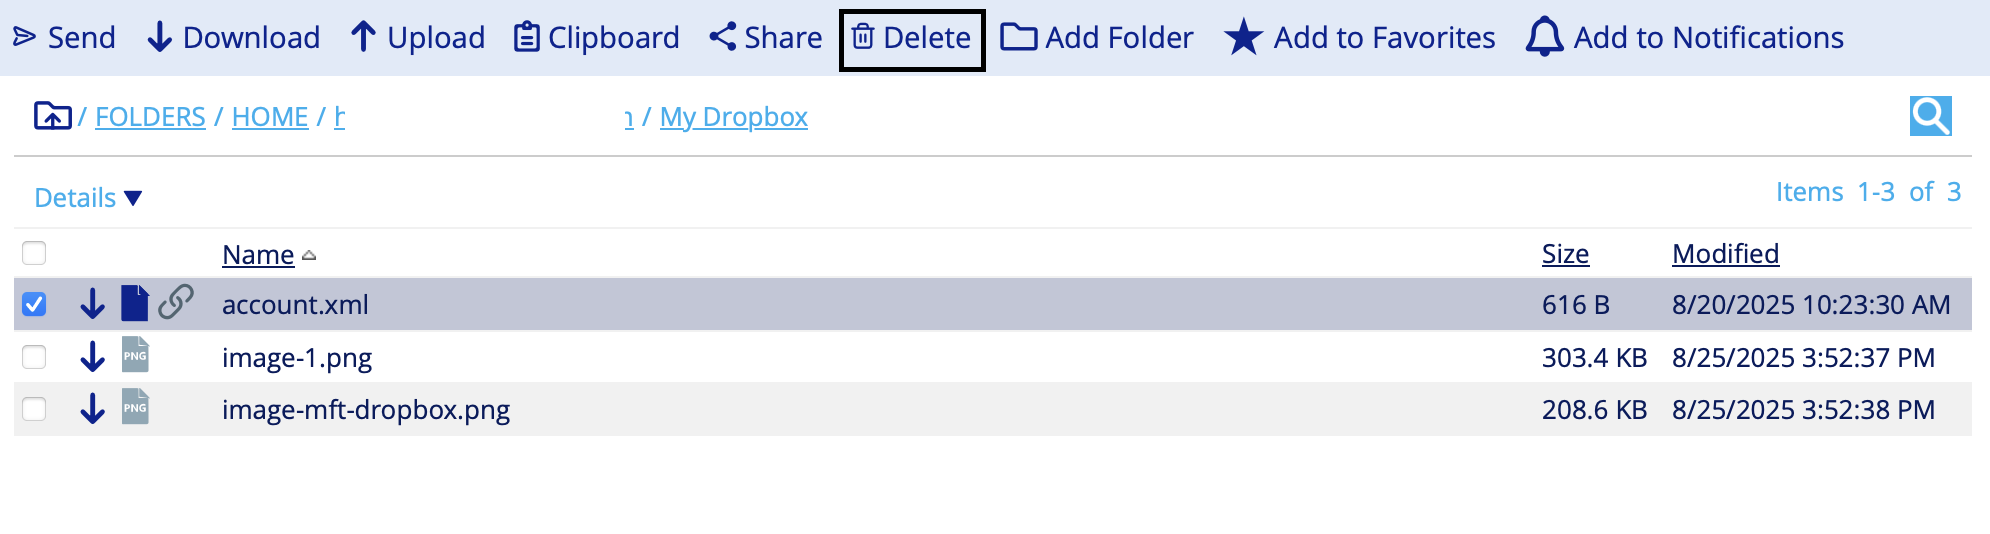
- Navigate to the Managed File Transfer File Sharing page.
- Select the checkbox next to the files or folders you want to delete.
- Click Delete.
- An Administrator can restore deleted files within a specified period, usually 72 hours.
- Some sites have different purge retention settings; contact your Site Administrator if you need data restored.
- Retention policies may automatically delete old files.
- The Site Retention Administrator, appointed by the Site Administrator, has access to manage these policies.
Uploading files
You can upload your files to the MFT web using a browser that supports HTML5.
- Navigate to the Managed File Transfer File Sharing page.
- Select the Folder tree and locate the My Dropbox.
- Click Upload to open Browse Upload.
- Drag and drop the file or click Select files to choose the file you want to upload.
- Click Upload to start the upload. A new window shows the upload progress and the approximate time to complete.
Sending files
You can send files and folders located in the file system to recipients.
- Navigate to the Managed File Transfer File Sharing page.
- Click the Folder tree and locate your file or folder.
- Select the checkboxes next to the files or folders you want to send, and click the Send button. After clicking the Send button, the email form appears.
- Enter your recipient addresses in the To field, or you can use Add from Contacts if you already have them stored.
- Optional: Enter CC, BCC, Subject, Message, and Private Message fields, or leave them blank.
- On the Message tab, type the message within the email body. This Message is not sent with encryption.
- On the Private Message tab, add content you want encrypted for delivery and not visible in the email body when recipients receive the message. Instead, the recipient will read the Private Message from a web page with SSL encryption.
- Click the date next to Expiration Date to open the calendar and select a date when you want the files to be no longer downloadable.
The link that provides access to the files and private messages from the web ceases to be active at midnight of the selected date. - Select the Priority of the message: High, Normal, Low.
- Select Notify me when a recipient collects the files to receive an email when a recipient downloads the files you have sent.
- Select Request recipient login to let the user register their email address and create a personal password before they are allowed to download the contents of your email.
Only those listed in the recipient fields have access to the files.infoIf the message is forwarded, recipients will not access the files or register an email address not included in the original recipient list.
- Click the Send Message.
Messaging password
Administrators can switch to a message password option instead of recipient login.
Passwords for distribution are optional if they are not enforced by Site Administrators.
You can manually define the password or click the Generate button. The Administrators define the password length and complexity based on the Site Password options.
Domain filter
Managed File Transfer Site Administrators can also enable a domain filter for the message password option. In this case, allowed email domains do not require passwords for distributions. Any unauthorized domain will prompt a password request for access to the distribution.
Pausing or resuming file uploads
You can pause or resume large file uploads with a checkpoint restart feature.
Google Chrome only supports Browser (HTML5) uploads.
- Navigate to the Managed File Transfer File Sharing page.
- Select My Dropbox and click Upload.
- Do one of the following:
- Click the Pause to pause uploads.
- Click the Resume to resume uploads.
-
If a transfer is cancelled, a warning appears.
-
Incomplete uploads are highlighted in the MFT file system.

Resuming Incomplete Transfers - When you try to re-upload an interrupted file, you can choose one of the following options:
- Overwrite
- Resume
- Rename and save as a new file
- Skip
