Creating an Endpoint
After creating your organizations, you need to create endpoints for each organization. You must add at least one endpoint per organization. Endpoints are of two types: External and MFT Server endpoints.
-
External endpoints: When MFT connects to an external server using credentials provided by the organization.
-
MFT Server endpoints: When MFT acts as a server for the organization.
If you’re using a MFT Server endpoint, you’ll need to create a user who can access the MFT Server endpoint.
FTPS is Explicit only.
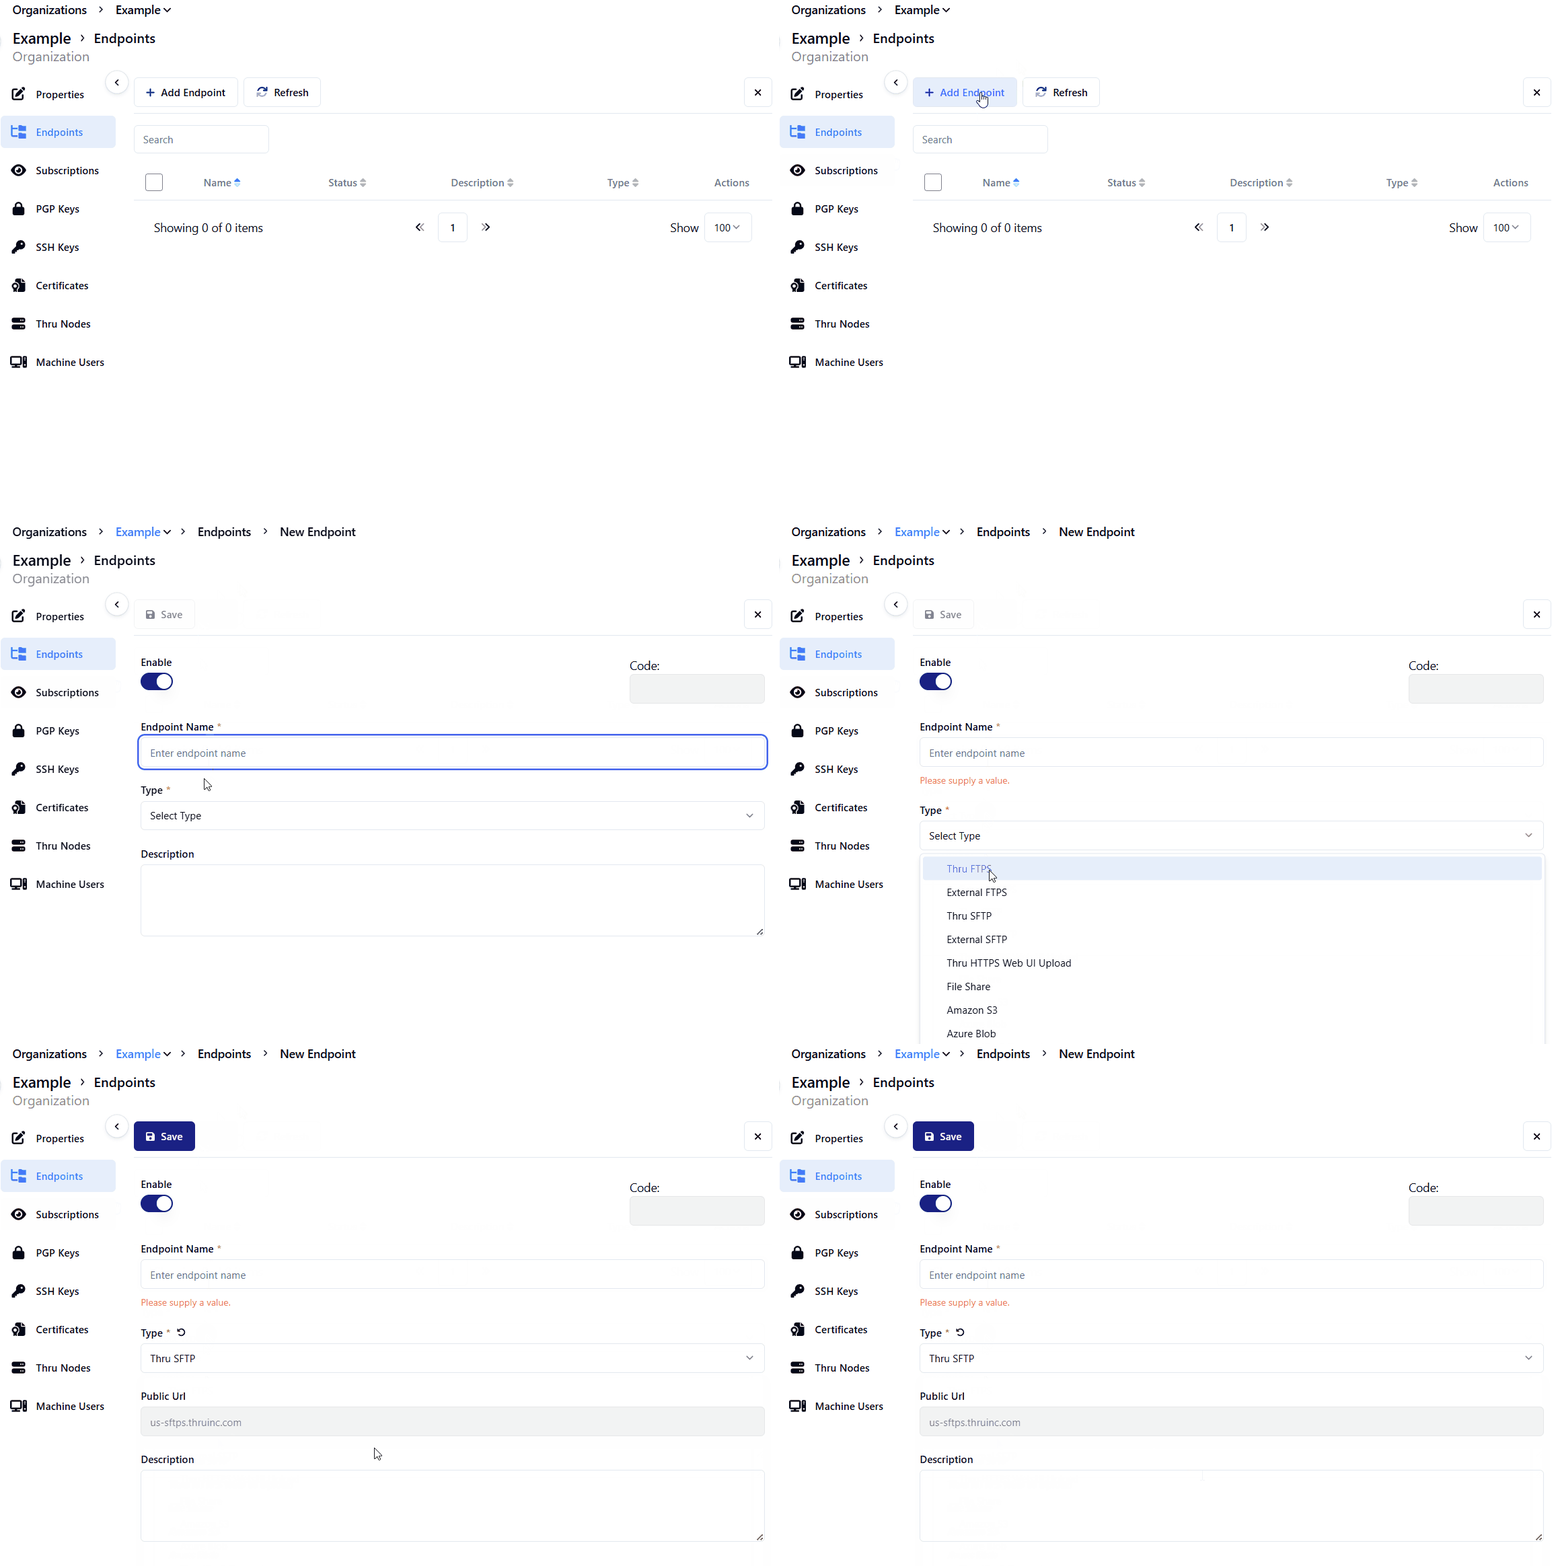
To create an endpoint, follow these steps:
-
Click the Organization tab.
-
Click the three dots for more options next to the Actions and select Endpoints.
-
Click Add Endpoint.
-
In the Endpoint Name field, enter the name.
-
Select the endpoint type from the Type list and configure the endpoint type.
-
Enter a description for the endpoint.
-
Click Save.
Clicking Save saves any changes made to the endpoint and updates any flows that use that endpoint.
If you select the File Share endpoint type, you must have an MFT Node to associate with the File Share endpoint.
Repeat these steps for all your organizations.
For more information about types of endpoints, refer to Endpoints.
For more information on creating endpoints and adding them to flows, refer to External Endpoints and MFT Server Endpoints
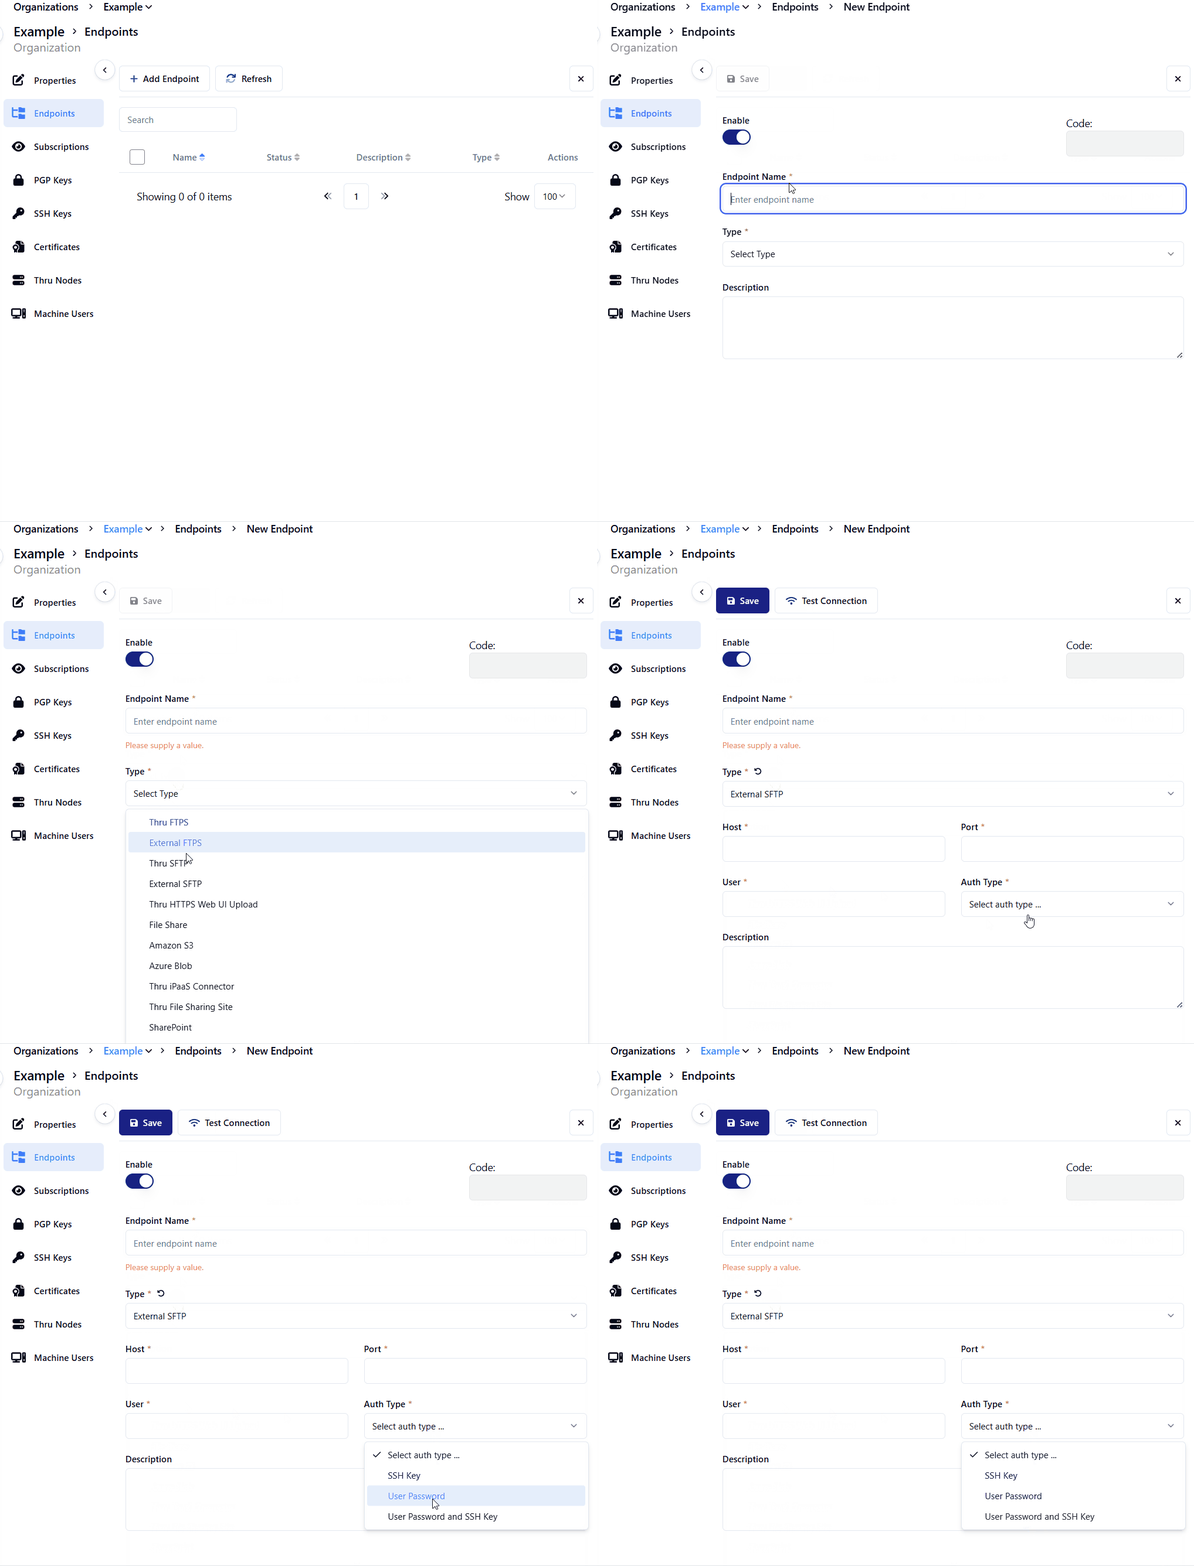
Example: Set up external endpoint
External Endpoints are endpoints for external servers. This type of endpoints allows MFT to connect to an external server using credentials provided by the organization. For example, we will set up an external SFTP Endpoint in MFT to start pulling files into a flow.
-
Click the Organization tab.
-
On the Organization you just created, click the three dots for more options next to the Actions and select Endpoints.
-
Click the Add Endpoint.
-
Click Enable toggle to the on position.
-
In the Endpoint Name field, enter the name.
-
Select External SFTP Server from the Type list and configure it.
-
Enter a description for the endpoint.
-
Click the Save.
Only external endpoints have a scheduling option in the Flow Endpoint Editor.

Adding Endpoint to a Flow
-
Click the Flows tab.
-
Select the Flow you want to use.
-
Do one of the following to add an endpoint:
- Click the name of the Flow.
- Click the Actions menu and select Edit for the endpoint.
-
Click the Flow Studio tab.
-
Click ADD FLOW ENDPOINT and select the endpoint which you have created.
-
Enter the Endpoint Source Path to the server you want to use for the endpoint.
-
Configure other settings based on your use case. Refer to Flow Studio for more details.
-
Click Save.
Example: Set up MFT Server endpoint
MFT Server endpoints depict situations where MFT operates as a server, offering a platform for users, systems, or applications to engage with us as clients.
Upon endpoint creation for the organization, MFT generates an URL (host) for connection establishment.
For users opting to utilize a MFT Server endpoint, an associated user account must also be generated to gain access to the MFT Server.
To set up a source MFT SFTP endpoint and create a user to upload files.
- Click the Organization tab.
- On the Organization you just created, click the three dots for more options next to the Actions and select Endpoints.
- Click the Add Endpoint.
- Optional: Click Enable toggle to off position.
- Select the endpoint type from the Type list and configure the endpoint type.
- Select MFT SFTP Server from the drop-down.
- Enter a description for the endpoint.
- Click the Save.

Trigger files are required to prevent partial files when using MFT Server endpoints.
Refer to the Adding the Endpoint to add the endpoint to a Flow.
To add a user, follow these steps:
- Click the Flows tab.
- Select the Flow you want to use.
- Click the Actions menu and select Edit for the endpoint.
- Click the Users tab.
- Click Add or Edit User.
- Enter a username in the Username field.
- For the Authentication Type, select User Password.
- Enter a password in the Password field.
- Click Save.
MFT can create a user automatically, this user can be used, edited or deleted. See Feature Flags.
Security best practice
Using unique user accounts for both source and target SFTP/FTPS endpoints is a security best practice for file transfer operations. This practice enhances the overall security posture of file transfer operations by enforcing isolation, limiting lateral movement, and adhering to the principle of least privilege.
Benefits of unique user accounts:
-
Isolation and Least Privilege: Unique user accounts for both source and target SFTP/FTPS endpoints follows the principle of least privilege and isolation. Each SFTP/FTPS endpoint, whether it's the source or the target, should have its own dedicated user account with the minimum necessary permissions to perform its specific role. This ensures that if a breach or unauthorized access occurs on one endpoint, the attacker's ability to move laterally within the environment is limited. It prevents a compromised account on one endpoint from directly affecting the other.
- For example, if a shared user account is used for both source and target endpoints, an attacker who gains access to that account (or compromises the password) would have unrestricted access to both sides of the file transfer. With separate accounts, the attacker's ability to propagate their access is constrained, reducing the potential impact of a security breach.
-
Enhanced auditing and accountability: Unique user accounts simplify the process of tracking and attributing actions to specific individuals or processes, making it simpler to identify the source of any security incidents or breaches.
With this practice, you can achieve a more robust and secure file transfer process, effectively mitigating risks associated with unauthorized access.
Next step
