Performing a saved or advanced search in NetSuite
The NetSuite connector uses NetSuite's Basic and Advanced searches.
About this task
The NetSuite connector requires the internal ID or script ID of the saved search defined in NetSuite. You can augment the search criteria by adding filters in the operation. You can also select the result columns you want returned in the document.
Note: In the October 2015 release, custom fields are supported in saved searches for all NetSuite versions supported by the connector.
Procedure
-
Create or open a NetSuite Operation.
-
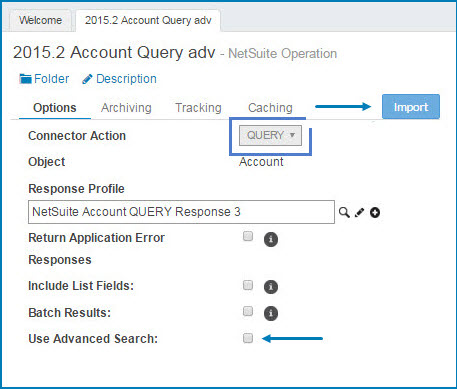
Set the Connector Action to Query.
You do not need to check Use Advanced Search on this page.
-
Click the Import button.
-
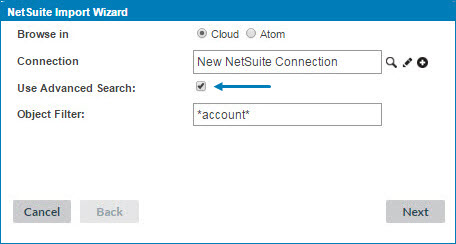
In the Import Wizard, turn on Use Advanced Search.
This restricts the list of objects to those that support the Advanced Search option. The names of your saved searches do not appear in the list during the browse. Instead of selecting a search name, choose the record type for which your saved search was created and then reference your search by filtering on its internalID or scriptID.
-
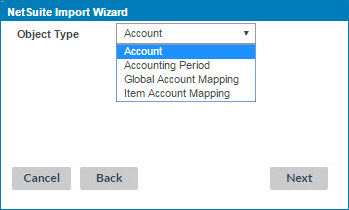
Select the object type to import and then click Next.
-
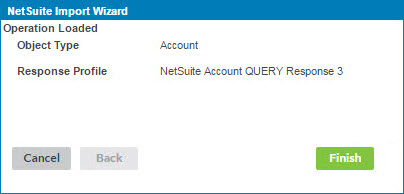
Click Finish to complete and close the Import Wizard. When the Import Wizard finishes, it creates the profile.
-
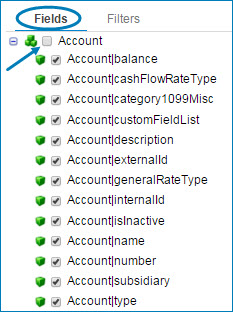
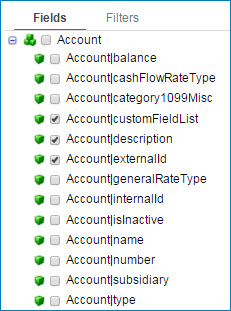
By default, it selects all fields. In the Operation, on the Fields tab, toggle the parent on and off to clear the check boxes for the children.
-
Select the fields to return. If you select too many fields, the process can time out.
OPTIONAL — Depending on the size of the object profile, some element values can be hidden from the response profile. Open the newly-created profile to confirm that you can expand the fields you selected in step 8. If the selected fields do not contain a searchValue element, proceed with steps 9 and 10.
-
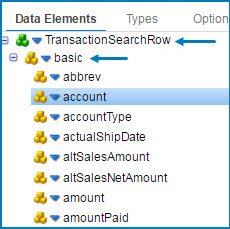
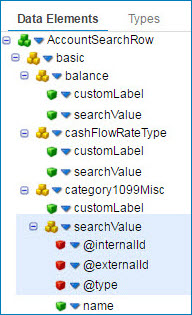
On the Data Elements tab, under the
<Object>SearchRowroot element, expand the basic object node by clicking on the plus sign.For each field you select to return in the operation, expand the XML element definition in the profile to expose the element containing the actual response value.
-
Click the blue arrow next to the secondary element and select Expand Element.
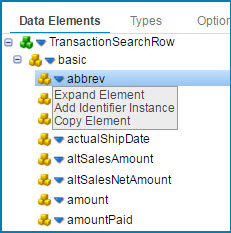
This action adds a secondary searchValue element containing the value. The search values vary depending on the element type.
The following steps apply only to Saved Searches.
-
On the Operation’s Filters tab, click the blue down arrow
 next to Filter, then select Add Logical Sub-Group.
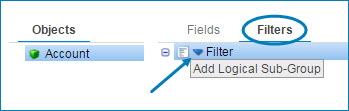
-
On the Logical-And filter, click the blue down arrow
then select Add Expression.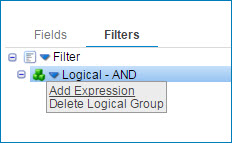
The window expands showing Filter Name and Field.
-
Click the search icon
 .
. -
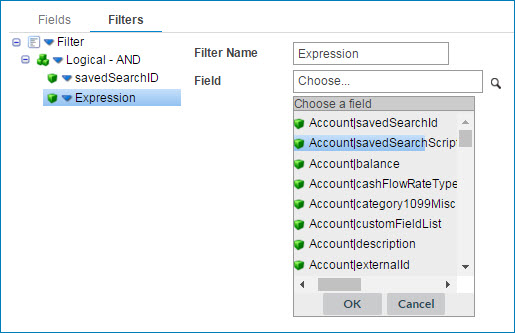
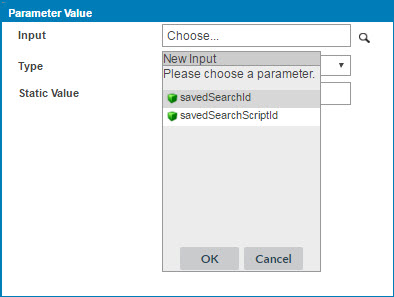
In the Choose a field window, select either the
<Object>|savedSearchIdor<Object>|savedSearchScriptIDthen enter a Filter NameYou can add other filters but you must add at least one of the two savedSearch filters. For more information see Changing a NetSuite saved search linked below.
-
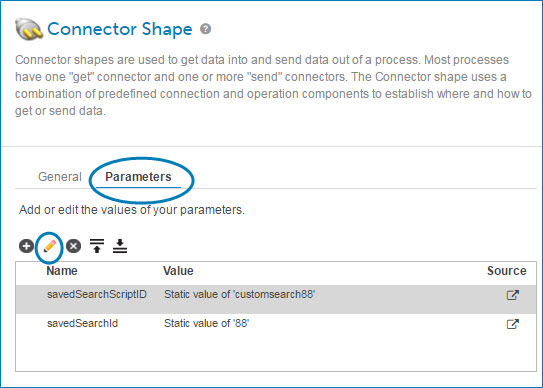
In the process, on the Connector’s Parameters tab, select the filters by clicking the plus button and choosing an input.
-
In the process, on the Connector stepdialog, on the Parameters tab, edit the filters by highlighting a parameter and then clicking the pencil icon.
-
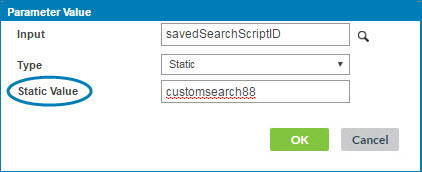
In the Parameter Value window, enter the internal ID or script ID for the saved search as a Static value. To obtain the ID value, in NetSuite edit the saved search and note the numeric internal ID in the browser URL or the script ID below the name, such as customersearch88.
When the search runs, it returns each row as a separate document.
