Exporting a connector package in Eclipse
After exporting an Eclipse connector package, you are ready to upload the package to your Boomi account.
-
In Eclipse, select File > Export….
The Export wizard opens.
-
In the Select an export destination list, expand Boomi and select Export Connector.
-
Click Next.
The wizard advances to the next screen.
-
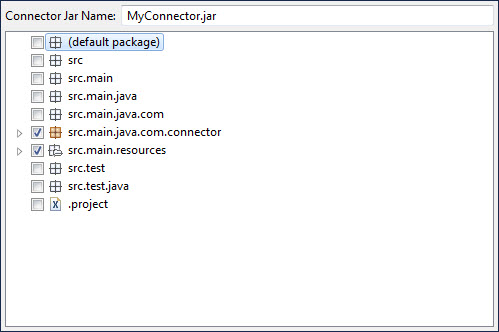
In the list, select the check boxes for any files to include in the connector JAR file — for example, connector source files, resource files, and so on. Do not include test files in the connector JAR file.
-
Click Next.
The wizard advances to the next screen.
-
Specify the destination path and filename for the connector package. Do one of the following:
-
Accept the defaults,
project_path\project_name.zip, by leaving Export Location as is. -
Specify a different path and filename (
.zip).-
Click Browse.
-
In the Save As dialog, set the desired path and filename.
-
Click Save.
-
-
-
Optional: If your connector depends on any third party libraries that are not part of the runtime installation, include them by turning on their check boxes in the list.
Note:
Do not include JARs that are part of the runtime installation. For more information, see the linked topic about packaging connectors.
-
Click Finish.
The connector package Zip file is created. Once created, you are ready to upload the package to your account.
