Tenant page
The Tenant page allows you to manage and administer your tenant.
Opening the page
- Select Tenant from the top Settings menu.
Page overview
The Tenant page displays all the users and subtenants currently set up within the tenant, as well as providing access to tenant settings.
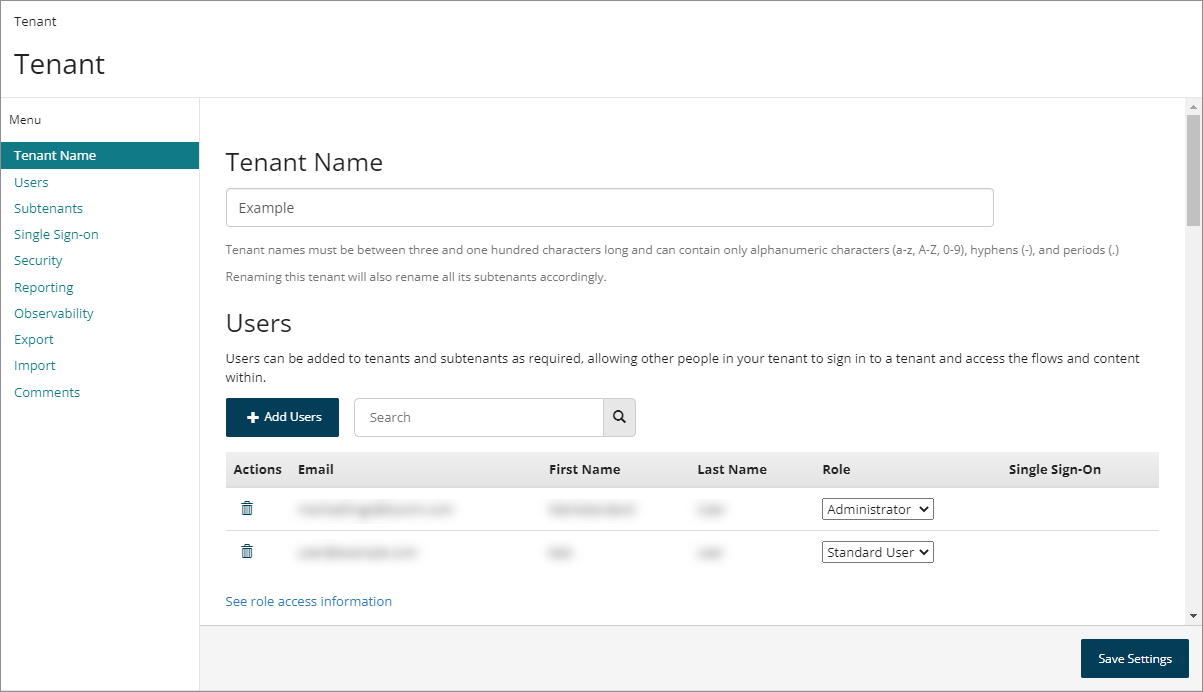
Tenant name
-
The name of the tenant is displayed in the Tenant Name field.
-
Tenant naming restrictions are as follows:
-
A tenant name must be between 3 and 100 characters in length. For example, a valid tenant name is at least 3 characters or more in length, but no longer than 100 characters.
-
A tenant name can only contain alphanumeric characters (a-z, A-Z, 0-9), hyphens (-), and periods (.). You are informed when an invalid character is entered in a tenant name, and will be unable to save the renamed tenant until the highlighted invalid characters are removed from the tenant name.
-
-
To rename a tenant, enter a new name into the Tenant Name field and click Save Settings.
- Renaming a tenant also renames all subtenants that belong to the tenant, using the new naming structure. For example, renaming a tenant from “NewTenant” to “TenantA” will also rename the subtenant “Sub+NewTenant” to “Sub+TenantA”.
Users
-
Click Add Users to add a new user to the tenant. Refer to Adding a user to a tenant.
-
Users set up within the tenant are displayed in the Users list.
-
Click Delete User in the Actions field to delete a user from the tenant. Refer to Removing a tenant user.
-
Assign a user role in the Role field. This defines what areas of features a user is able to access within Flow. Refer to User roles.
-
The Single Sign-on field indicates if the user is a single sign-on (SSO) enabled user, that is that they sign in to the tenant using single sign-on with SAML. Refer to Single sign-on with SAML authentication.
-
‘Yes’ is displayed in the column if the user is a single sign-on (SSO) enabled user.
-
The column remains blank if the user is not a single sign-on (SSO) enabled user.
-
-
The Users Search field allows you to search for and filter which users are displayed in the list.
-
The list only displays 10 users at a time. If there are more than this, you can use the Page Navigation icons to navigate the list of users.
Subtenants
-
Click New Subtenant to add a new subtenant to the tenant. Refer to Creating a new subtenant.
-
Subtenants set up within the tenant are displayed in the Subtenants list.
-
The Subtenants Search field allows you to search for and filter which subtenants are displayed in the list.
Single sign-on
Select the Enable SAML Single Sign-On toggle to enable SAML single sign-on for the tenant. Refer to Single sign-on with SAML authentication.
- If this feature is enabled, additional configuration fields are displayed. Refer to SAML single sign-on settings.
Security
The Security section of the page allows you to restrict run, draw, admin, and package access to flows within a tenant by IP address, as well as enable SAML single sign-on for the tenant. Refer to Restricting tenant Flow access by IP address.
You can use the optional toggle button to disable and suppress the automatic warning for each Flow publish attempt that includes a Flow application not protected by an authentication provider. The warning helps prevent you from accidentally publishing a sensitive application publicly. Toggling this option records the action in the audit log.
-
Restrict run access by IP address: Users who run the Flow web app have to be within a specified IP range otherwise they will be unable to run the Flow.
-
Restrict draw access by IP address: Users who wish to access the canvas have to be within a specified IP range otherwise they will be unable to access the tool. Your current IP address will automatically be added to the range to prevent locking yourself out of the canvas.
-
Restrict admin access by IP address: Users who wish to access the Admin API have to be within a specified IP range otherwise they will be unable to access the Admin API.
-
Restrict package access by IP address: Users who wish to access the Package API have to be within a specified IP range otherwise they will be unable to access the Package API.
Observability
The Observability section of the page allows you to enable and configure observability for a tenant.
-
OTLP endpoint: Enter the OpenTelemetry Protocol (OTLP) endpoint to which data should be sent, that is your APM system or OpenTelemetry collector.
-
Only RPC over HTTPS (Remote Procedure Call over HTTPS) endpoints are supported.
-
Entering a value into this field enables the observability data export.
-
-
OTLP headers: Optionally enter a list of headers to send with the data, such as API key credentials for authentication to the APM system.
- Multiple headers are supported, but must be comma-separated. For example, “name1=value1,name2=value2”.
To learn more about observability, refer to Observability and Configuring observability in a tenant.
Export
You can export tenant data from the current tenant as a packaged tenant data file (.tenant), which can then be imported into a different tenant.
-
This feature allows you to create a 'copy' of a tenant, for backup purposes or for migrating tenant content to other regions.
-
To learn more about exporting tenant data, refer to Exporting and importing tenant data.
Import
Import a previously exported tenant data file into the current tenant.
You can either drag and drop a .tenant file onto the Import Tenant field or click and browse to a .tenant file.
- To learn more about importing tenant data, refer to Exporting and importing tenant data.
