MySQL walkthrough
Working with MySQL
Step 1: Establish a connection
Make sure you have appropriate credentials for establishing a connection with a MySQL database server.
Step 2: Grant read-only access for data extraction in MySQL
Configure a MySQL user with read-only access to extract data from a specific database. Execute the following SQL statements in MySQL:
-- Grants read access and view metadata permissions on the target database
GRANT SELECT, SHOW VIEW ON my_database.* TO 'etl_user'@'%';

-- Grants permission to list available databases (optional for some tools)
GRANT SHOW DATABASES ON *.* TO 'etl_user'@'%';
Replace placeholders
- my_database: Target database name.
- etl_user: MySQL username used for extraction.
Step 3: Choose the Data Flow mode
Once you have successfully established a connection to MySQL, select the Data Flow mode to load data into a Target.
The following are two available options for you to choose from:
By clicking on the highlighted modes, Data Integration redirects you to a relevant page that offers a comprehensive explanation and presents a Product Tour example showcasing the available features in MySQL.
- Multi-Tables: Simultaneously load multiple tables from MySQL to your desired Target.
- Standard Extraction - This Data Flow mode maps, transforms, and loads data from multiple tables into a unified schema. It uses SQL queries for transformations, and you can schedule it or trigger it manually.
- Change Data Capture (CDC) - This mode monitors the Source database logs, capturing and transforming changes in real-time. This ensures minimal data loss and low-latency transfer when loading the transformed data into the target database, keeping it in sync with the Source.
- Custom Query: Create a customized query and import it into your designated Target.
Step 4: Configure the Schema and extraction settings
After selecting Change Data Capture (CDC) as the Data Flow mode, go to the Schema tab to select the tables to sync and configure how Data Integration handles the initial load and log snapshot tables.
Under Multi Tables | CDC (Change Data Capture), select the tables to include. Each table's status defaults to Waiting For Migration unless you change the extraction settings (see below).
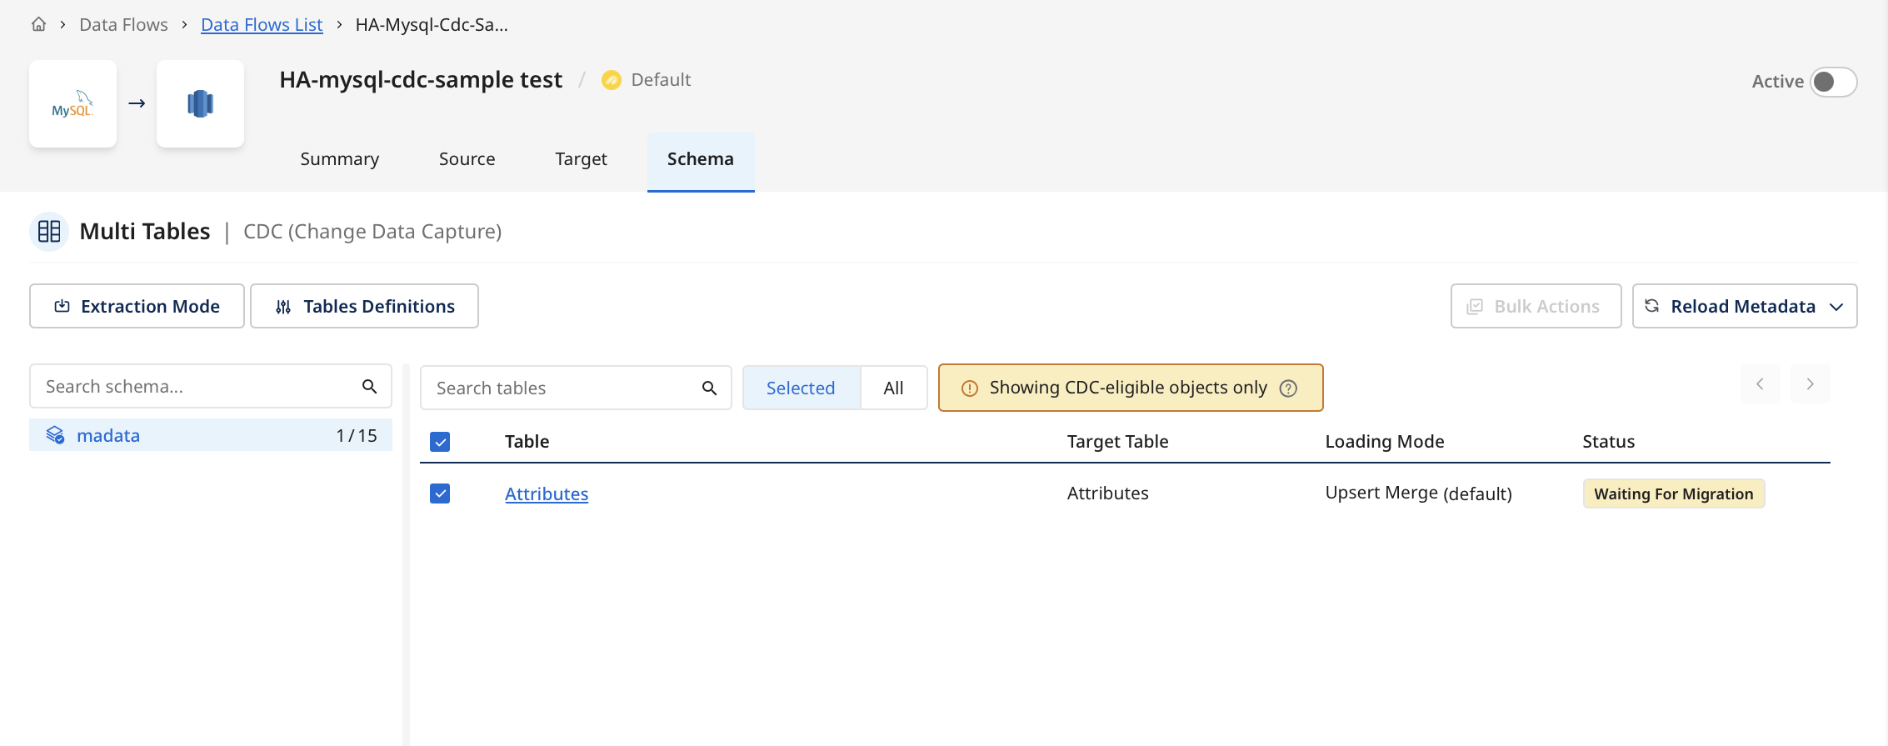
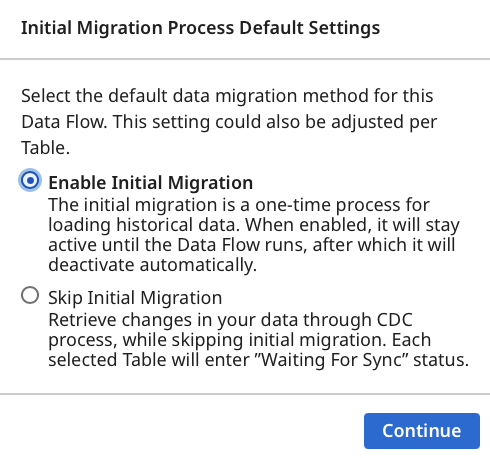
Select Extraction Mode to choose how Data Integration performs the initial load:
- Enable Initial Migration (default): performs a one-time historical data load. This stays active until the Data Flow runs, then deactivates automatically. Selected tables start in Waiting For Migration status.
- Skip Initial Migration: retrieves only changes through the CDC process and skips the historical load. Selected tables start in Waiting For Sync status instead.
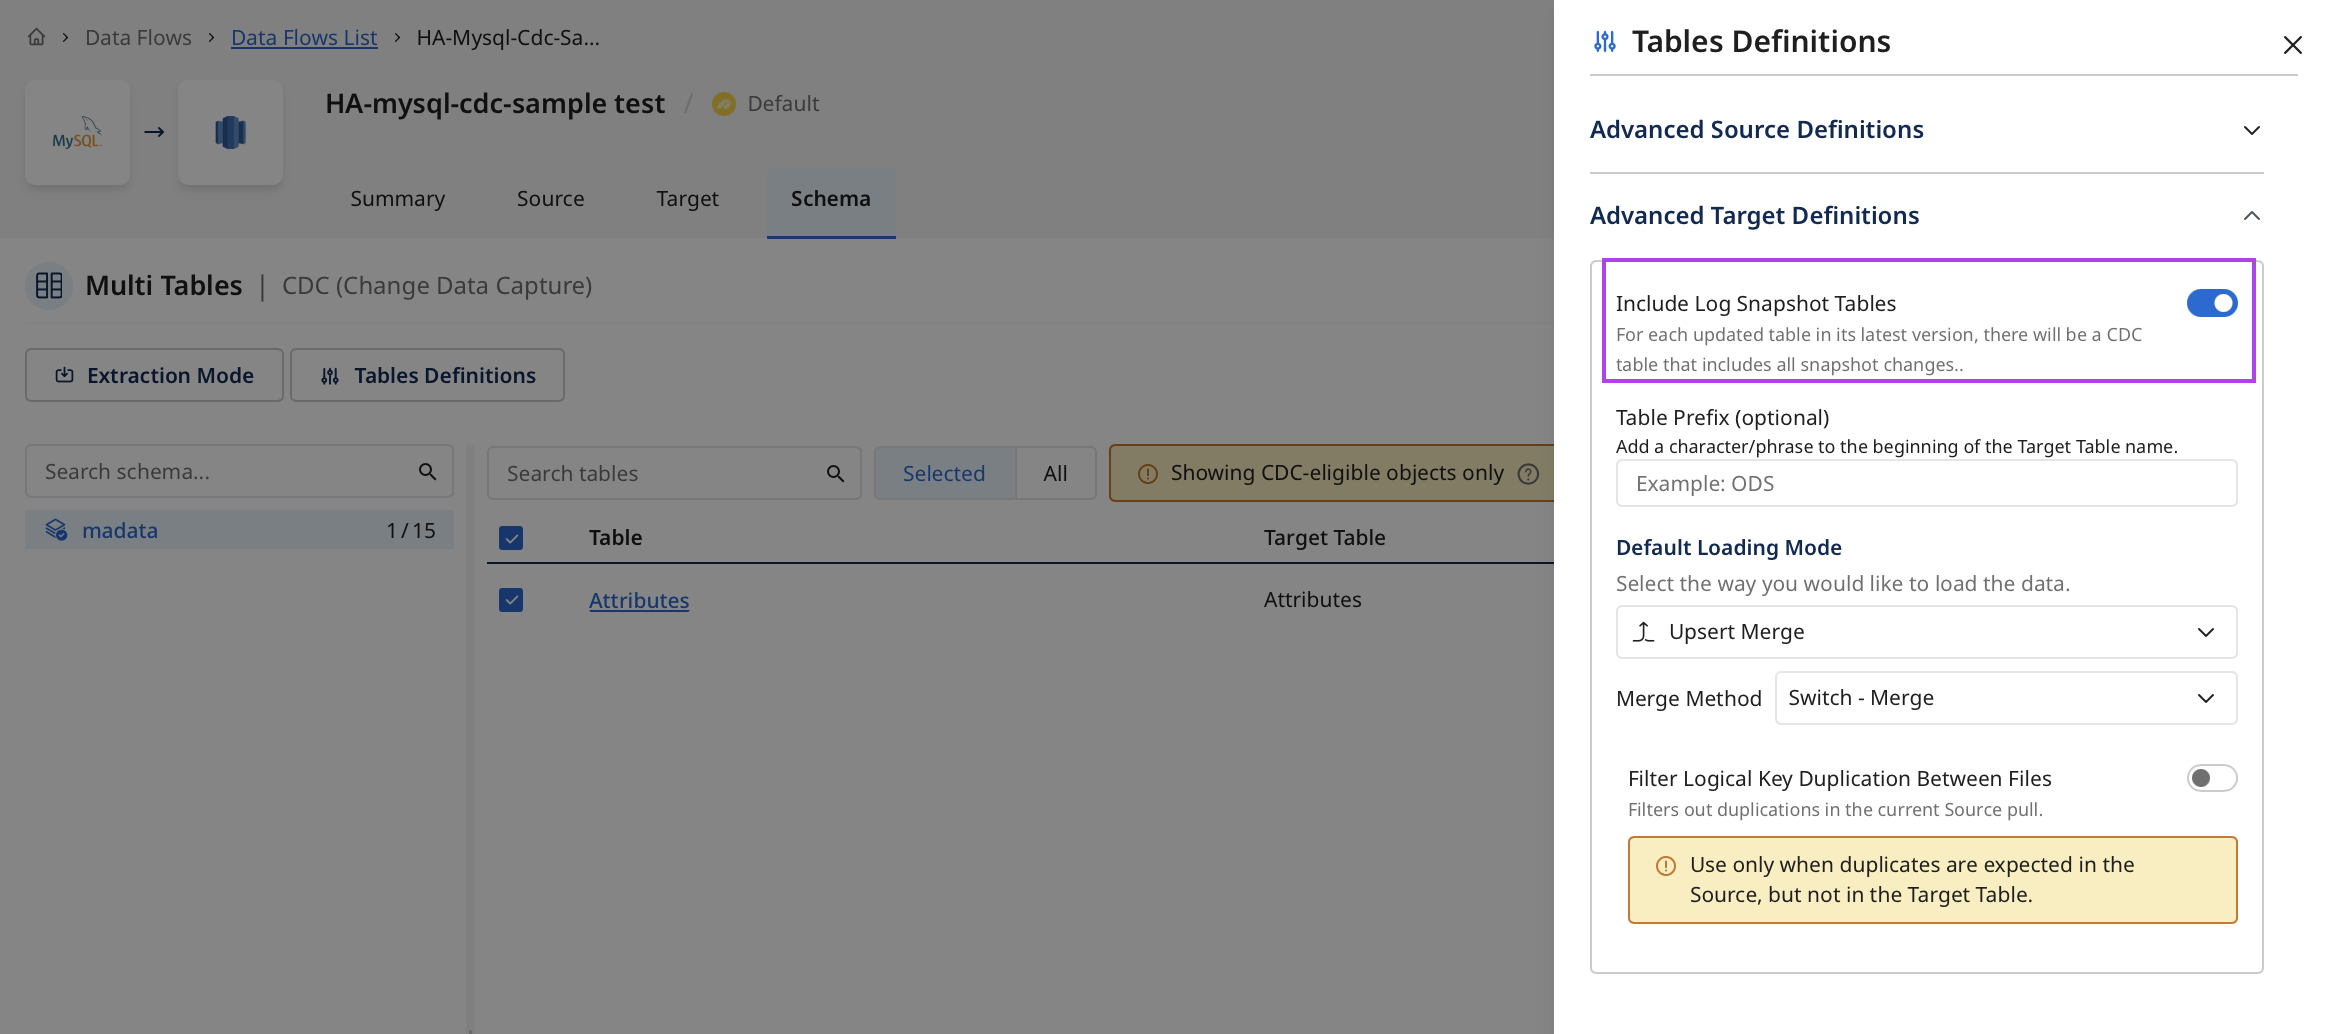
Select Tables Definitions to configure log snapshot tables and loading behavior:
- Advanced Source Definitions > Stream Configurations: view the current log position by selecting Check Log Position.
- Advanced Target Definitions > Include Log Snapshot Tables: toggle on so Data Integration creates a log snapshot table for each updated table.
- Table Prefix (optional): adds a character or phrase to the beginning of the target table name, for example
ODS. - Default Loading Mode: sets how Data Integration loads the data, for example Upsert Merge.
- Merge Method: sets how Data Integration merges records, for example Switch - Merge.
- Filter Logical Key Duplication Between Files: use only when duplicates are expected in the source but not in the target table.
Step 5: Run the Data Flow
Once you have successfully configured the Data Flow mode, extraction settings, and scheduling, you are ready to start with the Data Flow and its operation.
