Configuring Microsoft Entra ID (Azure Active Directory)
Microsoft Entra ID (Azure Active Directory) provisioning is currently in private preview.
Integrate a System for Cross-domain Identity Management (SCIM) and Single Sign-On (SSO) using Microsoft Entra ID (Azure Active Directory). This enables you to streamline user authentication and management within your organization's identity provider (IdP) in Data Integration.
Prerequisites
Make sure you have access to:
- A Microsoft Entra ID (Azure Active Directory) tenant with Administrative privileges.
- Data Integration with an Enterprise plan account.
Step 1: Configure Microsoft Entra ID new application
To configure Microsoft Entra ID for a new application, create an app registration in Azure Entra ID and define its settings, including permissions and authentication methods. This lets you authenticate and access resources within your Azure Entra ID tenant. This process enables users and services within your organization to have secure and controlled access to your application.
-
Log in to your Azure Portal and find Entra ID in the search panel.
-
Select Enterprise Applications from the left-hand menu.
-
Click New Application.
-
Choose Create your own application.
-
Enter a name (For example, Data Integration), and choose Integrate any other application you do not find in the gallery.
- Select Create.
Step 2: Configure SCIM provisioning
Set up System for Cross-domain Identity Management (SCIM) provisioning to automatically provision and de-provision users and groups in external applications supporting SCIM. This process ensures that user accounts and access rights synchronize between Azure Entra ID and the target applications, reducing manual effort and ensuring consistent identity management across systems.
-
Navigate to the Data Integration Console.
-
Click Setting and select Account Settings.
-
Click the Security tab.
-
Click Generate Token under Users and Groups Provisioning.
-
Copy the Service URL (Tenant URL) and Token (Secret Token) and store them in a safe location.
-
Navigate to the Azure portal and find Entra ID in the top search panel.
-
Select Enterprise applications from the left-hand menu under the Manage section.
-
Search for the application you created in the application gallery.
-
Locate the Provisioning section in the application overview page.
-
Click Get started.
-
Select Automatic as the provisioning method.
-
Enter the Service URL (Tenant URL) and Token (Secret Token) that you copied and saved from the Data Integration console, for System for Cross-domain Identity Management (SCIM) provisioning, then click Test connection.
-
If a success notification appears, save the provisioning configuration.
-
Access the Mapping drop-down list and choose the option to Provision Microsoft Entra ID Users.
-
This list automatically populates Azure Entra ID attributes, but Data Integration requires only:
userNameactivedisplayNameemails[type eq work].valuename.givenNamename.familyNamename.formattedexternalId
When your userPrincipalName attribute does not match all users' Email attribute values, use Email as the Microsoft Entra ID Attribute field for the userName attribute mapping.
- In the Mapping drop-down list, choose Provision Microsoft Entra ID Groups. Data Integration requires only the following specific attributes:
displayNameexternalIdmembersRemove any other attributes not mentioned above.
If provisioning errors or delays occur due to your Microsoft Entra ID configuration, you may experience a one-way lockout from Data Integration. To avoid this, ensure that the designated Data Integration Administrator user is 'not provisioned'. This enables an Administrator manually configure permissions and user management within Data Integration.
- After you set the mappings, go to Provisioning > Settings.
- Choose Sync only assigned users and groups under the scope option and click Save to save the provisioning configuration. Azure syncs users and groups to Data Integration.
Azure syncs with Data Integration every 40 minutes. Check if any changes are available within that timeframe.
Step 3: Configure Microsoft Entra ID single sign-on
With Microsoft Entra ID single sign-on, you can access Data Integration using your Microsoft Entra ID account.
-
To set up Microsoft Entra ID SSO and add users to the application, refer to Single Sign-On Using Microsoft Entra ID (Azure Active Directory) topic.
-
Complete the setup and establish the connection to Data Integration.
Step 4: Configure user and teams in Data Integration
After setup, the Azure Entra ID configurations automatically populate the Users and Teams sections.
Azure Entra ID Groups appears as Teams in Data Integration.
- Navigate to the Data Integration Console.
- Click Settings and select Users.
The Users and Teams tabs are auto-populated with your configurations.
Azure syncs with Data Integration every 40 minutes. Data Integration applies these changes within the specified timeframe.
User management
Adding a new user
Entra ID provisioning automatically generates users. This guarantees precision and uniformity. You do not manually include users in Data Integration.
The Add User feature lets you include Data Integration Users who do not exist in the Azure Entra ID portal and exist only within Data Integration.
Understanding user permissions
Permissions for a user depend on their teams in Entra ID. The configurations designated for those teams define their permissions.
Administrators can modify team permissions.
-
Once you assign a user to a team, you cannot directly assign individual permissions to that user. The user inherits the team's configured settings.
-
To assign a user different roles across multiple Environments, you can add the user to multiple teams and assign permissions across those teams.
-
Permission Hierarchy: When a user belongs to multiple teams, the most permissive role (the strongest permission) takes precedence.
For example, If Team 1 has Viewer permissions for environment 'A' and Team 2 has Admin permissions for the same environment, the user inherits Admin permissions for environment 'A'.
Editing a user
You can view provisioned users in Data Integration. To make changes, edit them in Microsoft Entra ID.
Admin users can modify the information of Data Integration users (those created in Data Integration and not provisioned from Azure Entra ID) such as Name, Email address, and Environments. You can click edit them from the right-hand menu of the corresponding row in the user list.
Deactivate or delete a user
You can deactivate or delete a user via the Azure Entra ID portal for provisioned users. For Data Integration users (created directly in the platform), you can deactivate or delete them using the options in the right-side menu of their row in the user list.
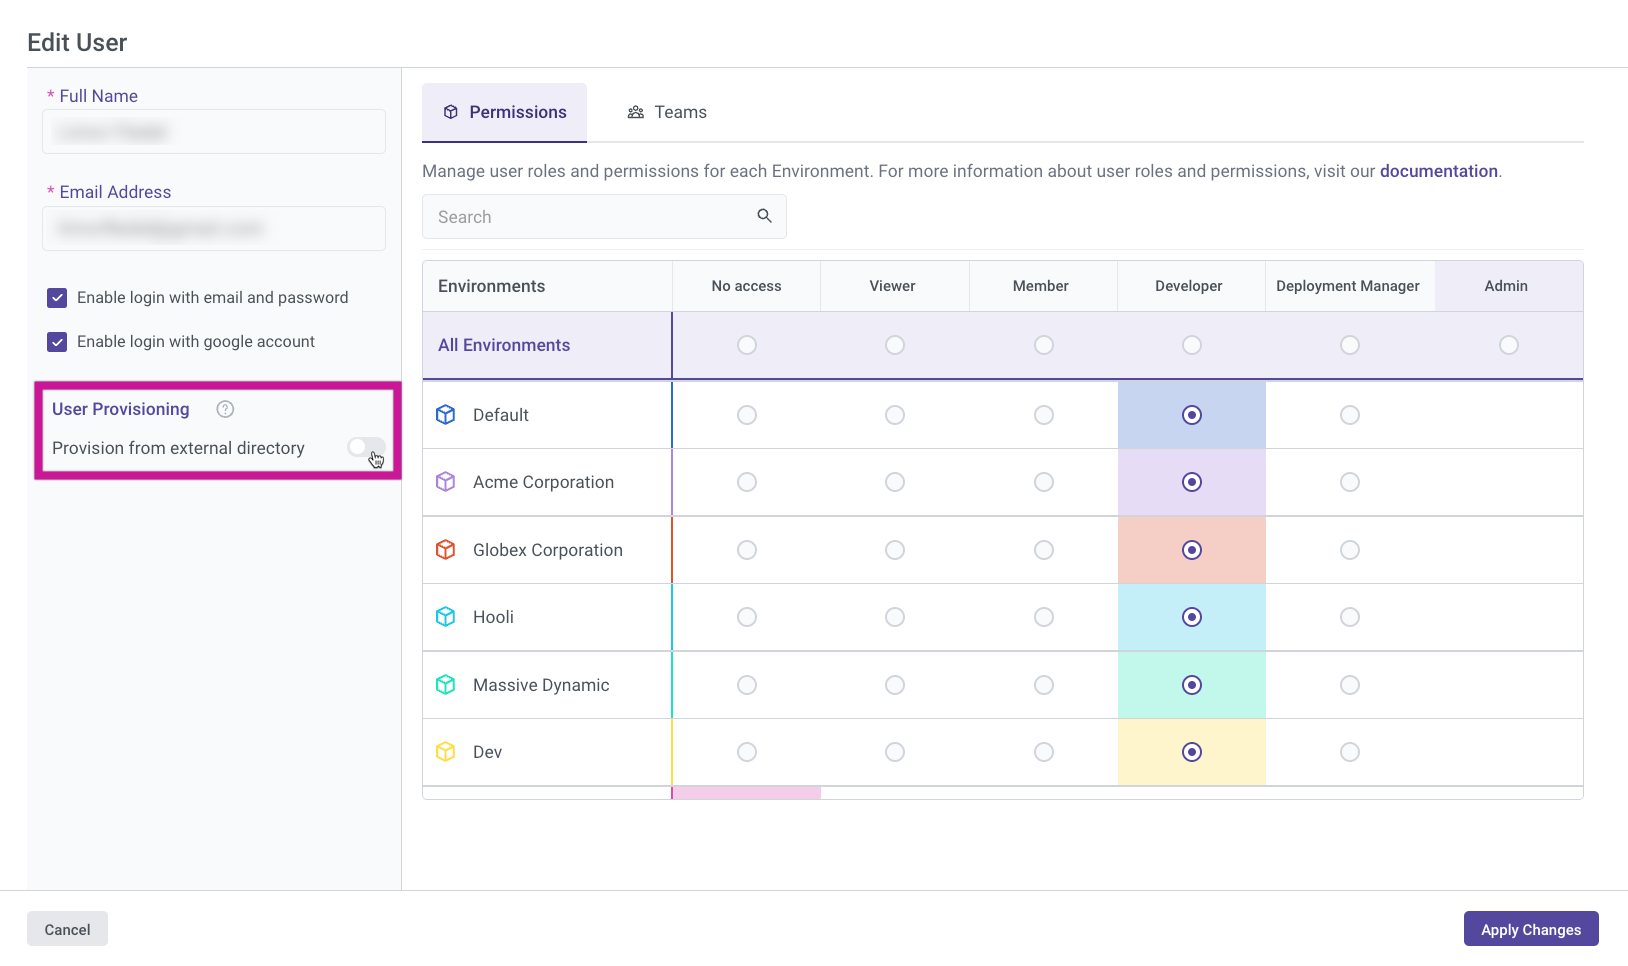
Associating Data Integration users to Azure Entra ID
Enabling association between a Data Integration user and a Directory lets you manage the user and their team memberships using Azure Entra ID.
Establish a connection between this Data Integration user and the Directory to manage the user and their team memberships through an external directory.
-
You cannot reverse this action and update the user's designation to Directory, adjusting their teams and permissions according to the Azure Entra ID settings.
-
After the Data Integration admin turns on the Directory toggle for a user, the admin can add the user to provisioning. If you try to add the user before this, it may cause errors on your Entra ID.
-
If the user logs in via SSO before the provisioning cycle is complete, the system re-creates them as a Data Integration user. This feature relies on provisioning cycles, and designation changes take effect only after the next successful provisioning cycle runs.
Team management
Adding a new team
Azure Entra ID provisioning automatically creates teams in Data Integration. You do not add them manually. The Add Team option in the user interface enables you to add Data Integration Teams not appearing in the Azure Entra ID portal exist only within Data Integration.
Editing a team
Admin users can edit team details, including Name, Description, and Environments through the Team Management tab.
Procedure
-
Navigate to the Data Integration Console.
-
Navigate to the Teams management tab.
-
Find the team you want to update.
-
Click Edit on the right side of the team’s row.
-
Update the team’s name, description, and environments as needed.
- In the Edit Team section, you can set the Environments for your team and view the list of users associated with that team in the Users tab.
- If you provision the team through Microsoft Entra ID, you can view the list of users in the Users tab and edit any team member through the Azure interface.
- Click Save.
Administrators can set a default environment for a particular team within the Permissions tab. This streamlines team operations by ensuring that team members consistently work within the predetermined environment, thereby enhancing workflow efficiency.
Deactivate or delete a team
You cannot manually deactivate or delete teams, as Azure provisioning automatically creates them.
