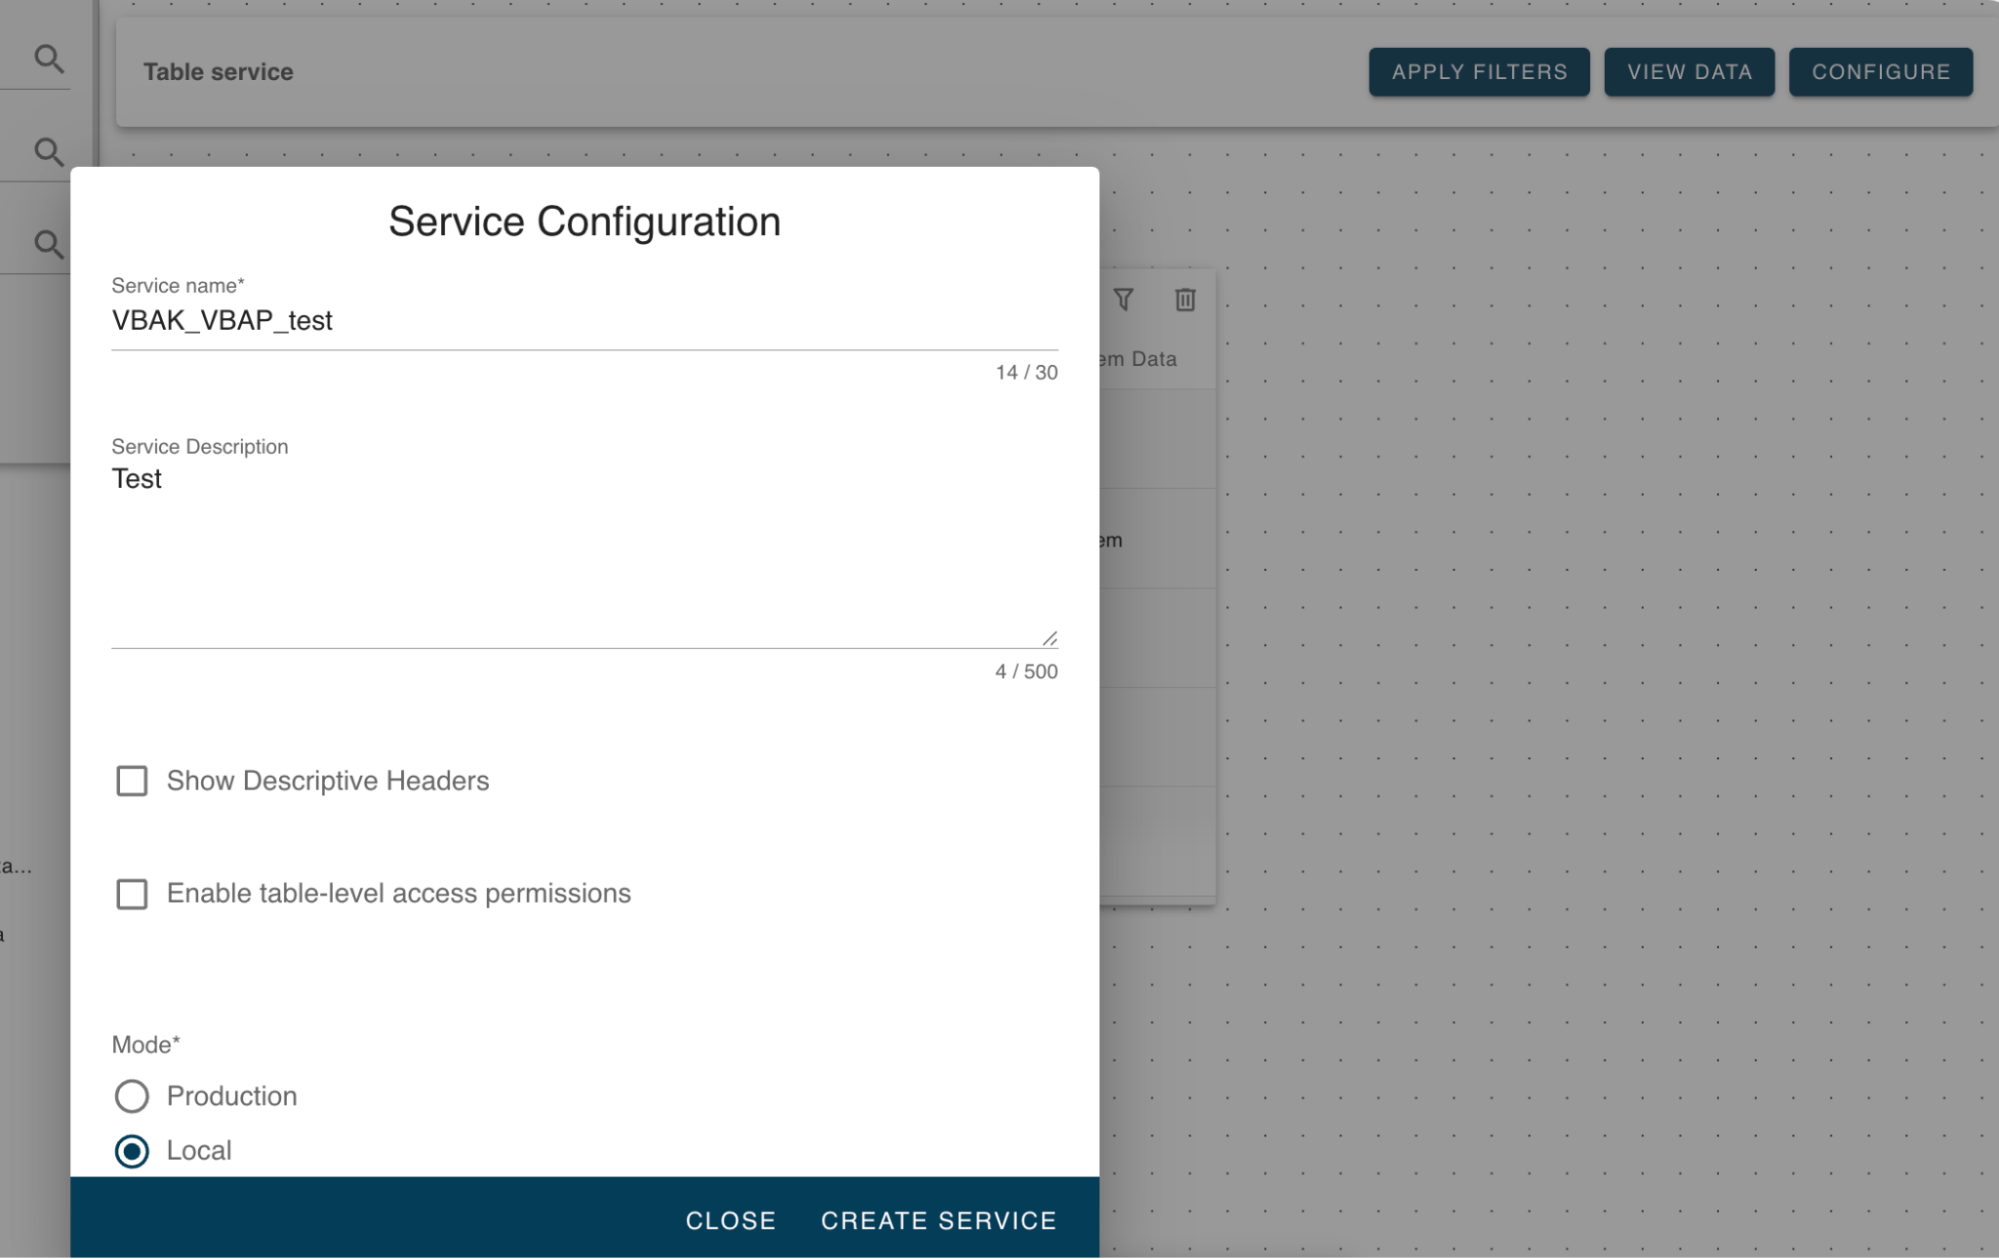
Create a Table Service
Click the Configure button in the upper right-hand corner. In the pop-up window, fill out the information needed to create the service, as described below.
-
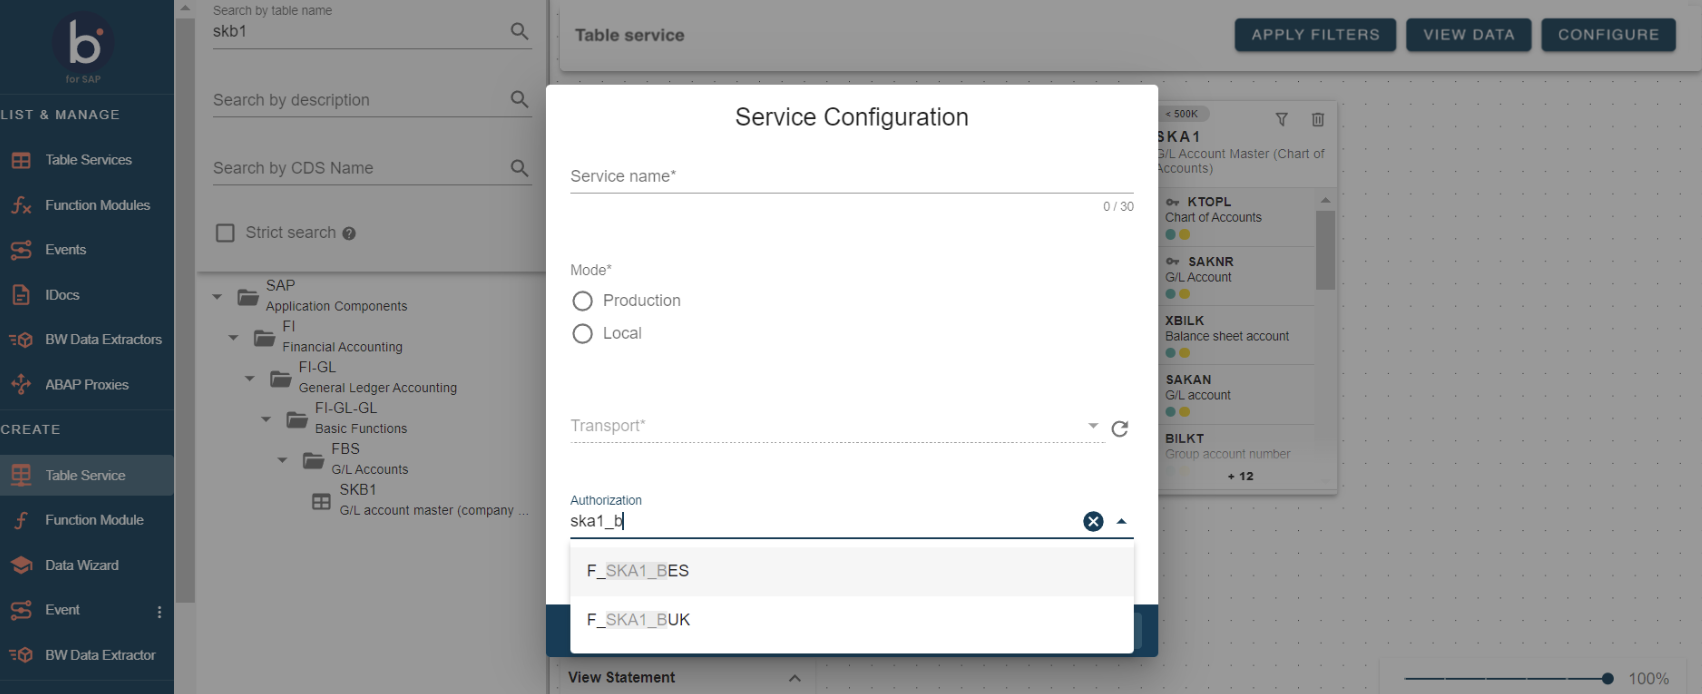
Service name: To create a service, enter a service name.
-
Show Descriptive Headers: Select this checkbox if you want to replace the default SAP column headers with descriptive titles. The descriptive headers will also appear in the process payload output.
-
Mode: This indicates if the service created is transportable. By selecting Production, the service can be transported. When using this option you must select a transport for the service before it can be created. On the other hand, by selecting Local, the service created can not be transported, and therefore, no transport can be selected.
-
Transport: This is the transport that will be assigned to the service. You can promote a table from Local to Production.
-
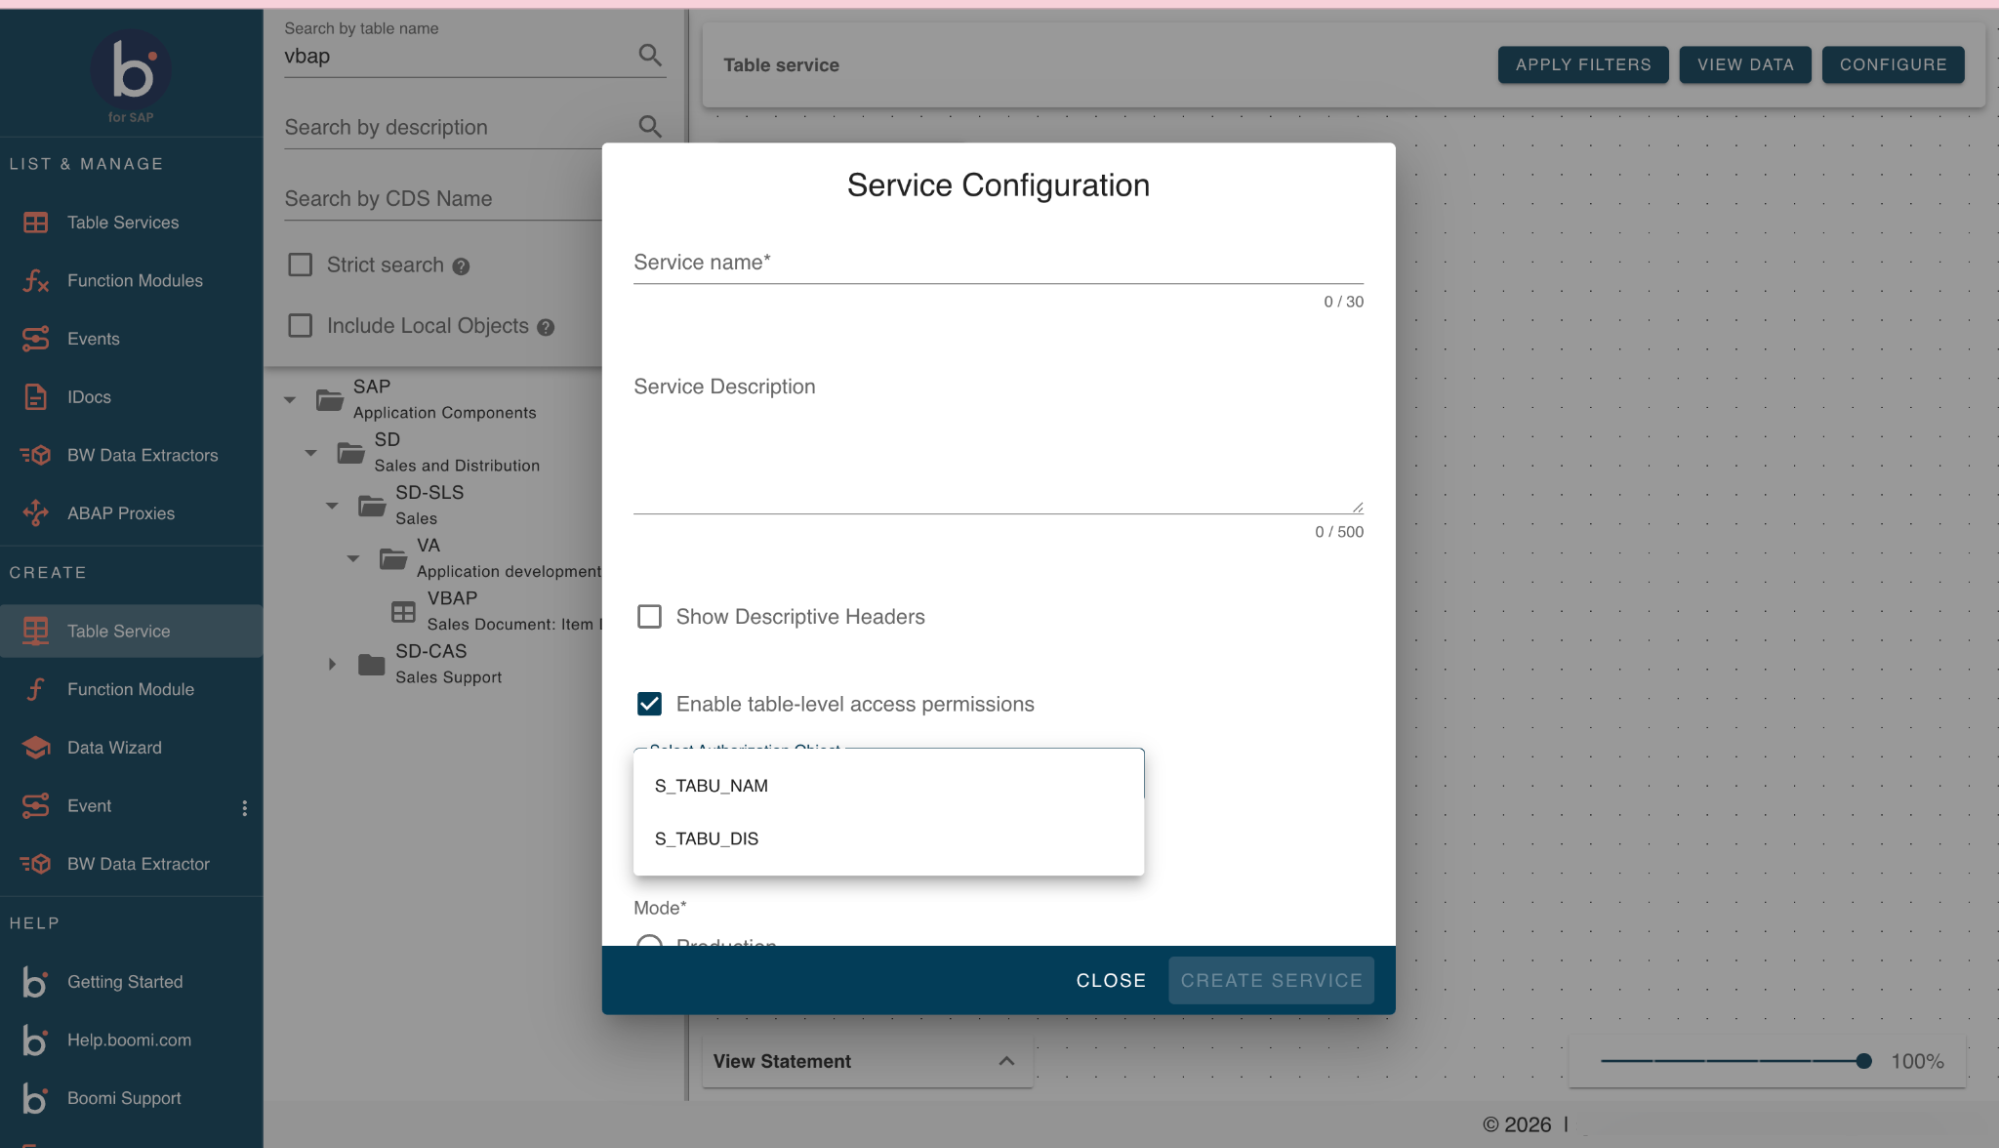
Authorization: You will configure the authorization object for the service with the corresponding authorization fields and values. Press the drop-down menu to choose the authorization object, and then fill out the authorization field's values.
- You can select the Enable table-level access permissions checkbox to restrict who can call the service based on an SAP authorization object. By default, the checkbox is cleared and the service does not enforce a table-level authorization check.
- When you Enable table-level access permissions, a dropdown appears. Choose the object that should govern access to the service. In the example below, the options are
S_TABU_DISorS_TABU_NAM.- If you select the checkbox but don't choose a value, Boomi for SAP blocks the request and displays an error message. Either select an object or clear the checkbox to continue.
- When you edit an existing table service for editing, the Enable table-level access permissions settings you just selected are applied automatically.
If no authorization objects are assigned, it doesn't check for authorization when calling the service. Thus, it is also possible to configure the service without selecting any authorization objects.
- Test as user: You can test the authorization to check for a specific user by entering a user name. If the user exists and has the correct authorization, a green checkmark will appear.
If no user exists and there are no correct authorizations, an error message will appear.
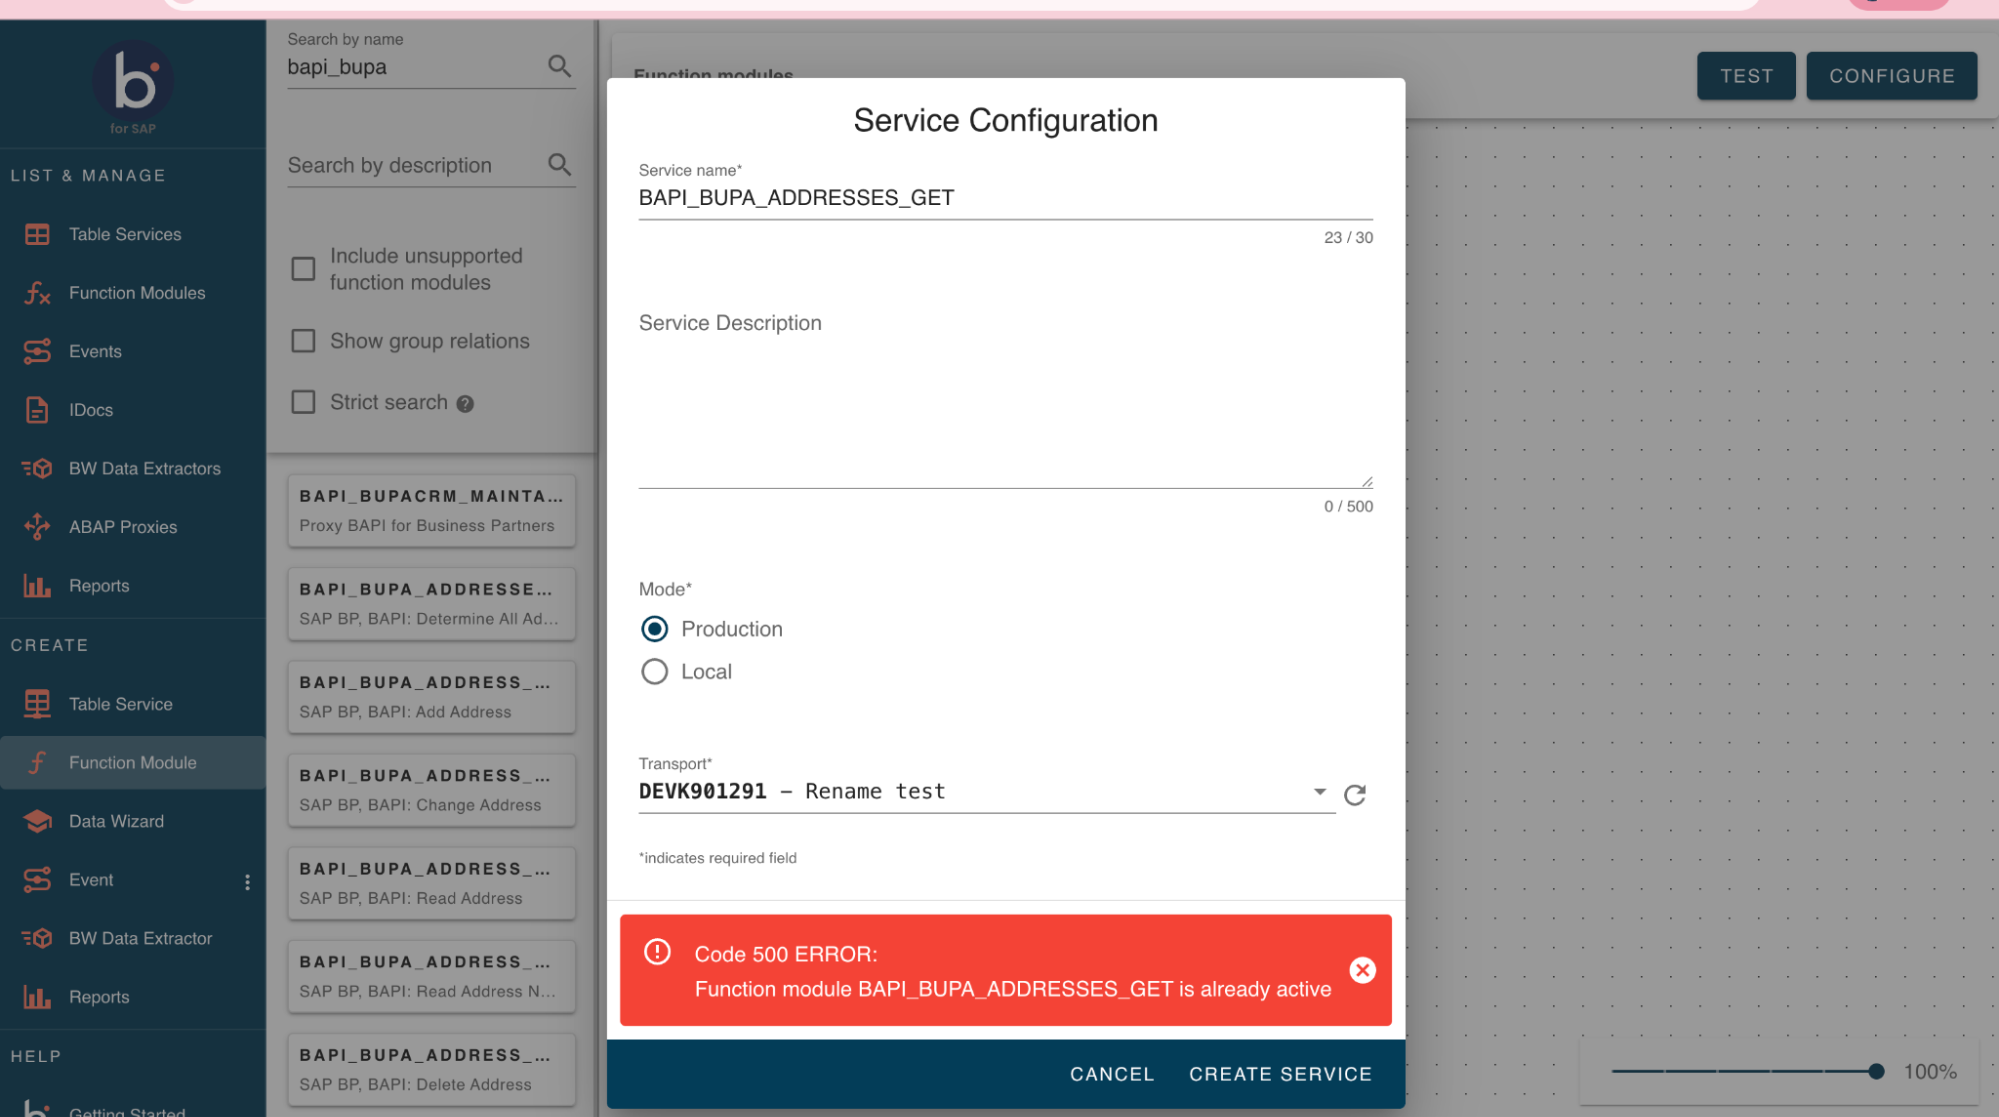
After filling in the above information, click the Create Service button. If the service creation was successful. the following confirmation message will appear: The process successfully created all services. If you want to return to the canvas, click the Close button.
Once you create the service, the system will redirect you to the Table Services page, where you can find the service(s) you just created. You can use the Apply Filters button to pre-filter table data based on your desired criteria before the data is displayed.
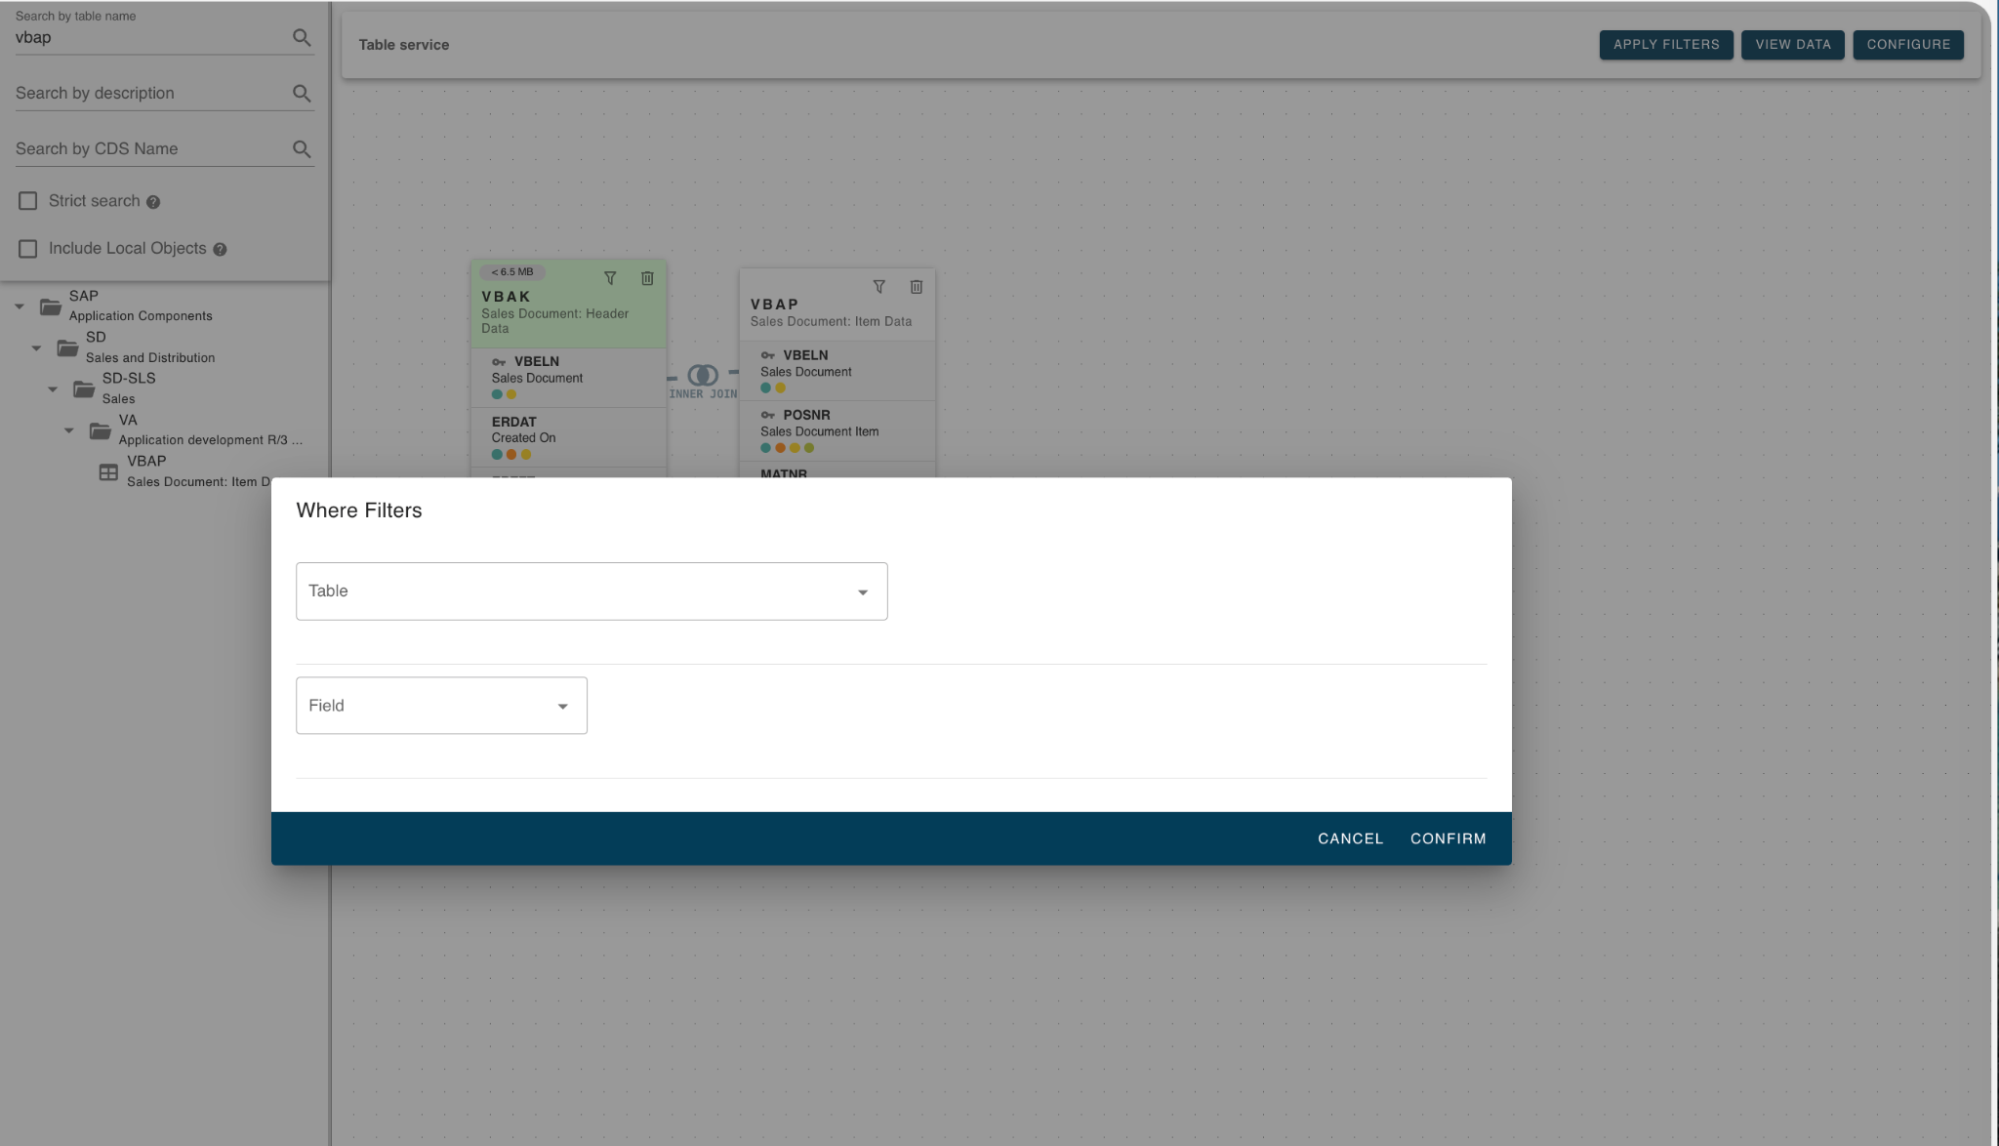
When you click Apply Filters, a drop down box of tables on the canvas appears.
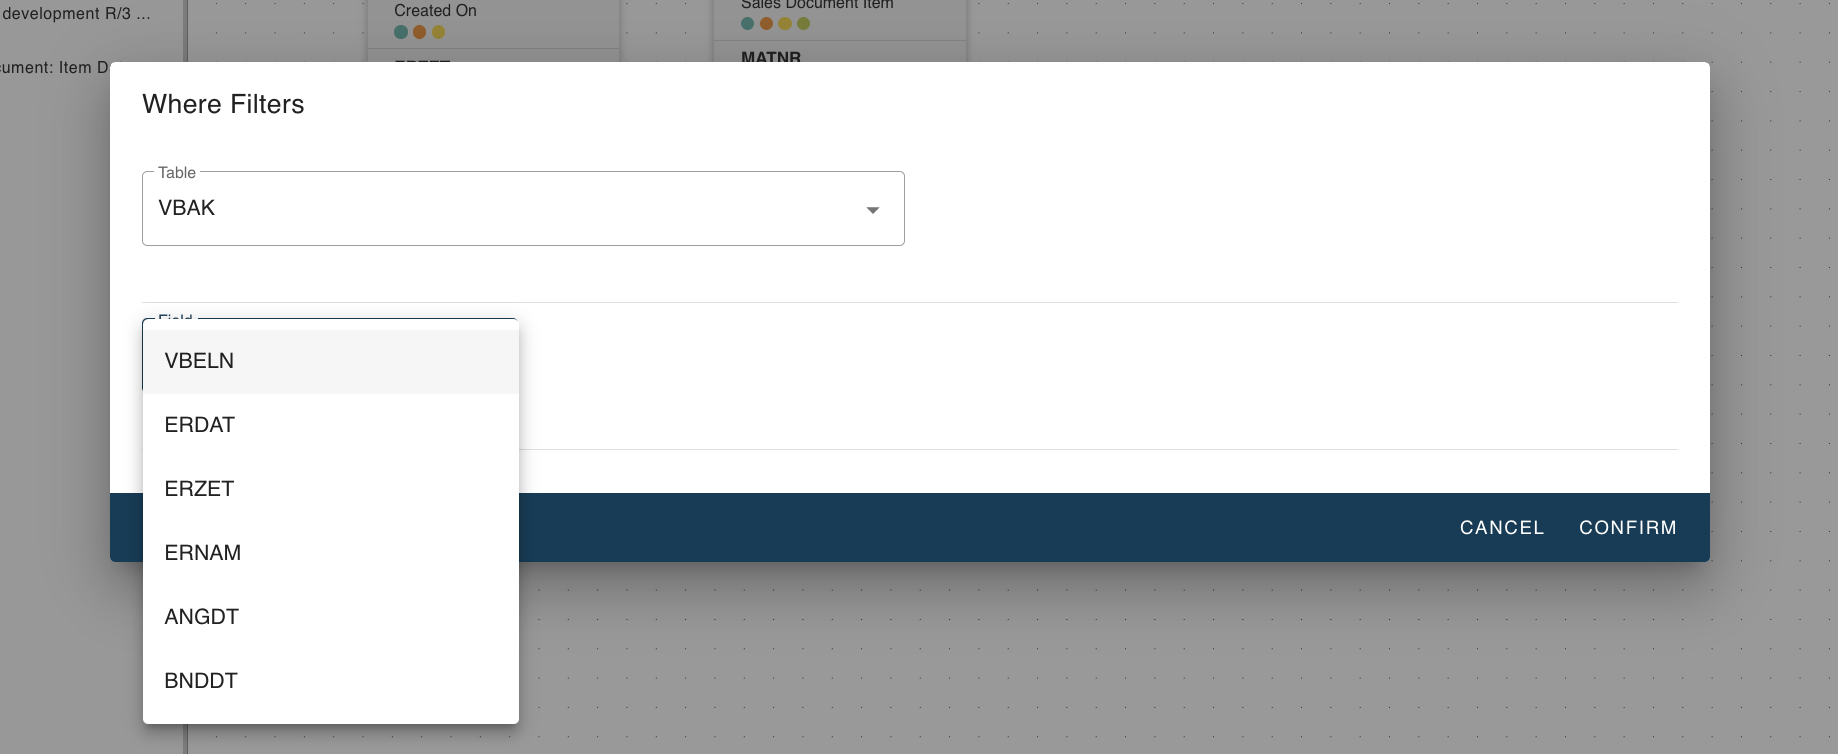
After selecting a table, you can fill in the relevant parameters.
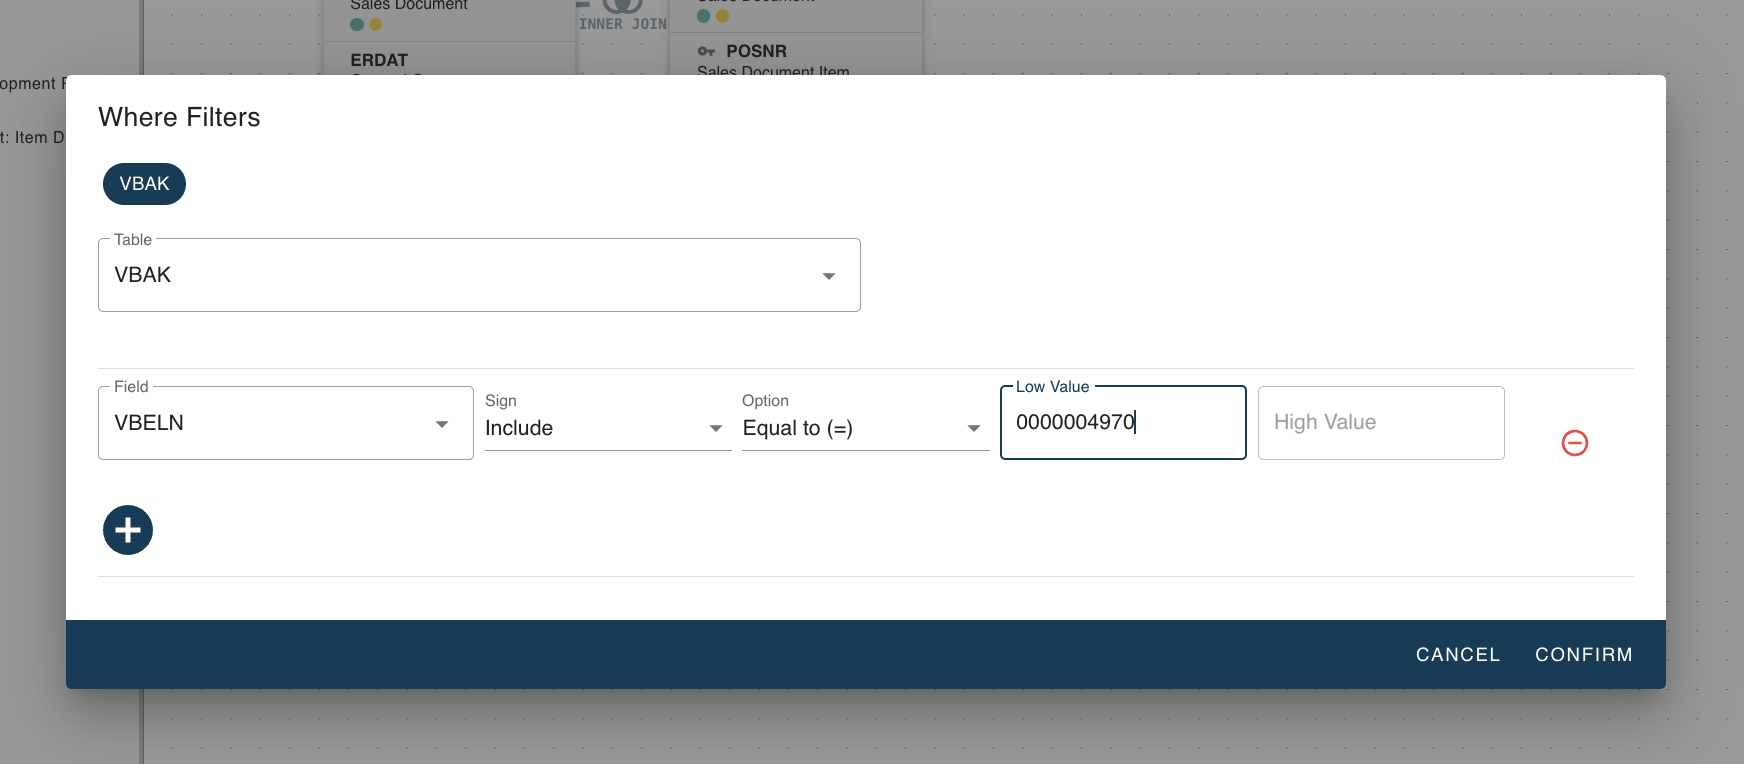
You can have multiple filters active at the same time.
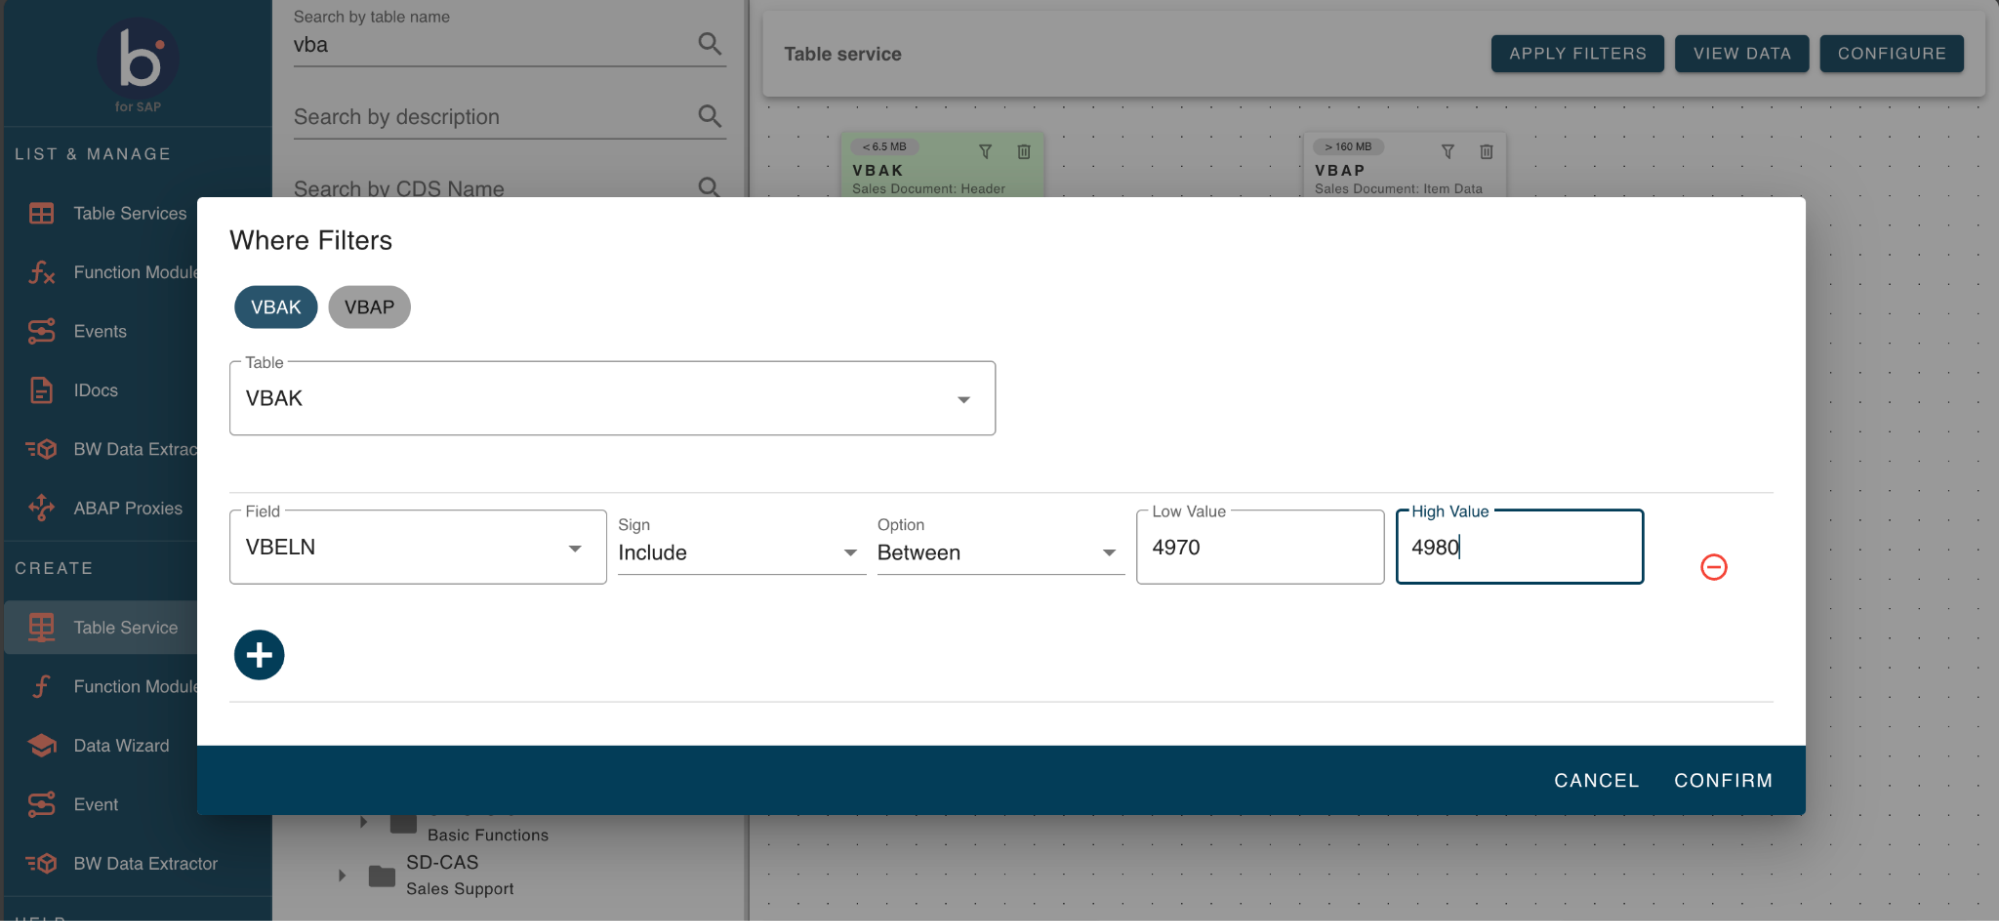
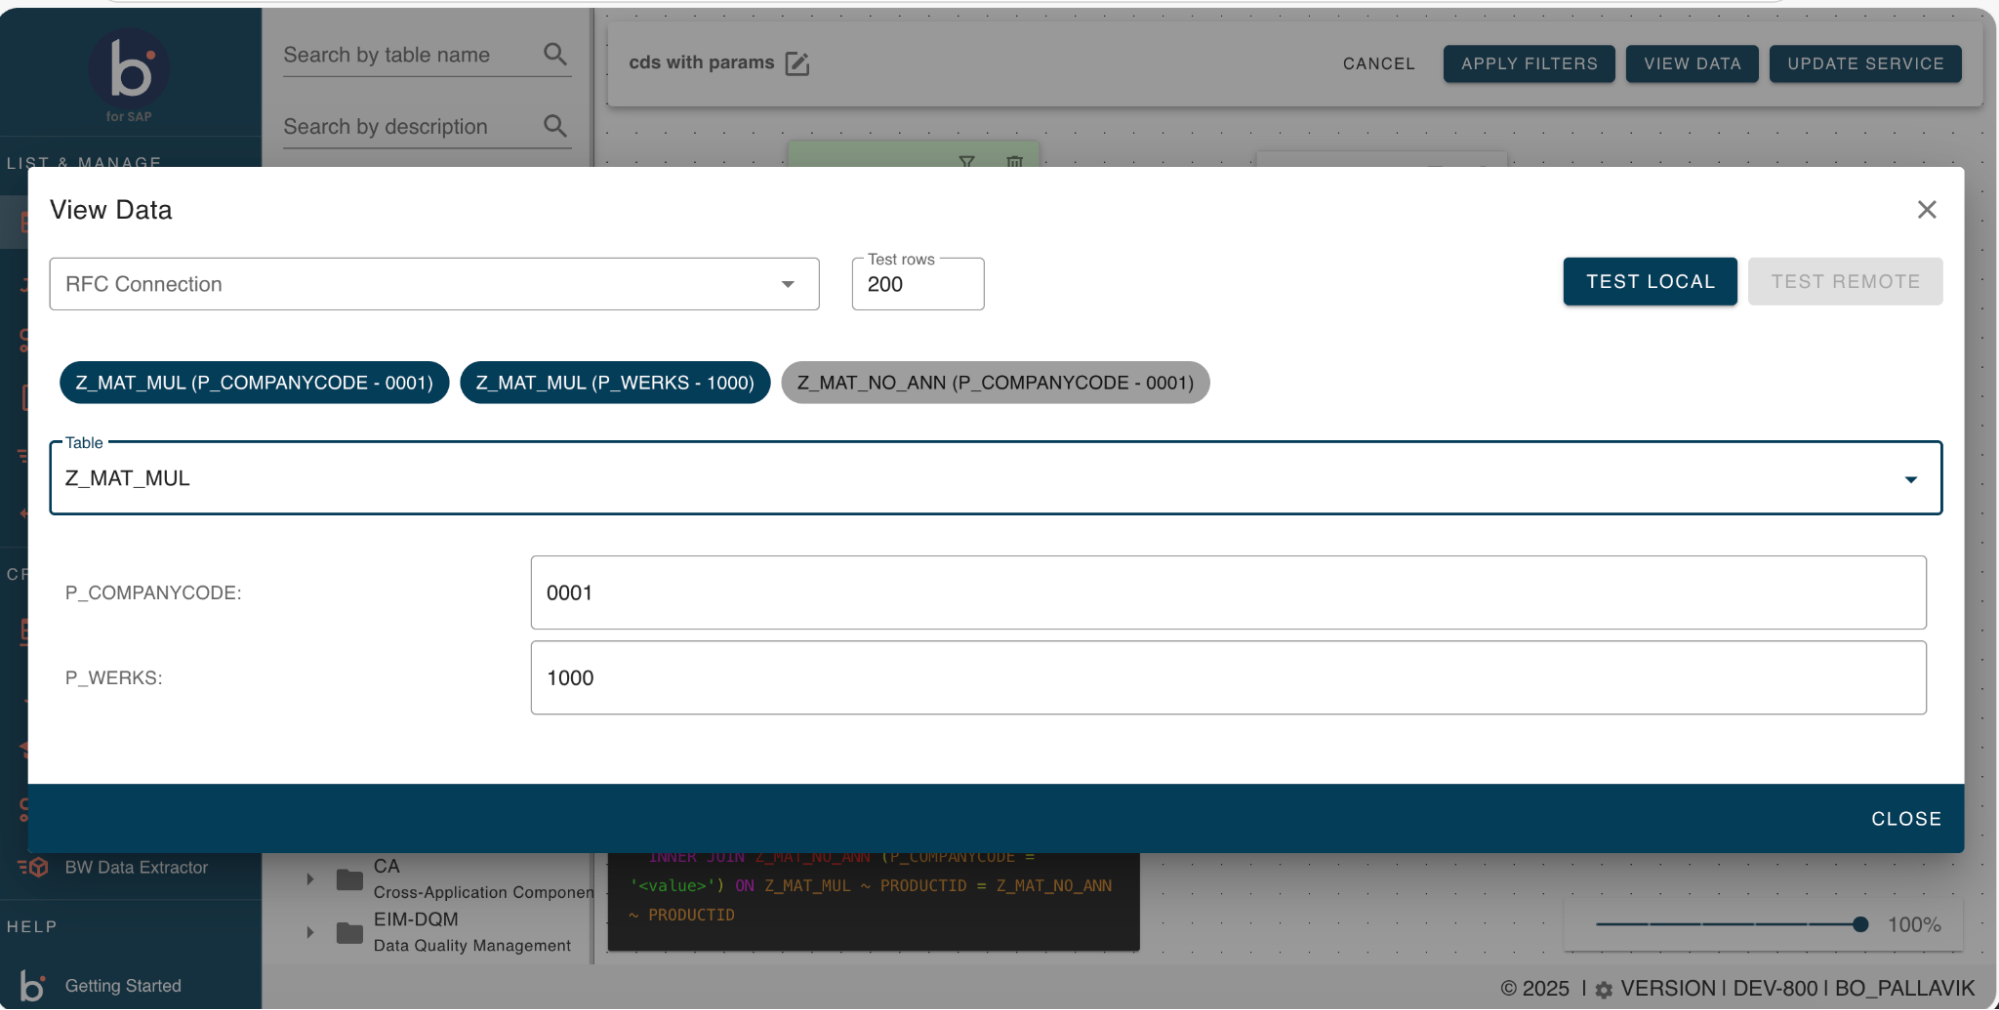
Table Service for CDS views
You can create a table service for CDS views with the following mandatory input parameters to display data. Use the Test Local button to view the data after you enter it.