Importing Swagger API Definition File
You must be an Area level Administrator to import an API definition from a Swagger file. To learn more about Administrator roles, refer to Control Center Roles.
Procedure
-
Navigate to New API Definition > Import a file. The Import an API Definition pop-up window opens.
-
In the Import an API Definition window, provide the following values:
-
In Schema Type, select Swagger, and click Choose file. In the system file selection dialog, select the file to upload.
-
In Public Endpoint Domain, select a public domain from the list.
-
Optional: In Public Endpoint Subdomain, specify an optional subdomain for the public domain.
-
In Organization, select an organization from the list.
noteOnly users with API permissions for the selected organization will be able to edit this newly created API definition.
-
Click Preview.
The Preview window displays the API definitions and endpoint objects that will be created from the uploaded file. It allows you to decide which endpoints to include or exclude in the API definition. By default, all endpoints are automatically selected.
Ensure that the API specification conforms to Swagger v2.0/OpenAPI v3.0 and the file format is JSON or YAML. To open the file directly from this window, click the file link in the Uploaded API Definition field. If the information looks correct, click Create to continue creating your API definition.
-
Verify the information in the uploaded JSON file in the Preview window. Then, click the file link in the Uploaded API Definition to open the uploaded JSON file directly.
-
If the information looks correct, click Save and continue to create your API definition.
After successfully creating the API definition, a Success window will appear.
noteIf duplicate endpoints are found or if the domain is not active, the API definition cannot be created. Duplicate endpoints must be either removed from Boomi Cloud API Management (Control Center) or removed from the Swagger document you are trying to import.
-
-
-
Optional: Click View Your API to view the Interactive Documentation page, which was automatically created based on the newly imported Swagger specification. This is a fully functional Interactive Documentation that uses the specifications from the imported JSON.
Refer to the Interactive Documentation for more information.
-
Optional: Click Add Interactive Documentation to add the API definition as an Interactive Documentation item.
In the Add Interactive Documentation pop-up window, specify the uploaded API definition as either an IO Doc or Swagger document, then click Save.
-
Optional: Click Edit Interactive Documentation to edit the API definition document or Add to Packages and Plans to add the API definition or endpoint to an existing or new package or plan.
-
If editing Interactive Documentation, edit the API definition on the
Edit Interactive Documentation: <endpoint name>page and then click Save. -
If adding to packages and plan, use the Packages and Plan selector to navigate to your existing package and existing plan:
-
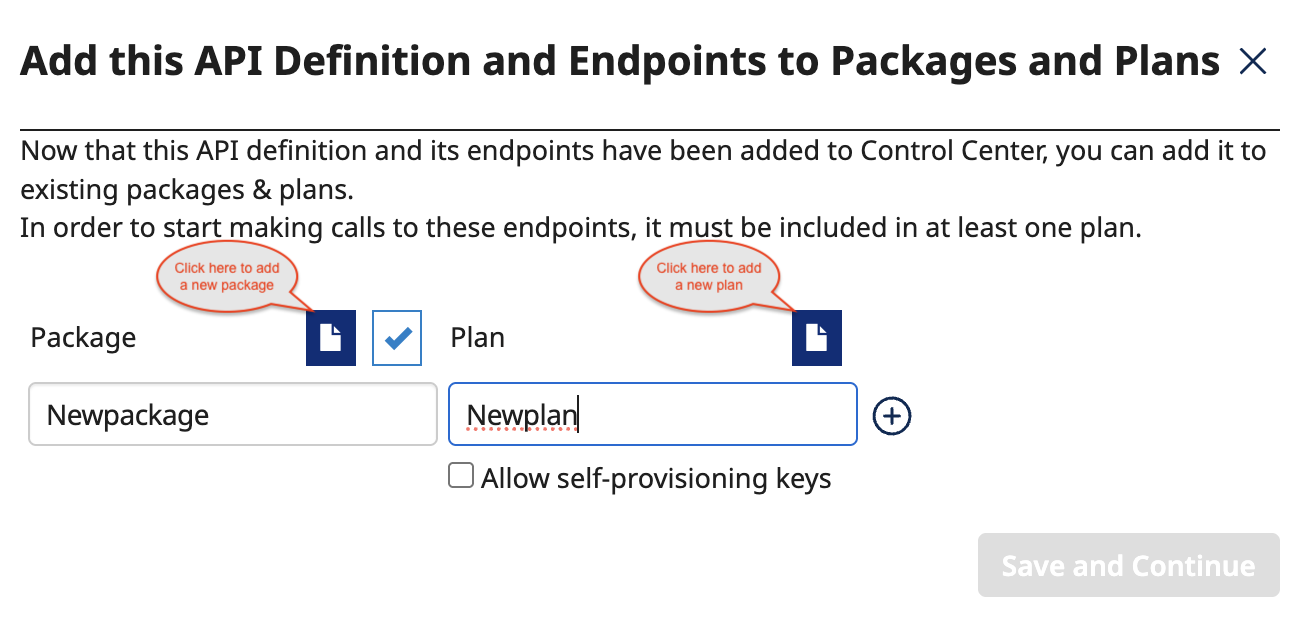
To add the API definition or endpoint to a new package, click the Package and Plan icon (📄) to create a new package and a new plan, and then click Save and Continue.
-
To add the API definition or endpoint to an existing package and plan, click the existing Package and Plan (✔) icon to select an existing package and plan as shown below, and then click Save and Continue.
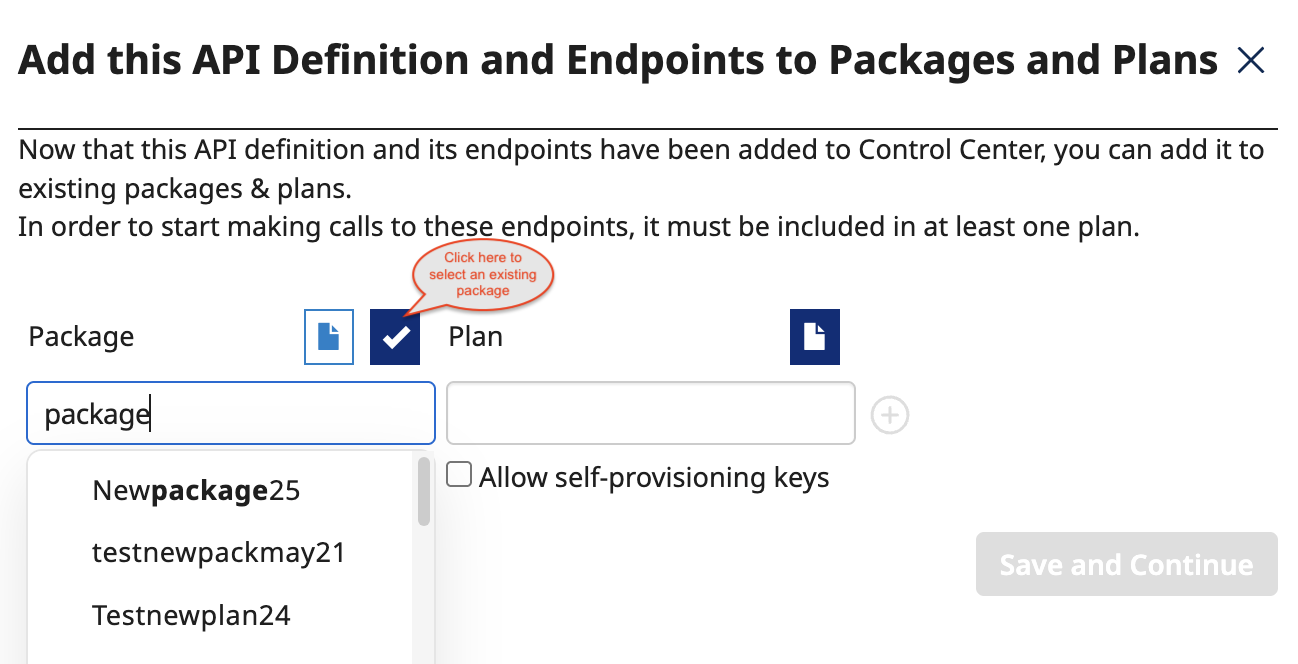

Enable the Allow self-provisioning keys checkbox to permit the use of keys without requiring developer approval.
Once the API definition and all of its endpoints have been successfully added to the new package and plan, click Close.
-
-
Next Steps
On the Key & Method Detection page, configure REST API key and method settings. Refer to Configuring API Endpoint Key and Method Detection Settings for more information.
