Creating a policy template
Create and manage reusable policy templates for your APIs and endpoints.
Before you begin
Before creating a policy template on Control Center, ensure the following:
-
You have access to Cloud API Management with the Administrator, API Manager, or Organization Administrator role. Only these roles can create, edit, view, enable or disable, delete, override, and attach policy templates.
info-
Other roles (Portal Manager, Reports User, Organization Reports User, Support User, Organization Support User) have only view access to Policy Templates and the Endpoint Policies page.
-
A Platform User (non-admin) role also gets access, but only by inheriting the permissions that its Boomi Platform user mapping assigns: Administrator or Organization Administrator. Other roles have view-only access to policy templates.
-
-
You have at least one API definition with a resource endpoint available in Control Center that you can attach to the created policy template.
The Policy Templates option in Control Center is only available if it is enabled for your area. If it is unavailable, contact the Boomi Account Representative to enable it.
Procedure
-
Click Policy Templates on the Get Started page, or navigate to Manage > Policy Templates.
If no templates exist yet, this page shows an empty state with a Create Policy Template button. If at least one template exists, it shows the full Policy Template list page instead.
-
Click Create Policy Template.
-
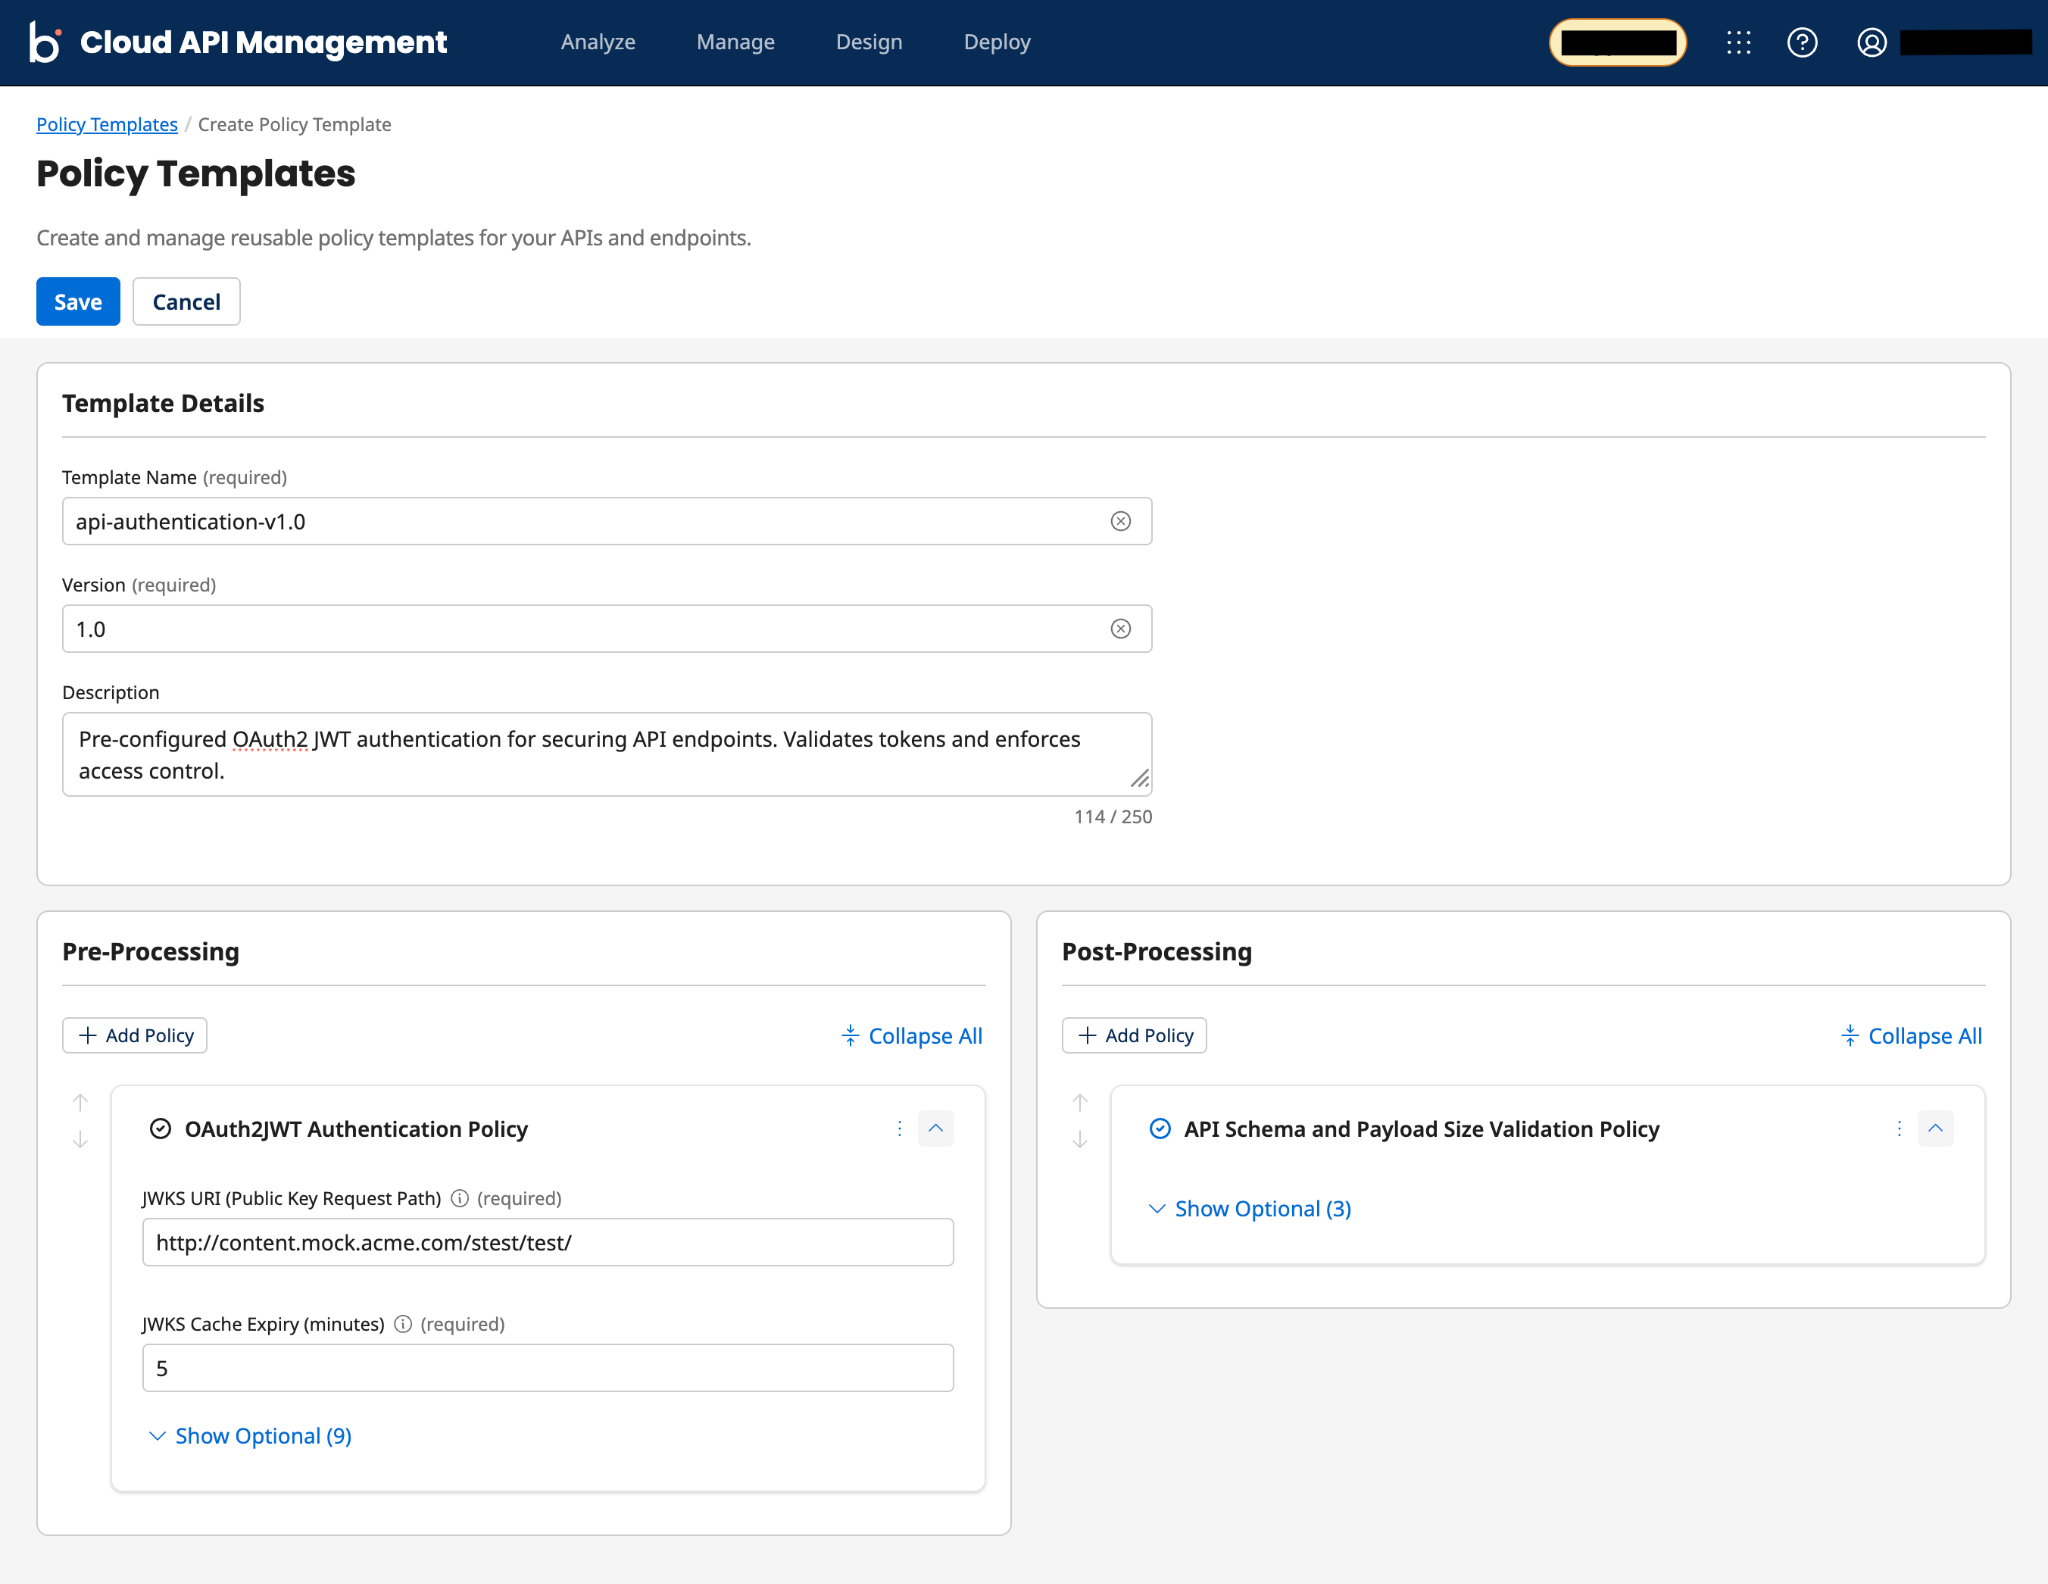
In the Template Details section, provide the following values:
noteThe Template name and Version must be unique together. If you enter a name and version that already exist, you cannot save the template until you change one of them.
-
In Template name, enter a template name.
-
In Version, enter a version number. Only positive version number values are accepted.
-
Optional: In Description, enter a description that defines the purpose of the template.
-
-
Optional: Click Add Policy in the Pre-Processing and Post-Processing panels. This opens the Add pre-processing policies or Add post-processing policies side panel, which includes a searchable, paginated list of available pre-processing or post-processing policies.
Chaining policy limitControl Center enforces a limit of one chaining policy per template. In the Pre-Processing panel, only one chaining policy can be added (for example, OAuth2 JWT Authentication Policy); the Circuit Breaker Policy can go in either panel. If you add more than one, the system rejects the additional chaining policy. To learn more about how chaining behaviour is handled while adding a policy, refer to Automatic chaining behavior.
-
Search for a policy by name or select one from the Names list, and then click Add. This adds the selected policy, auto-populates its configuration fields, displays inline help text for each field, and enforces the chaining rules for the selected policy.
tipWhen adding a policy with optional fields, click the Show Optional link to reveal those fields.
On the Pre-Processing or Post-Processing panels:
-
You can add multiple policies. If these panels already have an existing policy, Control Center appends the new policy after the existing policy in that panel.
-
You can change the sequence of policies within a template by using the Move up and Move down arrow options. Policy execution takes place in the order you added the policies in the policy template. To learn more, refer to Policy execution behavior.
-
You can replace or remove existing policies by clicking the Actions menu (three-dot icon) on the individual policy card.
-
To replace a policy with another policy, click the Actions menu in the selected policy card and choose Replace. To confirm the action, choose Replace again.
-
To remove a policy, click the Actions menu in the selected policy card and choose Remove. To confirm the action, choose Remove again.
-
-
For a policy that supports both pre-processing and post-processing (for example, Circuit Breaker Policy), you can configure either or both panels based on your requirements. Adding it to one panel (Pre-Processing or Post-Processing) automatically adds it to the other.
-
-
Complete all required fields for the policy you added. The fields vary by policy.
noteIf a policy added in the Pre-Processing or Post-Processing panel has required fields, the Save button remains disabled until you fill all required fields. If the policy has only optional fields, the Save button is enabled even if you enter no values.
-
-
-
Click Save. This creates a policy template in the Draft state on the Policy Templates list page.
Next steps
Enable the created policy template so that API endpoints can use it. Refer to Enabling or disabling a policy template for more information.
